The crochet cell phone bag is a perfect blend of style and functionality, making it an ideal project for both beginner and experienced crafters. This handy little accessory ensures that your phone is always within reach while adding a handmade touch to your everyday outfit. Whether you’re running errands, attending a casual outing, or simply want to travel light, a crocheted phone bag is your go-to companion.
What makes this project exciting is its simplicity, combined with endless possibilities for customization. You can experiment with different yarn colors, textures, closures, and strap lengths to make the bag truly your own. Plus, it’s a great way to use up scrap yarn and explore various crochet patterns in a small and manageable project.
In this blog post, you’ll learn everything you need to know to create your own crochet cell phone bag. From selecting the right materials to detailed step-by-step instructions, we’ve got you covered. Let’s dive into this creative journey and give your phone a cozy new home.
Choosing the Right Materials
When starting any crochet project, especially one meant to hold and protect a valuable item like your phone, selecting the right materials is crucial. The yarn, hook, and even the type of stitch used can all affect the durability and appearance of the final product.
Cotton yarn is a popular choice for crochet cell phone bags due to its strength and stitch definition. It’s easy to work with and offers a clean, structured look. Worsted weight cotton is usually ideal for this type of bag, offering both sturdiness and softness.
You’ll also need a suitable hook. A 4.0mm (G-6) or 4.5mm (7) crochet hook typically pairs well with worsted weight yarn. The exact size may vary depending on your tension and the specific yarn you choose.
Don’t forget about the finishing touches. Consider adding a lining fabric to give the bag extra support and to prevent your phone from poking through the stitches. You’ll also want to select a strap type—you can crochet a strap, use a leather alternative, or repurpose an old belt.
Other optional materials include buttons, zippers, magnetic clasps, and decorative embellishments. These additions enhance the aesthetic and functionality of your bag.
Finally, prepare a pair of scissors, a yarn needle for weaving in ends, and measuring tape to ensure your bag fits your phone properly. With all materials ready, you’re set to begin crafting your personalized crochet cell phone bag.
Creating the Base of the Bag
Begin by making a slip knot and chaining enough stitches to match the width of your phone plus one inch. This will provide enough room for the sides of the bag. For most standard phones, a starting chain of 15-18 stitches should suffice.
After creating your foundation chain, single crochet (sc) in the second chain from the hook and continue across. Once you reach the last chain, add two sc into the last stitch, and begin working in the round by crocheting along the opposite side of the chain.
Place a stitch marker at the start of each round to keep track. Continue working single crochet stitches in the round for about 25-30 rows, or until the bag reaches the height of your phone plus an additional inch for closing or trimming.
You can switch colors midway to add a design or stripe. Using different crochet patterns like the half double crochet (hdc) or extended single crochet (esc) can also introduce texture.
Once you’ve reached your desired height, fasten off and leave a long tail for sewing, or continue directly to the flap or strap if your design calls for a seamless construction.
The base of the bag should now look like a small pouch. Double-check the dimensions by slipping your phone inside. If it fits snugly and securely, you’re ready to move on to the next stage.
Adding the Strap and Closure
The strap of the crochet cell phone bag can be created in multiple ways. For a simple crocheted strap, attach yarn to one top corner of the bag and chain until you reach your desired length (usually 40-50 inches for a crossbody style).
Slip stitch or single crochet back down the chain to add strength and texture to the strap. Secure it to the opposite top corner of the bag and fasten off. Be sure to reinforce the joins for durability.
If you prefer an adjustable or detachable strap, you can add D-rings to each side of the bag and use clips to attach the strap. This allows for flexibility and convenience.
For closures, you can crochet a small flap by working additional rows from the back side of the bag, decreasing slightly with each row for a tapered finish. Add a button loop at the tip and sew a button on the front of the bag.
Alternatively, you can sew a zipper across the top or attach a magnetic clasp inside. Each option adds a different look and functionality, so choose based on your personal style and usage needs.
Make sure all elements are securely attached, especially if you plan to use the bag daily. A secure strap and closure will keep your phone safe and accessible at all times.
Embellishments and Finishing Touches
Once the structure is complete, you can personalize your crochet cell phone bag with embellishments. This is where your creativity really shines.
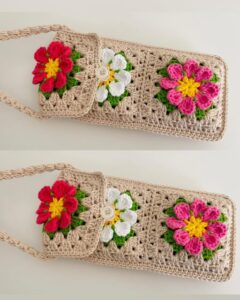
Try adding crochet flowers, small appliqués, or even surface embroidery for a decorative flair. These little touches make your bag unique and fun to carry.
If you’re lining the bag, cut a piece of fabric slightly larger than the finished bag, fold and sew the edges, and attach it to the inside using fabric glue or hand stitching.
Adding a lining not only improves the look of the bag but also increases its durability and helps prevent the phone from slipping out.
Consider adding a small interior pocket for credit cards or cash. You can crochet a small square or rectangle and stitch it to the inside lining.
Finally, weave in all ends, steam block the bag if needed to smooth out any unevenness, and give it a final inspection. Your handmade crochet cell phone bag is now ready to use or gift!
Final Thoughts
Creating a crochet cell phone bag is a satisfying and practical project that blends creativity with everyday function. It allows you to explore different crochet patterns, play with colors and textures, and create something truly useful.
From choosing the perfect yarn to adding the final embellishments, each step is a chance to enjoy the process and enhance your skills. Whether for personal use or as a heartfelt handmade gift, a phone bag is a timeless accessory.
Remember to measure your phone before starting and adjust the size of your base chain and rows accordingly. Customize your bag with unique details that match your personality.
With countless free tutorials and resources available online, you’ll find plenty of inspiration to try new stitches or improve your finishing techniques.
We hope this guide helps you on your journey to mastering the crochet cell phone bag. Don’t forget to share your creation with the crafting community and encourage others to explore the joy of crochet!
Stay creative and keep stitching!


