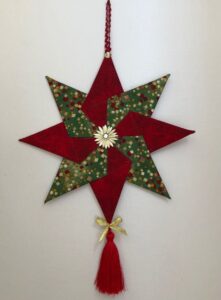
Kaleidoscope Star Quilted Christmas Ornaments – Step by Step Tutorial are one of the most delightful and festive additions you can bring to your handmade holiday décor. These quilted beauties are eye-catching, rich in color, and carry a nostalgic charm that appeals to everyone who sees them. Whether you’re making them as gifts or to hang on your tree, the intricate look of these ornaments makes them look far more complex than they actually are to make.
For quilters and crafters who love geometric patterns, the Kaleidoscope Star Quilted Christmas Ornaments – Step by Step Tutorial will become a favorite project. This design blends symmetry, contrast, and dimension all in one compact piece. Plus, it’s an excellent way to use up fabric scraps in holiday colors, especially those tiny but treasured leftovers from past quilting projects. The satisfaction of turning simple cuts into a three-dimensional masterpiece is unmatched.
In this guide, you’ll learn how to create your own Kaleidoscope Star Quilted Christmas Ornaments – Step by Step Tutorial with clear, friendly instructions. Even if you’re new to quilting, don’t worry—this tutorial breaks everything down into manageable steps. With some fabric, a bit of patience, and creativity, you’ll soon have a handful of personalized ornaments ready for the season.

Materials Needed for Kaleidoscope Star Ornaments
To begin the Kaleidoscope Star Quilted Christmas Ornaments – Step by Step Tutorial, gather the materials you’ll need ahead of time. The key to success in this craft is preparation, especially when working with small fabric cuts and layered patterns.
You’ll need 3-4 coordinating cotton fabrics in Christmas colors. Red, green, gold, white, and silver are excellent choices. Choose both solids and prints for visual contrast.
Cut your fabrics into 3-inch squares. You’ll need at least 32 squares total for one ornament, preferably divided among your chosen colors. Also, have a few extras in case you make a cutting mistake.
Get a 3-inch foam ball as your ornament base. This is what you’ll pin your fabric onto to form the quilted design. Make sure the foam is dense enough to hold straight pins securely.
You’ll also need flat head straight pins—around 200 for each ornament. It sounds like a lot, but the layering process requires several for each piece of fabric.
Ribbon for hanging and hot glue to secure the final look. Optional trims like buttons or sequins can be added for extra sparkle and character.
Lastly, have on hand a ruler, iron, and rotary cutter for precise measurements and fabric prep. Now that you’ve got everything, it’s time to dive into the exciting part!
Preparing and Folding the Fabric
The first step in your Kaleidoscope Star Quilted Christmas Ornaments – Step by Step Tutorial is preparing your fabric squares. Cut them cleanly and accurately to ensure uniformity in the final design.
After cutting your squares, fold each one in half diagonally with the right side of the fabric facing outward. Press the crease lightly with an iron to hold the fold. Then, fold the two bottom corners up to form a triangle with a pointed top. This triangle will be your quilted piece.
Repeat this folding process for all your squares. You should have 32 folded triangles in total, divided among the fabrics you’ve chosen. Try grouping by color so they’re easy to grab during the layering process.
This folded triangle is what gives your ornament its 3D look. Once pinned into the foam ball, the triangles form concentric stars that mimic a kaleidoscope effect. The layers build dimension and complexity without requiring any sewing.
You may also press the folds a second time for crisp edges. This extra effort can make your final ornament look more professional and polished.
Remember that accuracy is important. Sloppy folding or uneven creases can affect the symmetry of your ornament. Take your time and make sure each triangle looks the same.
Now that your fabric is folded and ready, let’s move on to assembling the star pattern on your foam base.
Building the Star Design
In this part of the Kaleidoscope Star Quilted Christmas Ornaments – Step by Step Tutorial, we begin the actual ornament construction. You’ll start by creating the center of the star, then build outward.
Pick one of your folded triangles and place it at the center of your foam ball. Secure it by pinning down the corners with straight pins. This is the tip of your kaleidoscope star.
Next, take four more triangles of the same color and place them around the center point in a cross pattern. Pin the bottom corners of each triangle so that the tips face outward evenly. This forms the first round of your star.
Now, switch to a contrasting color and create a second round. Pin these triangles between the ones already attached. The star shape will begin to appear as you continue adding more layers.
Continue layering triangles in rounds, switching between colors to enhance contrast. Be sure to pin only the bottom corners so the top points remain free, giving that dimensional, quilted look.
As you work outward, the spacing of your pieces is critical. Maintain symmetry by eyeballing or marking guidelines on your foam ball lightly with pencil before pinning.
You should have about 3 to 4 rounds of triangles by the time you reach the equator of the foam ball. The result is a mesmerizing starburst pattern perfect for the holiday season.
Finishing the Ornament
As you near the end of the Kaleidoscope Star Quilted Christmas Ornaments – Step by Step Tutorial, it’s time to finish the bottom half of the ball and add final touches.
Flip the ball and repeat the same layering process on the opposite side, beginning with a center triangle. This ensures both sides have a full kaleidoscope star effect.
As you add layers, make sure the alignment matches the top side. Symmetry on both ends enhances the overall look and balance of the ornament when it’s hanging.
Once the ball is covered with triangles, hide the edges using a ribbon wrapped around the center. This band of ribbon serves both decorative and functional purposes.
Secure the ribbon with straight pins or hot glue. You can also add a decorative bow or embellishment where the ribbon joins. Consider using a festive button or bell.
For hanging, cut a small loop of ribbon and glue or pin it to the top of the ornament. Make sure it’s centered so the ornament hangs straight.
Your Kaleidoscope Star Quilted Christmas Ornaments – Step by Step Tutorial is complete! Now you can admire your handcrafted masterpiece and start planning more in different colors.
FAQ
Can I make these ornaments without sewing?
Yes! That’s the beauty of the Kaleidoscope Star Quilted Christmas Ornaments – Step by Step Tutorial. These ornaments are no-sew, relying on precise folding and pinning techniques.
What size foam ball should I use?
A 3-inch foam ball is ideal. It’s large enough to show off the pattern but not too heavy for the tree. You can adjust the number of fabric squares if using a different size.
How many fabric squares do I need for one ornament?
You’ll need about 32 folded triangles, which means 32 squares. You may want to cut extra in case of mistakes or to experiment with color placement.
Can I use hot glue instead of pins?
Pins are preferable because they allow repositioning. However, hot glue can be used to secure embellishments or ribbon once the design is complete.
Is this project beginner-friendly?
Yes, the Kaleidoscope Star Quilted Christmas Ornaments – Step by Step Tutorial is beginner-friendly. It’s perfect for crafters new to quilting or looking for a relaxing, festive project.
Can I personalize these ornaments?
Absolutely! Use monogrammed fabric, add a name tag, or attach charms to make your ornaments unique and meaningful.
Conclusion
This Kaleidoscope Star Quilted Christmas Ornaments – Step by Step Tutorial is more than just a holiday craft—it’s an opportunity to create something beautiful, personalized, and meaningful. From folding fabric to layering pieces into a dazzling starburst, each step in this project offers satisfaction and creative joy. These ornaments are ideal for decorating your home or gifting to loved ones, and they’re sure to become treasured keepsakes.
We hope you’ve enjoyed following this tutorial. If you decide to make your own Kaleidoscope Star Quilted Christmas Ornaments, please leave a sincere opinion in the comments and share your suggestions. Your feedback helps improve this content and inspire more handmade joy.


