Creating a handmade quilt during the holidays is a cherished tradition, and nothing captures the spirit of the season quite like a Christmas angel quilted pattern – step by step tutorial. Whether you’re a beginner or an experienced quilter, this festive design allows you to express warmth, peace, and creativity through every stitch. In this guide, we will walk you through how to bring an angelic holiday motif to life, one square at a time.
The Christmas angel quilted pattern – step by step tutorial featured here is perfect for those looking to make a heartfelt gift or a seasonal decoration. With clear instructions, detailed breakdowns, and helpful tips, you’ll discover how easy and enjoyable it is to create a quilt that not only looks stunning but also tells a story. Quilting angels for Christmas combines both symbolic and aesthetic appeal, making it a favorite project for holiday crafting.
By following this Christmas angel quilted pattern – step by step tutorial, you will learn more than just how to sew fabric pieces together—you’ll understand how to build texture, apply layering techniques, and personalize your design with fabric selections, embroidery, or even glittery thread. Let’s begin your quilting journey with inspiration, patience, and joy.
Choosing the Right Materials for Your Angel Quilt
When beginning your Christmas angel quilted pattern – step by step tutorial, selecting the appropriate materials is the first and most important task. You want to ensure that your fabric choices align with the holiday theme while offering durability and ease of handling. Cotton is a top choice for quilting due to its breathability and texture, and it comes in countless festive prints, including stars, snowflakes, and metallics.
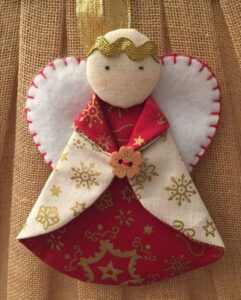
To bring your angel to life, consider using light-toned fabrics such as white, ivory, or pale blue for the angel’s body and wings. These shades enhance the gentle, divine essence of the pattern. Complement them with gold or silver accents to give the quilt a magical holiday touch. Don’t forget to choose a background fabric that contrasts well but still feels seasonal—deep green or crimson works beautifully.
Batting is another essential component in the Christmas angel quilted pattern – step by step tutorial. It provides softness and structure, giving your quilt that cozy feel. Opt for a medium-loft cotton or polyester blend to maintain flexibility without sacrificing warmth. Pre-washing your fabrics and batting is always recommended to prevent shrinkage and color bleeding later on.
Thread selection is also vital. Neutral threads for piecing and decorative threads like metallic gold or silver for topstitching can elevate your quilt’s design. Use a strong, high-quality thread to ensure your stitches remain secure and neat. A walking foot on your sewing machine can also help feed layers evenly as you quilt.
In addition to fabric and thread, you’ll need basic quilting tools like a rotary cutter, self-healing mat, clear quilting ruler, pins, and safety pins for basting. Having these tools ready will make each step smoother and more enjoyable. A fabric marking pen or chalk will help trace the angel’s outline or any appliqué pieces with precision.
Finally, prepare your workspace for the creative process. Lay out your fabrics, make color choices thoughtfully, and get inspired by angel imagery or previous quilt designs. This planning stage sets the tone for a fulfilling and beautiful quilting experience.
Cutting and Piecing the Angel Quilt Pattern
Now that your materials are ready, it’s time to move on to the second phase of the Christmas angel quilted pattern – step by step tutorial: cutting and piecing. Accurate cutting is the backbone of any successful quilt project, and it ensures that all your pieces fit together without distortion. Use your rotary cutter and ruler to make clean, even cuts for each part of the angel motif.
Start by cutting your background fabric into blocks of your desired size—usually 12″x12″ or 10″x10″ depending on the quilt’s dimensions. Next, trace and cut the angel shapes from your light-toned fabric. This includes the head, body, wings, and halo. You can either use a pre-made template or draw your own based on a simple angel sketch.
Once all pieces are cut, you’ll begin assembling them block by block. This process involves placing the angel parts on the background fabric using appliqué techniques. You can choose from raw-edge appliqué or turned-edge appliqué, depending on your comfort level. Either way, use pins or fabric glue to secure the pieces before stitching.
Sewing the appliqué shapes in place is both exciting and rewarding. Use a tight zigzag or satin stitch along the edges to prevent fraying and add decorative appeal. Don’t rush—take your time to sew each piece securely, maintaining clean lines and even spacing.
To add depth and personality to your angel, you can include embroidery or embellishments such as buttons for eyes or ribbons for sashes. This is where your creativity shines. The Christmas angel quilted pattern – step by step tutorial encourages personalization, allowing your angel to become a true expression of your holiday spirit.
Once all the blocks are finished, lay them out to determine the best visual arrangement. Make sure the colors are balanced and the angels are centered. Then begin stitching the blocks together row by row, pressing the seams flat as you go to ensure a smooth, professional finish.
Quilting and Assembling the Angel Quilt
After piecing the angel design blocks together, the next step in this Christmas angel quilted pattern – step by step tutorial is quilting and assembling the layers. This stage gives the quilt structure and transforms your fabric top into a finished product. Lay the quilt top on a clean surface and place the batting beneath it, followed by the backing fabric.
Smooth out all layers and baste them together using safety pins or a temporary adhesive spray. Basting is crucial because it holds the quilt sandwich in place as you sew through multiple layers. Start from the center and work outward to avoid wrinkles and puckering.
Choose a quilting style that complements your angel pattern. Straight-line quilting is simple and elegant, but you may also opt for free-motion quilting if you’re comfortable with it. Swirling patterns or halos around the angel’s head can add a heavenly touch to your design.
As you quilt, go slowly and adjust your fabric frequently to avoid bunching. Keep checking the back to ensure your stitches are even and that no fabric is folding under. This part of the Christmas angel quilted pattern – step by step tutorial requires patience but delivers impressive results.
Once the quilting is complete, trim the edges of your quilt to square it up. Now, it’s time to bind the quilt. Cut binding strips from your chosen fabric (usually 2.5” wide), fold them in half lengthwise, and sew them around the edges of the quilt. Hand-stitch or machine-sew the binding down to finish the edges cleanly.
Finally, add a label with your name and the date to mark your beautiful handmade creation. Whether you’re gifting it or keeping it, this angel quilt will become a beloved part of your holiday traditions.
Displaying and Caring for Your Christmas Angel Quilt
Your quilt is now complete, but the Christmas angel quilted pattern – step by step tutorial doesn’t end here. Displaying your quilt with care enhances its beauty and keeps it safe for years to come. You can hang your quilt on a wall using a rod sleeve or drape it over a couch or bed for a festive touch.
If you plan to gift your angel quilt, consider wrapping it in a decorative fabric bag or tissue paper for presentation. Include a small card with care instructions so the recipient knows how to cherish it properly. Handmade quilts are heirlooms, and thoughtful packaging adds to their sentimental value.
To store your quilt after the holidays, keep it in a cool, dry place away from direct sunlight. Avoid plastic containers, as they can trap moisture. Instead, use a cotton storage bag or pillowcase to let the quilt breathe. Fold it differently each year to prevent permanent creases.
Cleaning your quilt should be done gently. Spot-clean any small stains with a damp cloth, and if necessary, hand-wash it in cold water with a mild detergent. Avoid wringing or heavy agitation, and lay it flat to dry. If using a washing machine, use the delicate cycle and a mesh bag for added protection.
Take time every year to inspect your quilt for loose threads or signs of wear. A few maintenance stitches now and then will help preserve the quilt for generations. The Christmas angel quilted pattern – step by step tutorial is not just about making something—it’s about maintaining its magic for years to come.
Celebrate your accomplishment by sharing your quilt with family and friends, displaying it proudly, or simply enjoying the comfort it brings on a cozy December night. Every quilt tells a story, and yours is a message of peace, love, and handmade holiday joy.
FAQ About the Christmas Angel Quilted Pattern
1. Can beginners follow this Christmas angel quilted pattern – step by step tutorial?
Absolutely! This tutorial is designed with clear instructions and beginner-friendly techniques. Even if you’re new to quilting, you can successfully complete the project by following each step carefully.
2. What fabrics work best for angel quilt patterns?
Lightweight cotton fabric is ideal. Choose soft whites, ivories, and pastel blues for the angel, and festive reds, greens, or metallics for the background and borders.
3. Can I make this quilt without a sewing machine?
While a sewing machine speeds up the process, you can also complete the project by hand-sewing, especially for the appliqué and binding. It will just take more time and patience.
4. How big should each block be?
Typical quilt blocks for this pattern range from 10″x10″ to 12″x12″. You can adjust the size based on your desired final quilt dimensions.
5. Can I customize the angel design?
Yes! Feel free to modify the angel’s hairstyle, clothing, or colors. You can even personalize it with names, dates, or embroidery for extra charm.
Conclusion
We hope this Christmas angel quilted pattern – step by step tutorial has inspired you to create a meaningful holiday quilt. From selecting your fabrics to adding the final stitches, every part of this process is an opportunity to express love and creativity. Angel quilts are not just decorations—they’re warm reminders of holiday spirit, peace, and tradition.
If this tutorial helped you or brought joy to your crafting journey, we’d love to hear from you. Please leave a sincere comment sharing your experience and any suggestions for future tutorials. Happy quilting and may your holiday season be filled with warmth, light, and creativity!


