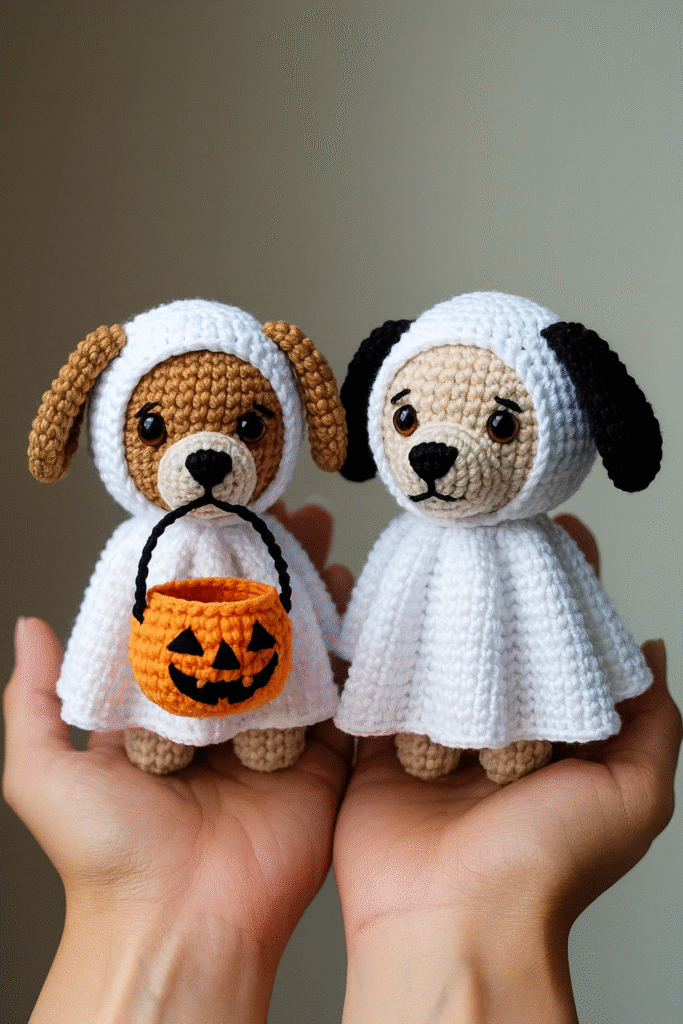
If you’ve ever looked at a handmade crochet dog and wondered how to make one yourself, this crochet puppy pattern is exactly what you need. Crocheting a cute puppy is a rewarding project that combines creativity, patience, and skill.
A crochet puppy pattern allows you to express your love for animals through yarn and stitches. It’s a versatile craft—some people make it as a plush toy for children, while others use it as an adorable home decoration.
What makes this crochet puppy pattern so special is how customizable it is. You can choose the yarn color, adjust the size, or even add accessories like a tiny collar or scarf. The process of crocheting your own puppy teaches patience and creativity, and it’s a great way to practice shaping and detailing techniques.

Materials and Tools You’ll Need for Your Crochet Puppy Pattern
Before you start crocheting, it’s important to gather all the necessary materials and tools. The beauty of this crochet puppy pattern is that it doesn’t require expensive supplies—just some yarn, a crochet hook, and a few basic accessories to bring your creation to life.
You’ll need medium-weight yarn in your desired puppy color—browns, tans, whites, or even a fun pastel shade. Acrylic yarn is a great choice because it’s durable, easy to clean, and widely available. For smaller details like the nose or eyes, you can use black yarn or small safety eyes, depending on your preference. Always make sure your materials are safe, especially if the finished puppy will be used as a toy for children.
A crochet hook that matches your yarn weight is essential. Most patterns recommend a size G (4.0 mm) or H (5.0 mm) hook, but you can adjust depending on how tight or loose you want your stitches. You’ll also need polyester stuffing to give your puppy shape and softness. A yarn needle will help you sew the parts together neatly.
Other optional items include stitch markers to keep track of your rounds, and scissors for trimming the yarn ends. If you want to give your puppy extra personality, you can add a tiny ribbon, button, or felt patch. Remember that personalization is one of the most enjoyable parts of the crochet puppy pattern, allowing you to make it completely your own.
As you prepare, keep all your materials organized in a small basket or box. This helps you stay focused and avoid losing small pieces while you work. Once everything is ready, you can begin crafting your adorable little puppy with confidence and excitement.
Step-by-Step Guide to Crocheting Your Puppy
Now that you have all your materials, let’s start the exciting process of bringing your crochet puppy pattern to life. It’s important to follow each step carefully, especially if you’re a beginner. With patience and practice, you’ll soon master the technique and create a stunning handmade puppy.
Start by crocheting the head. Most patterns begin with a magic ring, which allows you to create a smooth, closed circle. From there, you’ll increase stitches to form the rounded shape of the puppy’s head. Keep your tension even, as this will help maintain a smooth surface. The snout is usually crocheted separately and sewn onto the head later.
Once the head is finished, move on to the body. The body is typically an oval or cylinder shape, depending on your design. Use continuous rounds to avoid visible seams. Make sure to leave an opening at the bottom to insert the stuffing later. A well-stuffed body helps the puppy stand upright and gives it a plump, huggable look.
Next are the legs and paws. These are usually small cylindrical pieces that taper slightly at one end. Crocheting them separately allows for a more realistic shape and flexibility in positioning. Attach them evenly to the body using a yarn needle and strong stitches.
Then, create the ears—a detail that adds character to your puppy. Floppy or pointy, long or short, the ears can completely change the puppy’s appearance. Experiment with shapes and sizes until you find one that matches your vision. Finally, crochet a tail and sew it securely at the back.
After assembling all parts, add the finishing touches. Sew on the nose and eyes, embroider a little mouth, and make sure every seam is tight. Once done, your crochet puppy will come to life, ready to sit proudly on a shelf or bring a smile to someone’s face.
Tips for Customizing Your Crochet Puppy
The fun part of any crochet puppy pattern is personalization. You can make every project unique by adding small details, choosing creative color combinations, or experimenting with textures. Customization makes your puppy special, whether you’re making it as a gift or for your own collection.
Start by thinking about the breed or style you want. Do you love fluffy poodles, tiny chihuahuas, or playful golden retrievers? Your yarn choice and shaping techniques can mimic these breeds. For example, fuzzy yarn gives a poodle-like texture, while short, smooth yarn works well for a beagle.
Adding color variations is another great idea. Try crocheting a two-tone puppy with different shades for the ears or paws. You can also add cute accessories, such as a mini collar made from yarn or ribbon, a bow, or even a small crocheted bone toy. These details give your puppy personality and charm.
If you want your crochet puppy to stand out, experiment with stitch variations. Using textured stitches, like bobbles or popcorns, can create a realistic fur effect. You can also vary the yarn weight or hook size to adjust the puppy’s scale.
Don’t forget the expression—the eyes and mouth play a huge role in the overall look. Safety eyes give a professional finish, while embroidered eyes make the toy safe for small children. Try placing the eyes slightly farther apart for a cute, baby-like look, or closer together for a mischievous expression.
Lastly, remember that customization should be fun. Let your creativity flow, and don’t worry about perfection. The goal is to create something that feels personal and brings joy. Each crochet puppy you make will have its own story and personality.
Why Crocheting a Puppy Is Worth It
Crocheting a puppy pattern isn’t just about creating a toy—it’s a therapeutic and fulfilling experience. Each step allows you to relax, focus, and express creativity through your hands. For many, it’s a form of mindfulness, helping to reduce stress and anxiety.
When you finish a crochet puppy, you’ll feel a deep sense of pride. Unlike mass-produced items, handmade crafts hold emotional value. Every loop and stitch carries your effort and love, making the final piece truly one of a kind.
It’s also an excellent gift idea. A handmade puppy makes a wonderful present for birthdays, baby showers, or even as a keepsake. You can personalize it with colors and accessories to match the recipient’s taste.
Crochet projects like this are also eco-friendly, especially when made with sustainable yarn. Instead of buying plastic or factory-made toys, you’re crafting something beautiful and lasting with your own hands.
Moreover, crocheting is a skill that keeps on giving. Once you master this crochet puppy pattern, you can expand your skills to other animal designs or even create matching crochet families. The possibilities are endless.
Finally, sharing your finished puppy online or with friends can inspire others to start crocheting. It’s a way to connect, share creativity, and spread positivity through art.
FAQ About Crochet Puppy Pattern
1. What materials do I need to start a crochet puppy pattern?
You’ll need yarn, a crochet hook, stuffing, scissors, a yarn needle, and optional safety eyes or buttons for decoration.
2. Is the crochet puppy pattern suitable for beginners?
Yes! Many patterns are beginner-friendly, using basic stitches like single crochet, increase, and decrease.
3. How long does it take to make a crochet puppy?
It depends on your skill level and the size of the puppy. On average, it takes 5–10 hours spread over a few days.
4. Can I use any yarn for my crochet puppy?
Medium-weight acrylic yarn works best, but you can experiment with cotton or fuzzy yarn for texture.
Conclusion
Creating a crochet puppy pattern is an enjoyable and fulfilling craft that combines creativity, patience, and love. From choosing colors to adding the final details, every step offers a chance to express yourself through handmade art. Whether you make it for fun, as a gift, or to sell, the result is always heartwarming and unique.


