
How to Make Springtime Cheer Quilt is a joyful and inspiring quilting project that captures the fresh beauty of spring through soft colors, floral prints, and cheerful patchwork designs. If you are looking for a project that combines creativity, relaxation, and a sense of accomplishment, learning How to Make Springtime Cheer Quilt is the perfect choice.
One of the most captivating aspects of How to Make Springtime Cheer Quilt is how it reflects the essence of spring. Think blooming flowers, bright skies, and gentle breezes—these elements can all be translated into your fabric choices.
In this complete and detailed guide, you will learn everything about How to Make Springtime Cheer Quilt, including how to choose fabrics, prepare your materials, cut and arrange quilt blocks, assemble the quilt top, quilt and finish your project, and apply expert tips for a professional result.
Materials and Fabric Selection for How to Make Springtime Cheer Quilt
Before starting your How to Make Springtime Cheer Quilt, gathering the right materials is essential for achieving a beautiful and long-lasting result. The charm of this quilt lies heavily in the fabric selection, so take your time choosing colors and patterns that reflect the cheerful theme.
Cotton fabric is the most recommended option for quilting. It is easy to work with, durable, and available in a wide variety of prints and colors. For a How to Make Springtime Cheer Quilt, focus on pastel shades such as soft pink, baby blue, lavender, mint green, and light yellow. These colors evoke the feeling of spring and create a calming yet vibrant effect.
In addition to solid fabrics, consider incorporating floral prints, small polka dots, gingham, and subtle geometric patterns. Mixing prints adds visual interest, but it’s important to maintain balance so the quilt does not look too busy.
You will also need a background fabric. Neutral tones like white, cream, or light gray work best because they allow the colorful patchwork pieces to stand out.
Other essential materials include quilt batting for the middle layer, backing fabric for the underside, high-quality thread, and basic quilting tools such as a rotary cutter, cutting mat, quilting ruler, pins, and a sewing machine.
Pre-washing your fabrics is highly recommended. This step prevents shrinking and color bleeding, ensuring your How to Make Springtime Cheer Quilt maintains its beauty over time.
Organizing your materials before starting will make the process smoother and more enjoyable.
Cutting and Preparing Quilt Blocks
The next step in How to Make Springtime Cheer Quilt is cutting and preparing your quilt blocks. Accuracy is crucial at this stage, as precise cutting ensures that all pieces fit together correctly.
Start by deciding on the size of your blocks. A common choice is 5-inch or 6-inch squares, as they are easy to handle and sew. Using a rotary cutter and quilting ruler, carefully cut your fabric into uniform pieces.
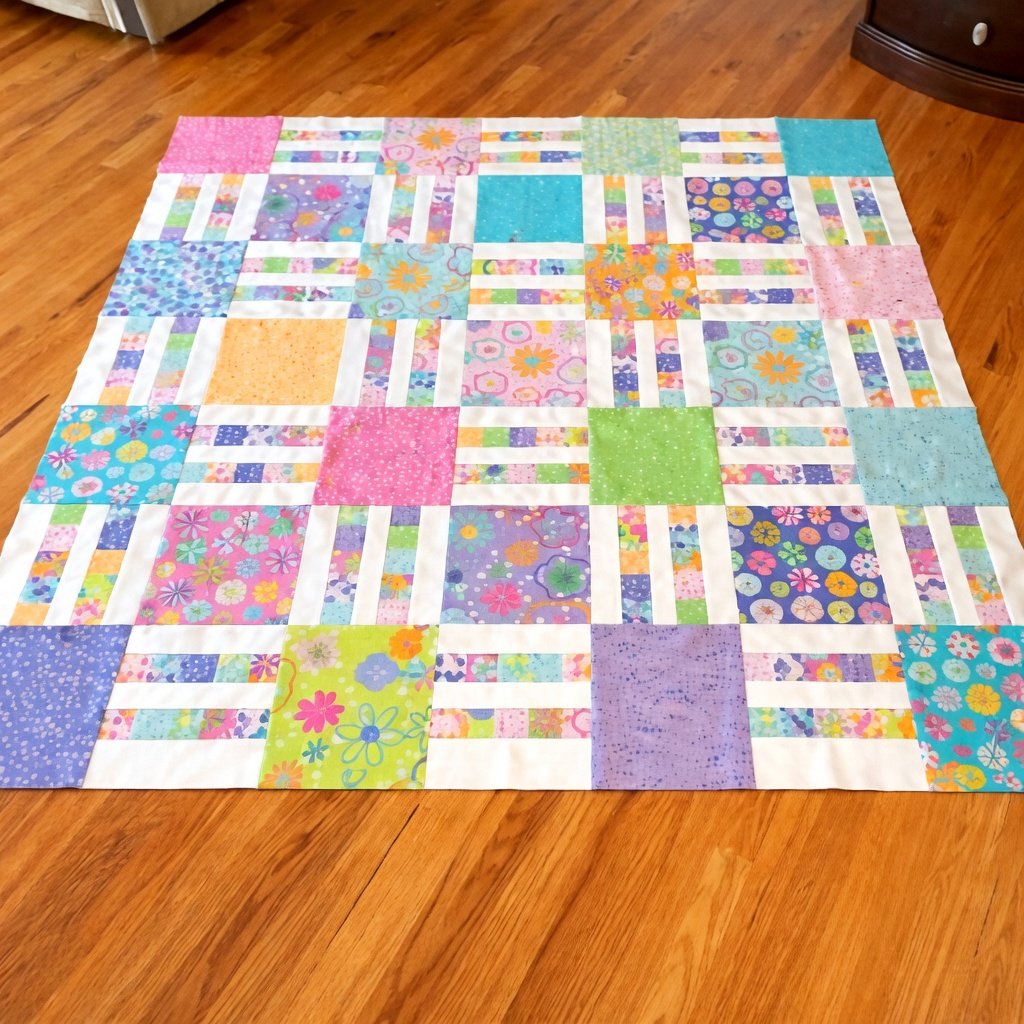
Once your pieces are cut, arrange them on a flat surface or design wall. This step allows you to experiment with different layouts and color combinations. Try to distribute colors evenly across the quilt to achieve a harmonious and balanced design.
You can arrange your blocks in a simple grid pattern or experiment with more dynamic layouts, such as diagonal arrangements or alternating color patterns. This is where your creativity comes into play in How to Make Springtime Cheer Quilt.
After finalizing your layout, group the pieces into rows. Keeping your blocks organized will make the sewing process more efficient and prevent confusion.
Double-check your measurements and alignment before moving on to the next step. Taking extra care during preparation will greatly improve the final result.
Sewing and Assembling the Quilt Top
Now it’s time to assemble your How to Make Springtime Cheer Quilt. Begin by sewing the individual pieces together to form rows. Place two fabric pieces right sides together and sew along one edge using a consistent ¼-inch seam allowance.
Continue adding pieces until each row is complete. Once all rows are finished, press the seams flat using an iron. Pressing is an essential step that helps your quilt lie flat and gives it a professional appearance.
Next, sew the rows together to form the quilt top. Carefully align the seams where the rows meet to ensure a clean and polished look. Pinning the seams before sewing can help keep everything in place.
As you assemble the quilt top, take your time to ensure accuracy. Small misalignments can add up, so attention to detail is important in How to Make Springtime Cheer Quilt.
Once the quilt top is complete, inspect it for any loose threads or uneven seams. Fix any issues before moving on to the next stage.
At this point, your quilt top should display a beautiful blend of spring colors and patterns, reflecting the cheerful theme of the project.
Quilting and Finishing Your Springtime Cheer Quilt
With your quilt top complete, the next step in How to Make Springtime Cheer Quilt is quilting and finishing. This stage involves assembling the quilt sandwich and stitching all layers together.
Start by laying your backing fabric flat on a large surface. Place the batting on top, followed by the quilt top. Smooth out any wrinkles and secure the layers with pins or clips.
Quilting involves sewing through all three layers to hold them together. You can use straight-line quilting for a simple and clean look, or experiment with decorative patterns such as curves, waves, or floral designs.
Take your time during this process, as quilting adds both texture and durability to your project. A well-quilted piece enhances the overall appearance of your How to Make Springtime Cheer Quilt.
After quilting, trim any excess fabric and prepare the edges for binding. Binding is the final step that gives your quilt a clean and finished look.
Attach the binding around the edges, folding it neatly and stitching it in place. This step requires patience, but it is essential for achieving a polished result.
Once the binding is complete, your How to Make Springtime Cheer Quilt is finished and ready to use or display.
Tips for a Professional and Beautiful Quilt
When working on How to Make Springtime Cheer Quilt, there are several tips that can help you achieve a professional-quality result.
Always use a consistent seam allowance. This ensures that your pieces fit together correctly and maintains the overall structure of the quilt.
Press your seams carefully after each step. Proper pressing improves accuracy and gives your quilt a smoother finish.
Choose a balanced color palette. While it’s tempting to use many different prints, maintaining harmony will enhance the overall design.
Take your time with cutting and measuring. Precision is key in quilting, and careful preparation leads to better results.
Use high-quality thread and materials. This ensures durability and helps your quilt last for years.
Finally, be patient during the finishing steps. Quilting and binding require attention to detail, but they make a significant difference in the final appearance of your How to Make Springtime Cheer Quilt.
FAQ About How to Make Springtime Cheer Quilt
Is this quilt suitable for beginners?
Yes, How to Make Springtime Cheer Quilt is beginner-friendly, especially when using simple square blocks.
What size should I make my quilt?
You can customize the size by adjusting the number of blocks.
How long does it take to complete?
It can take several days to a week, depending on your experience and available time.
What type of fabric is best?
Cotton fabric is ideal because it is easy to sew and durable.
Do I need a sewing machine?
A sewing machine is recommended, but hand sewing is also possible.
Can I wash the finished quilt?
Yes, use gentle washing methods to maintain its quality.
Conclusion
Learning How to Make Springtime Cheer Quilt is a rewarding and enjoyable experience that allows you to create a beautiful, meaningful piece of handmade art. Throughout this guide, you explored how to select fabrics, prepare quilt blocks, assemble the quilt top, and finish your project with professional techniques.
By practicing How to Make Springtime Cheer Quilt, you can improve your quilting skills while creating something that brings warmth, color, and joy into your home. This project is perfect for expressing creativity and celebrating the beauty of spring.

