
How to make crochet a hummingbird is a fascinating and creative project that allows you to transform simple yarn into a delicate and lifelike miniature bird. If you are searching for a crochet idea that is both artistic and rewarding, learning How to make crochet a hummingbird is a perfect choice.
One of the most captivating aspects of How to make crochet a hummingbird is how such a tiny project can hold so much personality and beauty. Hummingbirds are known for their vibrant colors and graceful movement, and with the right crochet techniques, you can capture that elegance in yarn form.
In this complete and detailed guide, you will learn everything you need to know about How to make crochet a hummingbird, including materials, step-by-step instructions, professional tips, creative customization ideas, and a comprehensive FAQ section.
Materials and Tools for How to Make Crochet a Hummingbird
Before starting your How to make crochet a hummingbird, it is essential to gather all the necessary materials. Choosing the right supplies will greatly impact the final appearance and durability of your project.
The most important material is yarn. Lightweight yarn such as cotton or fine acrylic yarn is highly recommended. Cotton yarn is especially ideal because it provides structure and helps the hummingbird maintain its shape. It also gives a smooth and clean finish that highlights the details of your stitches.
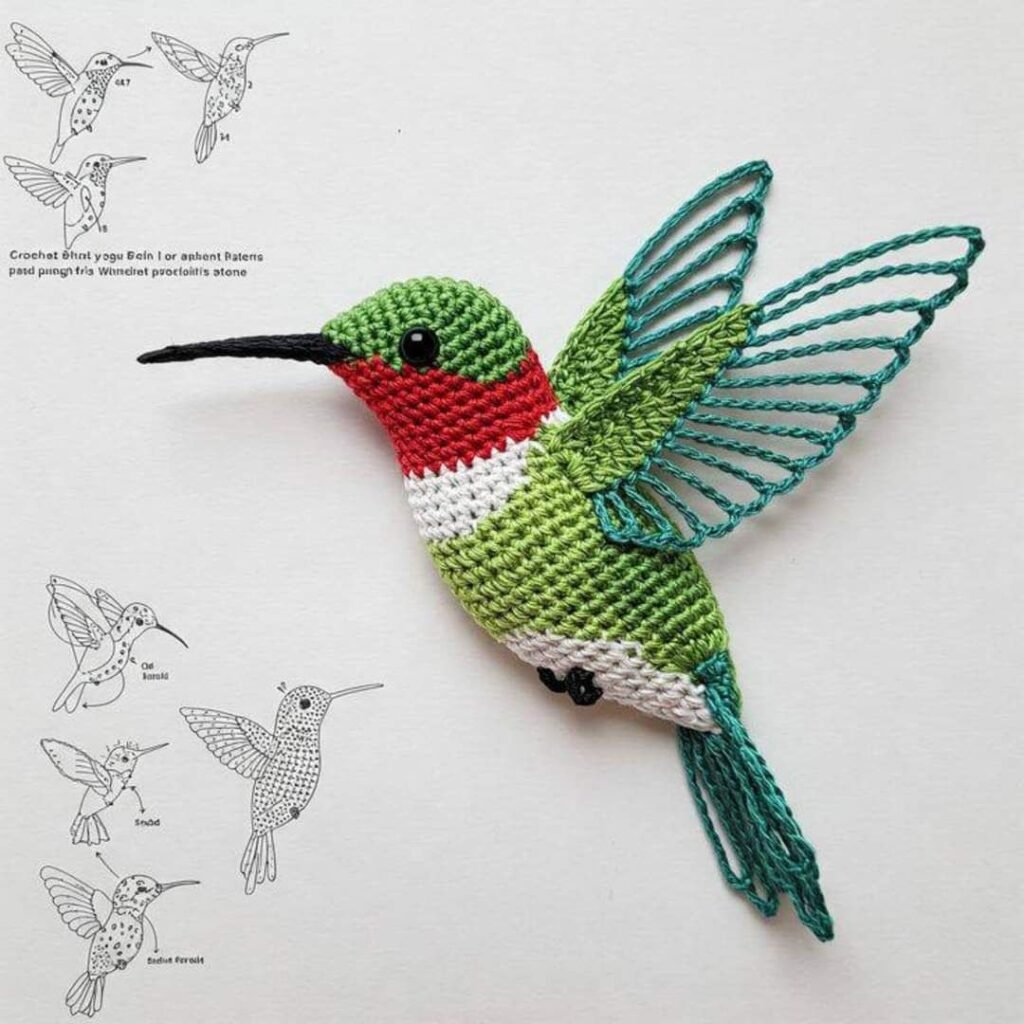
Color selection plays a crucial role in this project. Hummingbirds are known for their vibrant and iridescent colors, so consider using shades like emerald green, turquoise, ruby red, purple, and soft yellow. Combining multiple colors will make your How to make crochet a hummingbird more realistic and visually striking.
You will also need a crochet hook that matches your yarn size. Typically, a hook between 1.75 mm and 3.0 mm works best. Using a smaller hook helps create tight stitches, which is important for small amigurumi-style projects.
Other essential tools include scissors for cutting yarn, a yarn needle for sewing and weaving in ends, and stitch markers to help you keep track of rounds.
For stuffing, you will need a small amount of polyester fiberfill. This gives the hummingbird its three-dimensional shape. Optional materials include safety eyes, beads, or embroidery thread for adding facial details.
Preparing your materials in advance will make the process of How to make crochet a hummingbird smoother and more enjoyable.
Step-by-Step Instructions for How to Make Crochet a Hummingbird
To begin your How to make crochet a hummingbird, start with the body. Create a magic ring and work single crochet stitches in the round. Begin with a small number of stitches and gradually increase to form a rounded shape.
Continue crocheting in the round, increasing and then maintaining the stitch count to build the body. As the shape develops, you will notice it forming a small oval or teardrop shape.
Once the body reaches the desired size, begin decreasing stitches to taper the back end. This creates a natural body shape for your hummingbird. Lightly stuff the body with fiberfill as you go, ensuring it remains soft but structured.
Next, create the head. In some patterns, the head is worked as part of the body, while in others, it is made separately and sewn on. Shape the head slightly larger than the body’s front section.
To form the beak, use chain stitches or very tight single crochet stitches to create a small pointed extension. This is a key feature in How to make crochet a hummingbird, as it defines the bird’s identity.
For the wings, crochet two separate pieces. Start with a chain and work a combination of single, half double, and double crochet stitches to create a slightly curved shape. The wings should resemble a teardrop or leaf shape.
After completing the wings, attach them securely to each side of the body. Make sure they are positioned evenly and angled slightly upward for a more realistic look.
Create the tail by crocheting a small flat piece or a slightly pointed shape. Attach it to the back of the body.
Finally, add facial details such as eyes using embroidery or small beads. Carefully weave in all loose ends. Your How to make crochet a hummingbird is now complete.
Tips and Techniques for a Realistic Crochet Hummingbird
When working on How to make crochet a hummingbird, attention to detail is key. One of the most important tips is to maintain consistent tension throughout your project. Even stitches ensure a smooth and professional appearance.
Using a smaller hook is highly recommended. Tight stitches prevent gaps and keep the stuffing from showing through, which is especially important for small projects.
Color changes should be done carefully to create smooth transitions. This enhances the realistic look of your hummingbird and adds depth to your design.
When stuffing the body, add fiberfill gradually. This allows you to control the shape and avoid lumps or uneven areas.
Take your time when attaching the wings and tail. Proper placement and secure stitching make a significant difference in the final appearance of your How to make crochet a hummingbird.
Blocking is optional but can improve the shape of the wings. Lightly shaping them helps achieve a more natural look.
Finally, focus on the finishing details. Small touches like neatly embroidered eyes or subtle color accents can bring your hummingbird to life.
Creative Ideas and Customization Options
One of the most exciting aspects of How to make crochet a hummingbird is the ability to customize your design. You can experiment with different color combinations to create unique and personalized birds.
Try making hummingbirds in bright tropical colors or soft pastel shades for a more whimsical look. You can also create realistic versions inspired by actual hummingbird species.
Adding metallic or shiny yarn can give your hummingbird an iridescent effect, mimicking the natural shimmer of real feathers.
You can also vary the size of your hummingbirds by using different yarn weights and hook sizes. Smaller versions can be used as keychains, while larger ones can serve as decorative pieces.
Consider incorporating your hummingbirds into other projects. Attach them to wreaths, wall hangings, or floral arrangements for a beautiful decorative touch.
You can also create a collection of hummingbirds in different colors and styles. This is a great way to showcase your creativity and build a cohesive handmade display.
Personalization options include adding small accessories, embroidery details, or even creating themed hummingbirds for different seasons.
FAQ About How to Make Crochet a Hummingbird
Is this project suitable for beginners?
Yes, How to make crochet a hummingbird is suitable for beginners with basic crochet knowledge, though some patience is required.
How long does it take to complete one hummingbird?
It typically takes between 1 to 2 hours, depending on your experience level.
What type of yarn is best?
Cotton yarn is ideal because it provides structure and a clean finish.
Do I need stuffing?
Yes, a small amount of fiberfill is needed to shape the body.
Can I use multiple colors?
Yes, using multiple colors enhances the realism and beauty of your hummingbird.
Can I sell crochet hummingbirds?
Yes, they are popular handmade items and can be sold individually or as part of decorative sets.
Conclusion
Learning How to make crochet a hummingbird is a rewarding and enjoyable experience that allows you to create a delicate and artistic handmade piece. Throughout this guide, you explored the materials, step-by-step instructions, expert tips, and creative ideas needed to complete your project.
By practicing How to make crochet a hummingbird, you can improve your crochet skills while creating something unique and full of character. These charming creations are perfect for decoration, gifts, or personal collections.

