
Bloom Quilt Pattern is a vibrant, inspiring, and highly creative quilting project that captures the beauty of blooming flowers through fabric, color, and thoughtful design. If you are looking for a quilt that feels fresh, joyful, and full of life, learning the Bloom Quilt Pattern is a perfect choice. This pattern transforms simple fabric pieces into a stunning floral composition that can brighten any room and bring a sense of warmth and comfort.
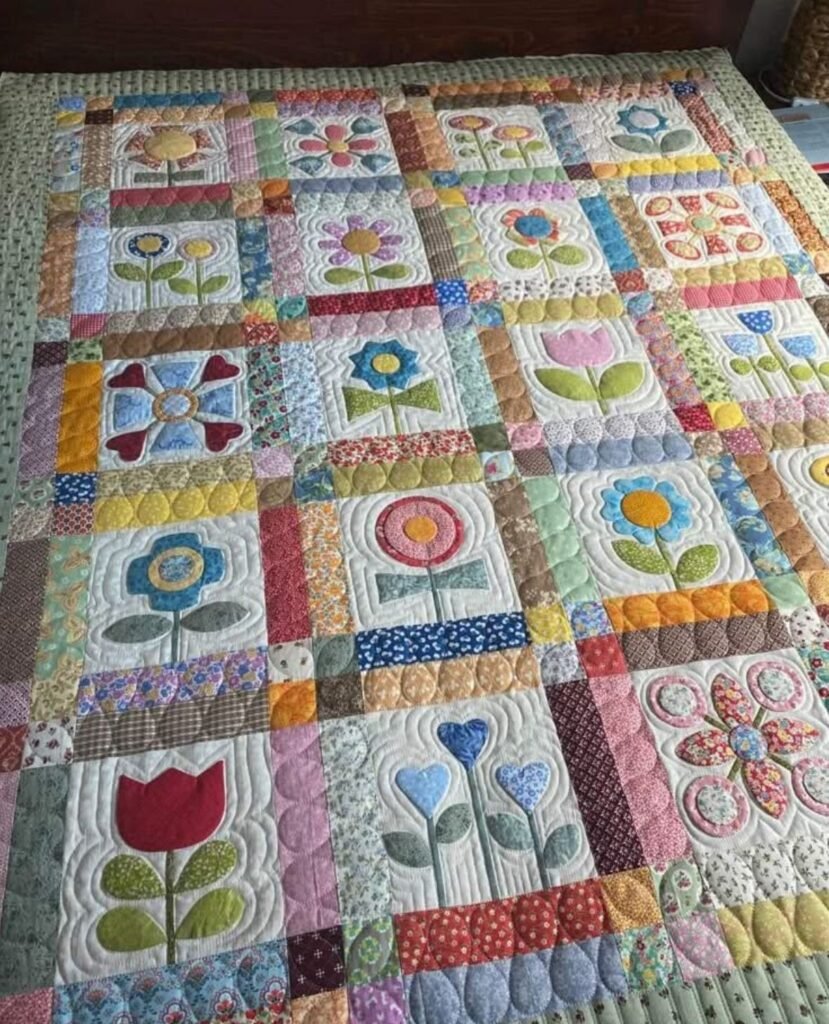
One of the most captivating aspects of the Bloom Quilt Pattern is its ability to mimic nature. The arrangement of flower-inspired blocks creates a sense of movement, growth, and harmony, much like a real garden in full bloom. Each block represents a flower, and when combined, they form a cohesive and visually striking quilt that feels alive and dynamic.
Another reason why the Bloom Quilt Pattern is so popular is its flexibility. It can be adapted for beginners using simple piecing techniques or expanded into a more advanced project with appliqué, layering, and detailed quilting. Whether you want a quick decorative quilt or a detailed heirloom piece, this pattern offers endless possibilities.
Materials and Fabric Selection for Bloom Quilt Pattern
Before starting your Bloom Quilt Pattern, gathering the right materials is essential for achieving a beautiful and long-lasting result.
Cotton fabric is the most recommended choice for quilting. It is durable, easy to sew, and available in a wide range of colors and prints. For a Bloom Quilt, you will want a variety of fabrics that can represent petals, flower centers, and leaves.
Choose floral colors such as pink, yellow, orange, red, and purple for the flower blocks. Mixing light and dark shades will create depth and dimension, making your quilt more visually interesting.
The background fabric should contrast with the flowers so they stand out clearly. Neutral tones like white, cream, beige, or soft gray work beautifully.
You will also need batting for the middle layer and backing fabric for the underside of the quilt.
Essential tools include a rotary cutter, cutting mat, quilting ruler, pins or clips, thread, and a sewing machine. An iron is crucial for pressing seams and keeping your work neat.
Optional materials include fusible web for appliqué and embroidery thread for adding decorative details such as veins on leaves or texture on petals.
Preparing your materials carefully will make the process of creating your Bloom Quilt Pattern smoother and more enjoyable.
Designing and Planning Your Bloom Quilt
The design stage is one of the most exciting parts of the Bloom Quilt Pattern, as it allows you to bring your creative vision to life.
Start by deciding the size of your quilt. This will determine how many blocks you need and how large each block should be.
Next, choose your flower block design. You can use simple geometric shapes to represent flowers or more detailed appliqué designs for a realistic look.
Sketch your layout on paper or use a design board to arrange your blocks visually. This helps you experiment with different arrangements before sewing.
Consider how you will distribute colors across the quilt. A balanced color arrangement will create harmony, while a more random layout can give a playful, modern feel.
You can also include sashing (fabric strips between blocks) to separate the flowers and add structure. Borders can frame the quilt and enhance its overall appearance.
Taking time to plan your design carefully will ensure your Bloom Quilt Pattern looks cohesive, balanced, and visually appealing.
Cutting Fabric for Bloom Quilt Pattern
Accurate cutting is essential for the success of your Bloom Quilt Pattern.
Use a rotary cutter and quilting ruler to cut your fabric pieces precisely. Consistent measurements are key to ensuring all blocks fit together properly.
Cut the shapes needed for flower petals, centers, leaves, and background squares.
If you are using appliqué, trace the shapes onto fusible web and cut them out carefully before attaching them to the fabric.
Organize your pieces by block to keep everything neat and easy to assemble.
Before sewing, lay out all your pieces to preview the design and make adjustments if needed.
Taking your time during this stage will improve the overall quality of your quilt.
Sewing and Constructing Flower Blocks
The next step in the Bloom Quilt Pattern is constructing the individual flower blocks.
If you are using piecing techniques, sew the fabric pieces together to form the flower shapes. Maintain a consistent seam allowance, usually ¼ inch, to ensure accuracy.
Press seams after each step to keep the fabric flat and reduce bulk.
If you are using appliqué, attach the flower shapes to the background fabric using a zigzag stitch, blanket stitch, or another decorative stitch.
Repeat this process for each block in your quilt.
Pay attention to alignment and symmetry to achieve a clean and professional appearance.
As you complete more blocks, you will begin to see your Bloom Quilt Pattern come to life.
Assembling the Quilt Top
Once all your blocks are complete, it is time to assemble the quilt top.
Lay out the blocks on a flat surface or design wall. Arrange them until you find a layout that feels balanced and visually pleasing.
Sew the blocks together row by row, ensuring that seams align properly.
Join the rows to form the complete quilt top.
Press all seams carefully to maintain a neat and polished look.
This stage is incredibly rewarding, as your Bloom Quilt Pattern starts to take its final form.
Quilting Techniques and Finishing
With the quilt top complete, the next step in the Bloom Quilt Pattern is quilting and finishing.
Create a quilt sandwich by layering the backing fabric, batting, and quilt top.
Smooth out any wrinkles and secure the layers with pins or clips.
Choose a quilting style that complements your design. Straight-line quilting creates a clean, modern look, while free-motion quilting adds texture and artistic detail.
Quilt evenly across the entire piece, taking your time to maintain consistency.
After quilting, trim any excess fabric and prepare the edges for binding.
Attach the binding around the edges, folding it neatly and stitching it securely.
These finishing steps give your Bloom Quilt Pattern a professional and durable finish.
Creative Variations and Customization Ideas
One of the most exciting aspects of the Bloom Quilt Pattern is the opportunity for customization.
Experiment with different color palettes to create unique designs.
Add embroidery or decorative stitching to enhance the flower shapes.
Incorporate different fabric textures such as linen or lightweight denim for added depth.
Create seasonal quilts inspired by spring, summer, or autumn.
Adjust the size of the quilt to suit your needs, from small wall hangings to large bed quilts.
These ideas allow you to make your Bloom Quilt Pattern truly one of a kind.
Tips for a Professional Finish
To achieve the best results with your Bloom Quilt Pattern, keep these expert tips in mind.
Maintain consistent seam allowances throughout your project.
Press seams frequently to keep your work neat and precise.
Use high-quality materials for durability and comfort.
Take your time with cutting and sewing to avoid mistakes.
Pay attention to small details, as they significantly impact the final result.
These tips will help you create a quilt that looks polished and professionally made.
FAQ About Bloom Quilt Pattern
Is the Bloom Quilt Pattern suitable for beginners?
Yes, beginners can start with simple flower designs and basic techniques.
How long does it take to complete a quilt?
It can take several days depending on the size and complexity.
What type of fabric is best?
Cotton fabric is ideal for quilting projects.
Do I need a sewing machine?
A sewing machine is highly recommended for efficiency.
Can I customize the design?
Yes, this pattern is highly customizable in terms of colors and layout.
How do I care for the finished quilt?
Wash gently with mild detergent and avoid high heat to preserve the fabric.
Conclusion
The Bloom Quilt Pattern is a creative, beautiful, and deeply rewarding quilting project that captures the essence of blooming flowers through fabric and design. Throughout this guide, you learned how to select materials, design your quilt, cut and assemble fabric pieces, quilt your project, and finish it with professional techniques.
By practicing the Bloom Quilt Pattern, you can improve your quilting skills while creating a unique piece that reflects your creativity and personal style. This quilt is perfect for gifts, home décor, or cherished keepsakes that can be passed down over time.

