
Miniature Crochet Doll Keychain Pattern is a charming project that transforms a small amount of yarn into a tiny handmade doll that can decorate keys, bags, backpacks, pouches, or other personal accessories. The miniature size makes this project especially appealing for crochet lovers who enjoy creating detailed items without beginning a large project. With carefully shaped parts, simple stitches, and creative color combinations, a miniature crochet doll keychain can become a unique accessory filled with handmade character.
One of the most interesting features of a Miniature Crochet Doll Keychain Pattern is the way basic crochet techniques can be used to create a recognizable three-dimensional figure. The head and body are generally worked with compact stitches, while small increases and decreases help control the shape. The hair and clothing can be created with color changes or added after the main doll is complete. Although the finished keychain may look detailed, the construction becomes much easier when the project is divided into simple stages.
Making a mini crochet doll is also an excellent way to practice useful crochet skills. The project can include working in continuous rounds, using a magic ring, making single crochet stitches, increasing, decreasing, changing colors, stuffing small pieces, embroidering simple details, and finishing neatly. Since only small amounts of yarn are needed, the pattern is also ideal for using leftover materials from previous projects.
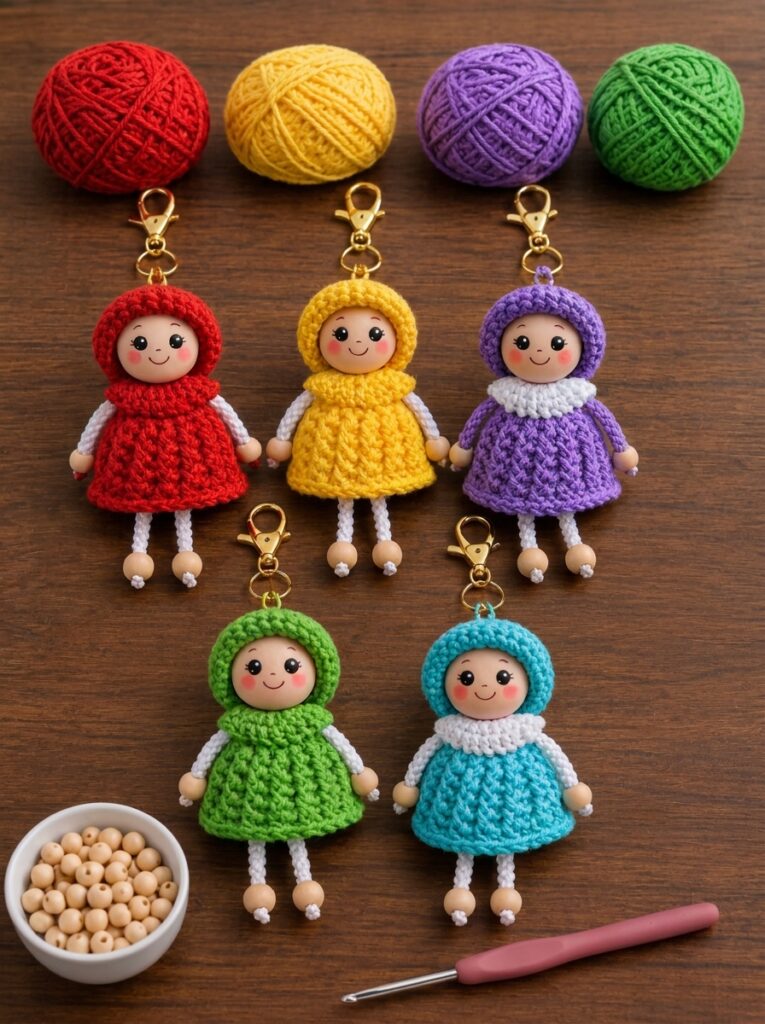
Materials, US Crochet Terms, and Preparation for the Mini Doll
The first step in making a Miniature Crochet Doll Keychain Pattern is choosing suitable yarn. Smooth cotton yarn is a popular option because it provides clear stitch definition and helps small crochet pieces maintain their shape. Acrylic yarn can also work well and may create a slightly softer doll. The most important point is selecting yarn that is comfortable to handle when making small stitches.
Lightweight or fine yarn is usually suitable for a miniature crochet keychain because it keeps the finished doll compact. Medium-weight yarn can be easier for beginners to use, but it will create a larger figure. If you want to make several matching dolls, use the same yarn weight and hook size for each one so the finished dimensions remain consistent.
Choose a crochet hook that creates firm fabric without making the stitches uncomfortable to work. A slightly smaller hook than you might normally use with the selected yarn can help reduce visible spaces between stitches. This is especially useful for a stuffed crochet project because the filling should remain inside the doll.
The main US crochet terms used in this project may include magic ring (MR), chain (ch), slip stitch (sl st), single crochet (sc), increase (inc), and decrease (dec). Single crochet is especially important because it creates the dense fabric commonly used for small three-dimensional crochet projects.
Additional supplies include scissors, a yarn needle, stitch markers, a small amount of suitable stuffing, and yarn in several colors. You may also need embroidery thread for simple facial details. A keychain attachment can be added when the doll is complete, but it should be secured carefully so the finished project remains connected during normal use.
Before beginning the Miniature Crochet Doll Keychain Pattern, choose the main colors and decide on the doll’s appearance. Select yarn for the skin tone, hair, clothing, and accessories. Planning these details before starting makes color changes easier and helps create a coordinated finished design.
How to Crochet the Head and Body of the Miniature Doll
Begin the miniature crochet doll with a magic ring using the selected color for the head. Work the required number of single crochet stitches into the ring and pull it closed carefully. Place a stitch marker in the first stitch so you can identify the beginning of each round.
Increase evenly during the next rounds to create a smooth circular shape. An increase is usually made by working two single crochet stitches into the same stitch. Distribute the increases carefully and count the stitches after each round. Accurate counting is especially important in miniature crochet because even one extra stitch can noticeably change the shape.
After reaching the desired width, work several rounds without increasing. These even rounds create the sides of the head. Continue moving the stitch marker at the beginning of each new round. Maintaining consistent tension helps the head remain symmetrical and prevents one section from becoming tighter than another.
Begin decreasing gradually to close the lower part of the head. Add a small amount of stuffing before the opening becomes too narrow. Use only enough filling to create a smooth shape. Too much stuffing can stretch the stitches, while too little may leave the crochet doll head uneven.
The body can be crocheted separately or continued directly from the head, depending on the preferred construction. Use color changes to create the appearance of clothing. For example, begin with the skin-tone yarn near the neck and change to the selected dress, shirt, or outfit color for the main body section.
Shape the body with carefully placed increases and decreases. Since this is a mini crochet doll keychain, the body should remain proportional to the head without becoming too large. Add a small amount of stuffing as the body develops, then close the final opening securely and weave in the yarn tail.
Creating Hair, Arms, Legs, and the Keychain Finish
The hair is one of the easiest ways to personalize a Miniature Crochet Doll Keychain Pattern. A simple hairstyle can be created by crocheting a small cap that fits over the head. Another option is to attach short yarn strands individually. Keep the hair lightweight so it does not overwhelm the miniature proportions of the doll.
A crocheted hair cap can begin with a magic ring and follow a similar increase pattern to the top of the head. Stop increasing when the cap reaches the correct width, then work a few even rounds. Place the cap on the head, adjust the position, and sew it securely with matching yarn.
The arms and legs can be made as small tubes using single crochet stitches. Because these parts are tiny, they may need little or no stuffing. Attach them securely to the body with a yarn needle. Check the position from the front and back before completing the final stitches.
Simple facial details can give the miniature crochet doll personality. Small embroidered stitches can be used for the eyes and mouth. Keep the features balanced and appropriate for the tiny scale of the project. Place the details carefully before securing the thread permanently.
To transform the doll into a keychain, create a strong attachment point at the top. A small crocheted loop can be incorporated into the design or sewn securely to the finished doll. The connection should pass through firm stitches rather than relying on a single strand of yarn.
After attaching the keychain component, inspect the entire project. Check the seams, limbs, hair, embroidered details, and attachment point. Weave in all yarn ends carefully. The completed crochet doll keychain should feel neat, balanced, and secure enough for its intended decorative use.
Creative Variations, Helpful Tips, Frequently Asked Questions, and Conclusion
The Miniature Crochet Doll Keychain Pattern offers many opportunities for creative color combinations. One doll can wear a pastel dress, while another can feature bright colors or neutral shades. Changing only the outfit and hair can make the same basic pattern look completely different.
Small clothing details can also personalize the project. A simple contrasting row can suggest a belt, collar, or decorative trim. Tiny crochet details may be added carefully, but avoid making the finished keychain excessively bulky. The main shape of the doll should remain easy to recognize.
Different hairstyles can create even more variety. Short hair, long yarn strands, small braids, buns, or a simple crochet cap can all change the appearance of the mini crochet character. Choose a style that is manageable at a miniature scale.
Consistent tension is essential when making small crochet pieces. Loose stitches may allow stuffing to show, while extremely tight stitches can be difficult to work into. Try to maintain a comfortable, even tension throughout the head, body, and smaller parts.
A stitch marker can prevent many mistakes. Since miniature dolls are often worked in continuous rounds, it can be difficult to identify where one round ends and the next begins. Move the marker after each completed round and count stitches regularly.
Most importantly, take time with the finishing details. A simple Miniature Crochet Doll Keychain Pattern can look polished when the parts are positioned carefully, the yarn ends are hidden, and the final attachment is secure. Small details often have the greatest influence on a miniature project.
Conclusion
The Miniature Crochet Doll Keychain Pattern is a creative project that turns basic crochet stitches and small amounts of yarn into a charming handmade accessory. By working carefully in rounds, shaping the head and body, adding simple limbs, creating hair, and finishing the attachment securely, crocheters can create a miniature doll with plenty of personality.
Throughout this guide, you learned about choosing yarn, understanding US crochet terminology, using a magic ring, working increases and decreases, stuffing small pieces, changing colors, creating hair, attaching limbs, adding facial details, and completing the keychain finish.

