
Denim Apron Pattern is one of the most rewarding sewing projects for anyone who enjoys creating practical, long-lasting handmade accessories. Whether you are making an apron for cooking, gardening, woodworking, crafting, or simply as a fashionable everyday accessory, a well-made Denim Apron Pattern combines durability, comfort, and timeless style. Denim is known for its strength and versatility, making it one of the best fabrics for aprons that are designed to withstand daily use while still looking attractive.
Creating your own Denim Apron Pattern allows you to customize every detail according to your personal preferences. From choosing recycled denim jeans to selecting new heavyweight denim fabric, every decision helps create an apron that reflects your style. You can decide on pocket sizes, strap placement, stitching colors, decorative details, and even personalize the finished apron with embroidery or patches. This flexibility makes the project enjoyable for beginners and experienced sewists alike.
Another advantage of following a Denim Apron Pattern is learning valuable sewing techniques that can be applied to many future projects. Throughout this guide, you will discover how to prepare the fabric, cut the pattern pieces accurately, assemble each section, reinforce stress points, and add professional finishing touches. By following each step carefully, you can create an apron that not only looks professionally made but also lasts for many years of regular use.
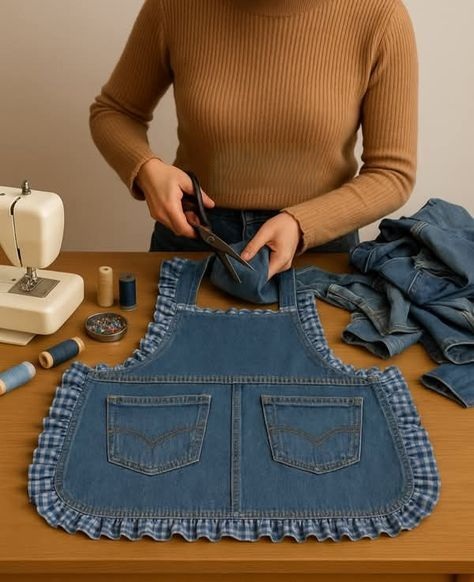
Gather Materials and Prepare Your Denim Apron Pattern
Before cutting any fabric, gather all the necessary supplies for your Denim Apron Pattern. You will need medium or heavyweight denim, coordinating thread, sharp fabric scissors, pins or sewing clips, measuring tape, tailor’s chalk, sewing machine, iron, and optional hardware such as rivets or adjustable buckles. High-quality tools make the sewing process smoother and improve the final appearance.
Choosing the right denim is one of the most important decisions. Medium-weight denim offers flexibility while remaining durable, whereas heavyweight denim creates a rugged work apron suitable for workshops, grilling, or gardening. Recycled denim from old jeans can also produce beautiful results while supporting sustainable crafting.
Wash and dry your denim before beginning the project. Since denim often shrinks during its first wash, prewashing prevents unwanted size changes after your apron is finished. Iron the fabric thoroughly to eliminate wrinkles before tracing your pattern.
Take accurate body measurements before selecting or drafting your Denim Apron Pattern. Measure the chest width, waist width, desired apron length, and neck strap placement. Custom measurements ensure a comfortable fit and allow for better movement while working.
Trace your pattern pieces carefully onto the fabric using tailor’s chalk or washable fabric markers. Double-check every measurement before cutting. Precision at this stage helps prevent mistakes during assembly and ensures symmetrical results.
Cut all pieces slowly using sharp fabric scissors or a rotary cutter. Clean edges make sewing easier and contribute to a polished final project. Label each piece if necessary to avoid confusion during construction.
Cutting, Sewing, and Building the Apron Body
Begin by preparing the main body of the Denim Apron Pattern. Fold and press all raw edges according to your seam allowance before stitching. Pressing each fold creates crisp lines and produces a much cleaner finish than folding by hand during sewing.
Sew the side hems first using straight stitches. Maintaining consistent seam allowances throughout the project helps create an apron that appears balanced and professionally finished. Topstitching with contrasting thread adds a classic denim appearance.
Next, fold and sew the bottom hem. Because the lower edge experiences frequent movement, consider using a double-fold hem for additional durability. This technique hides raw edges while strengthening the apron.
Prepare the upper edge where the bib meets the neck strap. Reinforce this section with additional rows of stitching since it carries much of the apron’s weight during daily use. Strong seams significantly extend the lifespan of the finished apron.
Now construct the neck strap. Depending on your preferred Denim Apron Pattern, you may create fixed straps, adjustable straps with buckles, cross-back straps, or extra-wide shoulder straps for improved comfort. Reinforce every connection point with backstitching.
Finally, attach the waist ties securely. Long waist ties provide flexibility for different body sizes and allow comfortable adjustments while wearing multiple clothing layers. Double stitching these attachment points ensures lasting strength.
Add Functional Pockets and Decorative Details
One of the biggest advantages of a homemade Denim Apron Pattern is the ability to customize storage. Decide which tools or accessories you plan to carry before designing your pockets. Large divided pockets work well for kitchen utensils, while smaller compartments are perfect for pens, scissors, or gardening tools.
Cut pocket pieces slightly larger than the desired finished dimensions to allow for folded seam allowances. Press all edges before attaching the pockets to simplify the sewing process and improve accuracy.
Position your pockets carefully on the apron front before sewing. Wear the apron temporarily and test whether the placement feels natural. Comfortable pocket positioning improves daily usability and prevents unnecessary reaching.
Secure each pocket with double rows of stitching, especially around the upper corners where stress is concentrated. Small reinforcement stitches or bar tacks help prevent tearing after repeated use.
Decorative topstitching enhances the traditional denim appearance while simultaneously strengthening seams. Many sewists choose contrasting gold, orange, or cream thread to achieve the iconic denim look associated with classic jeans.
For additional personalization, consider adding embroidered initials, fabric labels, decorative patches, contrast fabric lining, leather details, or metal rivets. These finishing touches transform a simple Denim Apron Pattern into a unique handmade accessory that reflects your personal creativity.
Final Assembly, Finishing Touches, and Care Tips
After assembling every section, inspect the apron carefully for loose threads or uneven stitches. Trim excess thread and reinforce any seam that appears weak before considering the project complete.
Press the finished apron thoroughly with steam. Proper pressing helps flatten bulky seams, improves overall appearance, and gives the apron a crisp professional finish that resembles store-bought quality.
Try on your completed Denim Apron Pattern and evaluate the fit. Check that the neck strap feels comfortable, the waist ties secure properly, and the pockets remain easily accessible during movement. Minor adjustments at this stage can greatly improve long-term comfort.
Wash your finished denim apron using cold water and mild detergent. Turn the apron inside out before washing to preserve decorative stitching and reduce fading. Avoid excessive heat during drying, as high temperatures may cause additional shrinkage.
With regular use, denim naturally develops a soft texture and unique character. Small signs of wear often enhance the apron’s appearance, giving it the classic lived-in look that denim enthusiasts appreciate. Proper care allows the apron to remain functional for many years.
As your sewing confidence grows, experiment with different versions of the Denim Apron Pattern. You can create shorter café aprons, full workshop aprons, cross-back utility aprons, children’s sizes, or matching family sets. Each variation builds new sewing skills while expanding your handmade collection.
Frequently Asked Questions About Denim Apron Pattern
Is a Denim Apron Pattern suitable for beginners?
Yes. A basic Denim Apron Pattern is an excellent beginner-friendly project because it teaches essential sewing skills such as measuring, hemming, topstitching, pocket construction, and strap attachment.
What type of denim works best?
Medium-weight denim is generally the best choice because it balances durability and comfort. Heavyweight denim is excellent for workshop or gardening aprons, while recycled denim from jeans creates sustainable and unique results.
Can I use old jeans instead of buying fabric?
Absolutely. Recycled jeans are perfect for creating a Denim Apron Pattern. Different denim shades can even be combined to produce creative patchwork-style aprons.
How many pockets should an apron have?
There is no fixed rule. Most aprons include one large divided pocket or two to four smaller pockets depending on their intended purpose.
Should I prewash the denim?
Yes. Prewashing removes excess dye and minimizes shrinkage, ensuring your finished apron maintains its intended size after future washes.
What needle should I use for denim?
A denim or jeans needle is recommended because it penetrates thick fabric more easily and reduces skipped stitches.
Can I make adjustable straps?
Yes. Adjustable neck straps using buckles or sliders make the apron more versatile and comfortable for different users.
How do I reinforce stress points?
Use backstitching, double rows of stitching, or bar tacks at pocket corners, strap attachments, and waist tie connections to maximize durability.
Can this apron be personalized?
Definitely. Embroidery, decorative stitching, labels, fabric patches, rivets, and contrasting fabrics all add personality while maintaining functionality.
How long does it take to sew a Denim Apron Pattern?
Most beginners complete the project in approximately four to six hours, while experienced sewists can often finish it in two to three hours depending on the complexity of the design.
Conclusion
Creating your own Denim Apron Pattern is a practical and enjoyable sewing project that combines creativity with everyday functionality. Throughout this guide, you learned how to choose the right denim, prepare your materials, accurately cut each pattern piece, sew the main body, construct durable straps, add functional pockets, reinforce high-stress areas, and apply professional finishing techniques. These steps help produce an apron that is comfortable, durable, and uniquely customized to your personal style.

