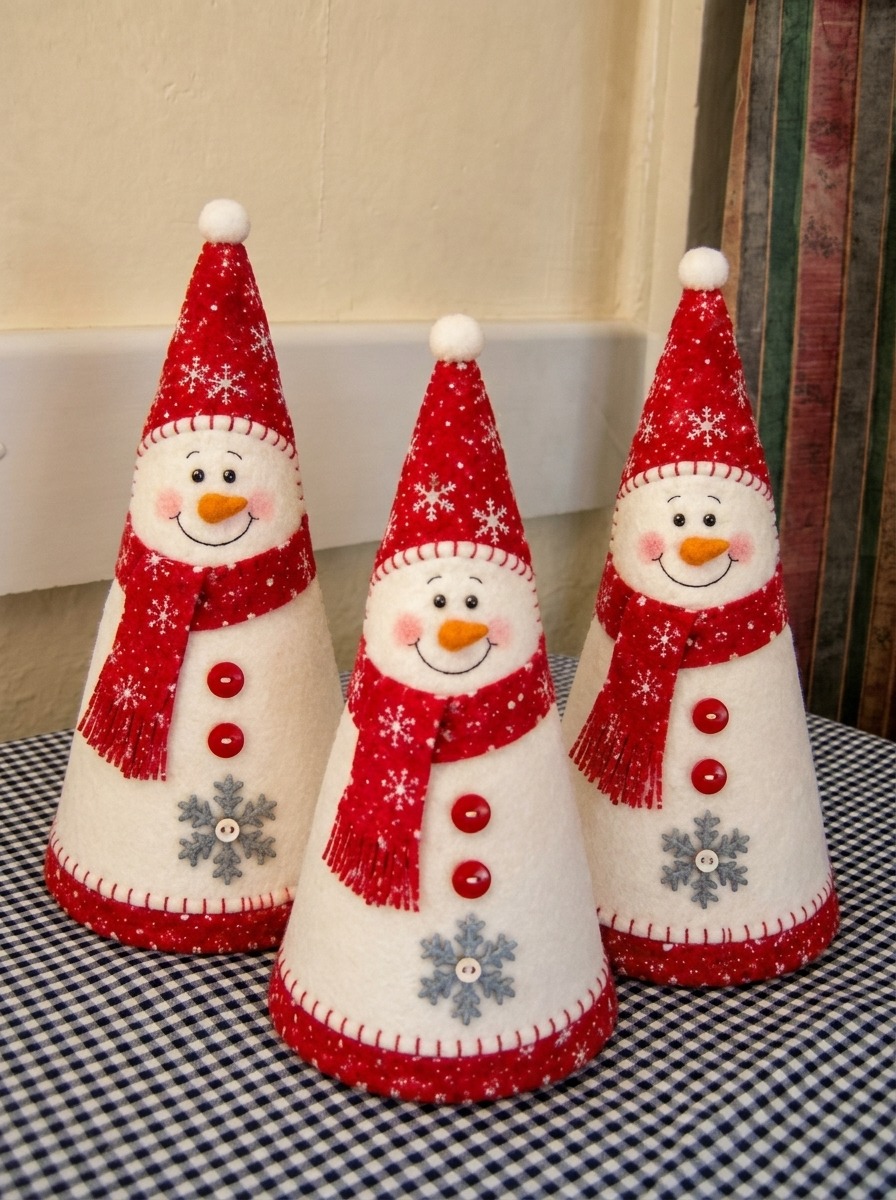
Fabric Snowman Pattern is one of the most enjoyable and rewarding sewing projects for crafters who love creating seasonal decorations with fabric. Whether you are decorating your home for winter, preparing handmade holiday gifts, or simply looking for a relaxing sewing project, this adorable fabric snowman is a timeless choice. With just a few basic sewing supplies, some fabric scraps, and a little creativity, you can transform simple materials into a charming decoration that brings warmth and personality to any space. Throughout this guide, you will learn exactly how to create your own Fabric Snowman Pattern from start to finish.
Making a Fabric Snowman Pattern is an excellent project for beginners and experienced sewists alike because it combines simple techniques with endless opportunities for personalization. You can choose rustic fabrics, elegant cotton prints, cozy flannel, linen, or even recycled textiles to give each snowman its own unique appearance. Since every handmade project reflects the maker’s creativity, no two finished snowmen will ever look exactly alike, making every creation truly special.
Another reason why the Fabric Snowman Pattern remains popular year after year is its versatility. Finished snowmen can be displayed on shelves, fireplaces, dining tables, front porches, entryway decorations, or holiday centerpieces. They also make thoughtful handmade gifts for family and friends. In this detailed tutorial, you’ll discover the materials you’ll need, the cutting process, sewing instructions, stuffing techniques, decorative finishing touches, and professional tips that help create a polished project while following beginner-friendly sewing methods.
Materials and Preparing Your Fabric Snowman Pattern
Before starting your Fabric Snowman Pattern, gather all necessary materials to make the sewing process smooth and enjoyable. Preparation is one of the most important steps because having everything organized saves time and helps avoid mistakes later in the project.
Choose a sturdy woven fabric for the body of the snowman. White cotton, muslin, linen, or light canvas work beautifully because they provide enough structure while remaining easy to sew. If you prefer a rustic farmhouse appearance, natural linen creates wonderful texture.
For accessories, select coordinating fabrics for the scarf, hat, mittens, or decorative patches. Plaid prints, holiday fabrics, gingham, flannel, burlap, or festive cotton prints all complement the snowman beautifully and add personality to the finished decoration.
Gather polyester fiberfill for stuffing the body. High-quality stuffing creates a fuller shape while helping the snowman maintain its form over time. Small amounts of weighted filling, such as plastic pellets or clean rice sealed inside a pouch, can be placed in the bottom for extra stability.
Prepare basic sewing tools including sharp fabric scissors, sewing pins, fabric marker, matching thread, sewing machine or hand-sewing needle, ruler, measuring tape, and an iron. Pressing fabrics before cutting improves accuracy considerably.
Finally, organize decorative embellishments such as black buttons, embroidery floss, felt, wooden beads, ribbon, twine, miniature bells, artificial greenery, berries, or fabric paint. These finishing details bring the Fabric Snowman Pattern to life and allow every project to reflect your own creative style.
Step-by-Step Instructions to Sew the Fabric Snowman
Begin by drawing or printing your Fabric Snowman Pattern. The simplest version consists of three connected circles that gradually become smaller from bottom to top. Add a seam allowance around the entire pattern before cutting your fabric.
Fold your white fabric with right sides together and pin the paper pattern securely in place. Carefully cut two identical body pieces using sharp fabric scissors to ensure clean, smooth edges that will sew together evenly.
Place both fabric pieces with right sides facing each other. Sew around the outline using approximately a ¼-inch seam allowance. Leave a small opening near the bottom or side so the snowman can later be turned right side out and stuffed.
Clip gentle curves around rounded sections without cutting through the stitching. This allows the fabric to relax when turned right side out, producing smoother curves and a more professional-looking snowman body.
Turn the body right side out using a turning tool, blunt pencil, or chopstick to gently push out all rounded sections. Press lightly with an iron if needed to smooth wrinkles before stuffing.
Gradually fill the snowman with polyester fiberfill. Begin with small portions, gently distributing the stuffing evenly into the head, middle, and bottom sections. Continue adding filling until the snowman feels firm while still maintaining a soft handmade appearance. Close the opening with an invisible ladder stitch for a clean finish.
Adding Personality and Decorative Details
One of the best parts of making a Fabric Snowman Pattern is decorating your finished creation. This is where your imagination truly shines, allowing every snowman to develop its own unique personality and charm.
Create the face by sewing small black buttons or embroidering French knots for the eyes. A carrot-shaped nose can be cut from orange felt and hand stitched securely into place. Small stitched eyebrows or rosy fabric paint cheeks add extra expression.
Wrap a fabric scarf around the neck using flannel, fleece, cotton, or homespun fabric. Allow the ends to drape naturally, or gently fray the edges for a cozy winter appearance. Seasonal colors like red, green, navy, burgundy, or plaid are especially attractive.
Construct a simple fabric hat using felt or cotton fabric. A miniature top hat gives the snowman a traditional appearance, while a soft stocking cap creates a playful, cozy style. Attach the hat securely using hand stitching.
Sew decorative buttons down the front of the snowman’s body using contrasting thread. Vintage wooden buttons, rustic metal buttons, or colorful decorative buttons each create a different visual style while emphasizing the handmade look.
Complete your project by adding optional embellishments such as cinnamon sticks, pine sprigs, faux holly berries, miniature pinecones, ribbon bows, snowflake charms, embroidery, lace trim, or tiny fabric patches. These finishing touches transform a simple sewing project into a beautiful seasonal decoration.
Tips for Customizing and Displaying Your Fabric Snowman Pattern
The wonderful thing about a Fabric Snowman Pattern is that it can easily be adapted to match virtually any decorating style. Small changes in fabric, accessories, and proportions create completely different finished projects.
Experiment with different body sizes by enlarging or reducing your original pattern. Tiny snowmen make adorable ornaments, while oversized versions become eye-catching floor decorations or welcoming entryway displays.
Mix different fabric textures throughout the project. Combining linen, burlap, fleece, cotton, wool felt, and homespun fabrics creates visual interest while adding warmth and dimension to the finished decoration.
Personalize each snowman with embroidered initials, holiday messages, family names, or meaningful dates. These thoughtful details make wonderful keepsakes and memorable handmade gifts for loved ones.
Arrange several snowmen together in varying heights to create an attractive winter village display. Coordinating scarves, hats, and fabrics produce a cohesive seasonal centerpiece while allowing each snowman to maintain its own individual character.
Store your finished Fabric Snowman Pattern in a dry container after the holiday season. Wrapping decorations in acid-free tissue paper helps protect fabrics, minimizes dust accumulation, and ensures your handmade decorations remain beautiful for many winters to come.
FAQ About Fabric Snowman Pattern
What fabric works best for a Fabric Snowman Pattern?
Cotton, muslin, linen, canvas, and light upholstery fabrics are excellent choices because they are durable, easy to sew, and hold their shape well after stuffing.
Can beginners make a Fabric Snowman Pattern?
Absolutely. This project uses basic sewing techniques such as cutting, straight stitching, turning, stuffing, and simple hand sewing, making it ideal for beginners while still being enjoyable for experienced crafters.
What stuffing should I use?
Polyester fiberfill is the most common choice because it creates a soft yet supportive shape. Adding a small weighted pouch to the base improves stability for standing decorations.
Can I sew the project entirely by hand?
Yes. Although a sewing machine speeds up construction, the entire Fabric Snowman Pattern can easily be completed with careful hand stitching.
How can I personalize my snowman?
You can customize your snowman using different fabrics, scarves, hats, embroidered faces, decorative buttons, ribbons, lace, greenery, bells, miniature accessories, or seasonal embellishments that complement your holiday décor.
How long does this project usually take?
Most sewists can complete a basic Fabric Snowman Pattern in approximately two to four hours, depending on the level of detail and decorative elements added.
Can I sell finished snowmen made from my own pattern?
Yes, if you create your own original Fabric Snowman Pattern or use a commercially licensed pattern, handmade finished items are generally suitable for craft fairs, holiday markets, and small handmade businesses.
Conclusion
Creating a Fabric Snowman Pattern is a delightful sewing project that combines creativity, simple construction techniques, and endless opportunities for personalization. Throughout this guide, you learned how to prepare materials, cut your fabric accurately, sew the body, stuff it evenly, and add beautiful finishing details that bring your snowman to life. You also discovered practical customization ideas that allow every finished decoration to reflect your own personal style, whether you prefer rustic farmhouse décor, classic holiday elegance, or playful winter charm.