
Birthday Quilt Block 7 Pattern is a creative quilting design that celebrates joyful moments through beautiful patchwork and thoughtful fabric combinations. Whether you are making a quilt to commemorate a birthday, creating a personalized handmade gift, or simply expanding your collection of classic quilt blocks, the Birthday Quilt Block 7 Pattern offers a wonderful balance of precision, creativity, and timeless appeal. This versatile block can become part of a full-size quilt, a decorative wall hanging, a pillow cover, or even a festive table runner that adds warmth and charm to any celebration.
One of the reasons the Birthday Quilt Block 7 Pattern is so enjoyable to sew is its flexibility. The design works beautifully with bright birthday-inspired colors, elegant floral fabrics, playful novelty prints, or modern solids. Every quilter can interpret the pattern differently by selecting fabrics that reflect the recipient’s personality or match a special celebration theme. With careful color placement and accurate piecing, each completed block becomes a small work of art that contributes to a meaningful handmade quilt.
In this detailed tutorial, you will learn exactly how to create the Birthday Quilt Block 7 Pattern step by step. Every stage has been written using clear, beginner-friendly English while following quilting techniques commonly used in the United States. From preparing your fabric and cutting each piece to assembling the block, pressing the seams, arranging multiple blocks, quilting the finished project, and adding the final binding, this guide provides everything you need to recreate the project shown in the photo with clean, professional-looking results.
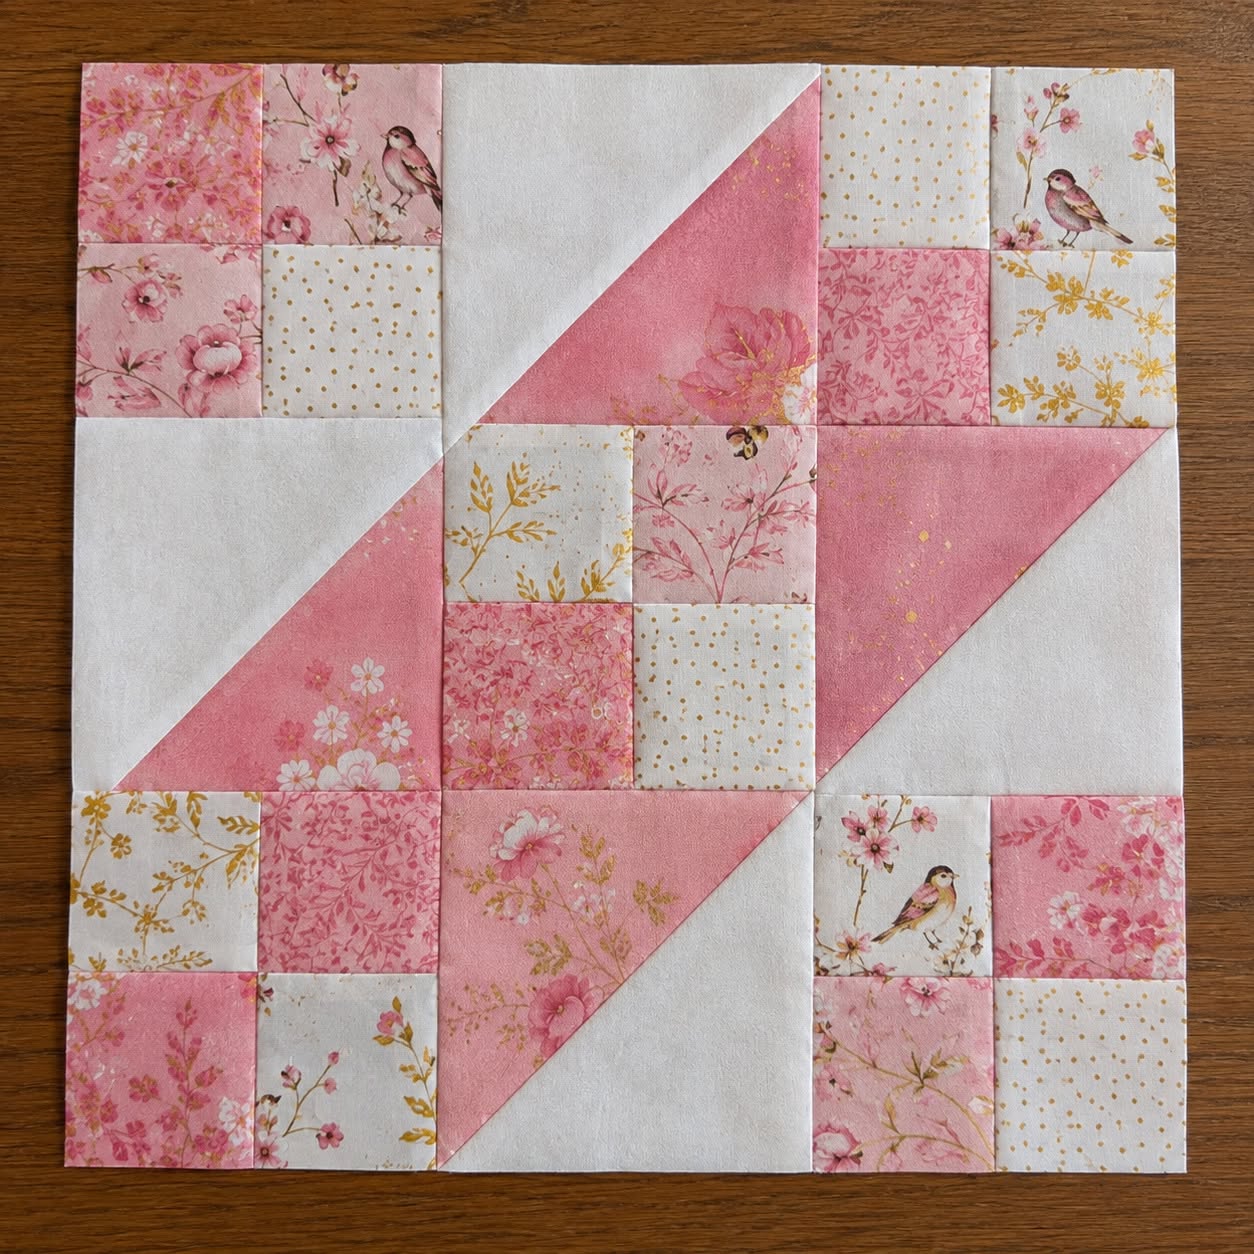
Prepare Your Materials and Organize the Birthday Quilt Block 7 Pattern
Before starting the Birthday Quilt Block 7 Pattern, gather all the quilting tools and supplies needed for a smooth sewing experience. You will need quilting cotton, rotary cutter, self-healing cutting mat, quilting ruler, sewing machine, coordinating thread, iron, pressing surface, pins or fabric clips, batting, backing fabric, and binding fabric.
Choose high-quality quilting cotton in colors that suit your project. Bright birthday colors such as pink, blue, yellow, green, purple, and red create a cheerful appearance, while softer pastel shades offer a delicate and elegant finish. Mixing solids with subtle prints adds visual depth without overwhelming the design.
Wash and press all fabrics before cutting. This important preparation step helps reduce future shrinkage, removes excess dye, and creates perfectly smooth fabric for accurate measuring and cutting.
Using your rotary cutter and quilting ruler, carefully cut every patchwork piece according to the dimensions required for the block. Precise cutting is essential because even small measurement differences may affect how the pieces fit together during assembly.
Lay all the cut pieces on a flat surface or design board before sewing. Arrange the shapes exactly as they will appear in the finished block so you can confirm fabric placement and make adjustments before stitching.
Keep similar pieces grouped together throughout the construction process. Organizing your fabrics helps prevent mistakes, saves time, and makes assembling multiple Birthday Quilt Block 7 Pattern blocks much easier if you plan to create an entire quilt.
Step-by-Step Guide to Sewing the Birthday Quilt Block 7 Pattern
Begin by sewing together the smallest patchwork units first. Pair matching fabric pieces with right sides together and sew using an accurate quarter-inch seam allowance. Press each seam immediately after stitching to maintain precise measurements.
Continue joining the small units into larger sections while carefully matching seam intersections. Taking time to align each corner results in crisp points and a beautifully balanced quilt block.
As each section is completed, compare it with your planned layout to ensure every fabric piece is facing the correct direction. Correcting orientation early prevents unnecessary seam ripping later in the project.
Join the completed sections together one step at a time until the full Birthday Quilt Block 7 Pattern is assembled. Pinning important intersections before sewing helps maintain alignment and creates a polished finished appearance.
After assembling the entire block, press it carefully from the back using a hot iron. Proper pressing flattens seam allowances and prepares the block for trimming if necessary.
Square the completed quilt block using a quilting ruler and rotary cutter. Consistent block dimensions are especially important if you plan to combine several Birthday Quilt Block 7 Pattern blocks into a larger quilt layout.
Helpful Quilting Tips for Professional Results
Maintaining a consistent quarter-inch seam allowance throughout the entire project is one of the most important techniques for successful quilting. Small inconsistencies can affect the overall size and alignment of the finished block.
Press your seams instead of sliding the iron across the fabric. Lifting and lowering the iron helps preserve accurate measurements while preventing unwanted stretching along the bias edges.
Choose fabrics with strong contrast between neighboring pieces. Clear contrast helps highlight the structure of the Birthday Quilt Block 7 Pattern and makes every design element stand out beautifully.
If you are making several blocks, chain piecing similar units together can improve efficiency while reducing thread waste. This popular quilting method also helps maintain a steady sewing rhythm.
Place completed blocks on a design wall before joining them together. Viewing the arrangement from a distance allows you to balance colors, prints, and values across the quilt before final assembly.
Take your time during every stage of construction. Careful measuring, accurate cutting, patient sewing, and frequent pressing all contribute to a quilt that looks clean, balanced, and professionally finished.
Finishing Your Quilt and Adding Creative Details
Once all the Birthday Quilt Block 7 Pattern blocks have been completed, arrange them into your desired quilt layout. Rotate blocks if necessary to create movement, symmetry, or additional secondary patterns throughout the quilt top.
Sew the quilt blocks together one row at a time while carefully matching seam intersections. Pinning each joining point before stitching improves alignment and produces a smooth, attractive quilt top.
Layer the completed quilt top with batting and backing fabric. Smooth every layer carefully before basting to eliminate wrinkles and prevent shifting during quilting.
Select quilting motifs that complement the overall design. Straight-line quilting provides a modern appearance, while loops, gentle curves, stars, balloons, hearts, or echo quilting can reinforce the celebratory birthday theme.
Trim the completed quilt after quilting to create straight, even edges. Prepare coordinating binding strips, sew them around the perimeter, and finish them using your preferred hand or machine binding technique.
After completing your Birthday Quilt Block 7 Pattern quilt, gently wash and press it if desired. The finished quilt will develop a soft texture while beautifully showcasing the precision of your patchwork and the thoughtful fabric combinations you selected.
Frequently Asked Questions
Is the Birthday Quilt Block 7 Pattern suitable for beginners?
Yes. The Birthday Quilt Block 7 Pattern is suitable for beginners who are comfortable with basic quilting techniques such as accurate cutting, straight stitching, pressing seams, and assembling patchwork blocks.
What fabrics work best for this pattern?
High-quality quilting cotton is the most popular choice because it is easy to cut, sew, press, and coordinate with many different prints and solid colors.
Can I personalize the block for birthdays?
Absolutely. You can customize the block using favorite colors, themed novelty fabrics, embroidered names, special dates, or meaningful color palettes that celebrate the recipient.
How many blocks do I need for a quilt?
The number depends on the finished quilt size. Baby quilts require fewer blocks, while throw, twin, queen, and king-size quilts naturally require larger layouts.
Should I prewash my fabric?
Many quilters prefer prewashing to reduce shrinkage and minimize color bleeding. Others choose not to prewash for slightly crisper piecing. Either approach works when applied consistently throughout the project.
What quilting designs complement this pattern?
Straight lines, gentle curves, loops, stars, balloons, hearts, meandering stitches, and echo quilting all work beautifully with the Birthday Quilt Block 7 Pattern.
Can I use fabric scraps?
Yes. This pattern works wonderfully as a scrap quilt project because smaller fabric pieces allow you to combine many different prints while creating a lively and colorful design.
Is this quilt appropriate as a handmade gift?
Definitely. A quilt made using the Birthday Quilt Block 7 Pattern becomes a meaningful keepsake that celebrates birthdays, milestones, family traditions, and special memories with a personal handmade touch.
Conclusion
The Birthday Quilt Block 7 Pattern is a beautiful quilting project that combines creativity, precision, and heartfelt craftsmanship into a timeless handmade gift. Throughout this tutorial, you learned how to prepare your materials, accurately cut every fabric piece, assemble the quilt block step by step, organize multiple blocks into an attractive layout, quilt the finished layers, and complete the project with durable binding and professional finishing techniques. Every stage contributes to creating a quilt that is both visually striking and built to last for years of enjoyment.
As your quilting skills continue to grow, the Birthday Quilt Block 7 Pattern offers endless opportunities for personalization through creative fabric choices, decorative quilting designs, and thoughtful color combinations. Every finished quilt becomes a unique reflection of the maker while celebrating meaningful occasions with warmth and beauty. If you found this tutorial helpful, please leave your honest opinion and share your suggestions for future quilting tutorials. Your feedback is always appreciated and helps inspire even more creative quilting projects for the entire sewing community.

