
Patchwork Horse Quilt Pattern is a creative quilting project that combines traditional patchwork techniques with the recognizable silhouette and personality of a horse. By arranging carefully selected fabric pieces into sections representing the head, body, legs, mane, tail, and surrounding background, you can transform simple geometric shapes into a beautiful equestrian-inspired quilt design. The finished block can become the focal point of a full quilt, wall hanging, pillow cover, table decoration, or handmade gift. From realistic browns and creams to colorful scraps and modern prints, the fabric possibilities make every Patchwork Horse Quilt wonderfully unique.
One of the most enjoyable aspects of a Patchwork Horse Quilt Pattern is selecting the fabrics that will give the horse its character. Traditional earthy shades can create a rustic country appearance, while bright colors and mixed prints can turn the same design into a playful contemporary quilt. The background is equally important because sufficient contrast allows the horse silhouette to remain clearly visible. A light background can beautifully highlight a darker horse, while deep navy, charcoal, or another dark background can make a light or colorful horse stand out dramatically. Small scraps can also be incorporated into individual sections, making this project an excellent opportunity to revisit favorite fabrics from previous quilts.
Creating a patchwork horse quilt block also develops valuable quilting skills. Accurate cutting, maintaining a consistent quarter-inch seam allowance, constructing smaller units, matching intersections, pressing seams, organizing a block layout, and finishing the quilt are all important parts of the process. Although a detailed horse may initially appear complicated, the project becomes much easier when you think of the animal as a collection of manageable geometric sections rather than one complex shape. This tutorial explains how to plan the design, prepare the fabrics, assemble the horse sections, complete the background, construct the quilt top, and finish your project with quilting and binding.
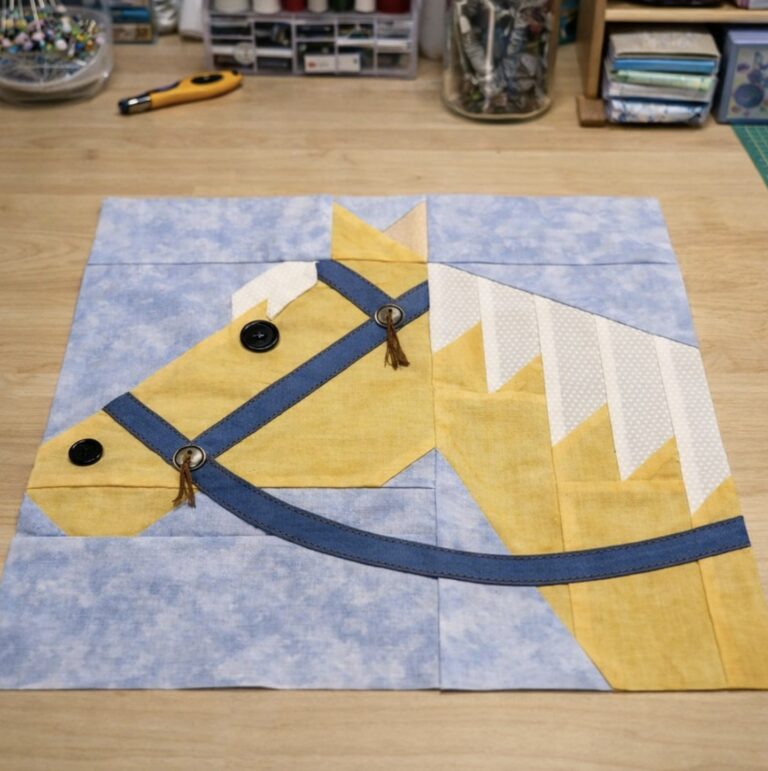
Materials and Fabric Preparation for the Patchwork Horse Quilt Pattern
Begin your Patchwork Horse Quilt Pattern by selecting quality quilting cotton. A stable cotton fabric is easy to cut accurately and maintains its shape while sewing. Using fabrics of similar weight throughout the block also helps the finished quilt lie flat.
Choose fabrics for the horse first. Browns, chestnut, tan, cream, black, gray, and white can create a traditional equestrian palette. You might use one main fabric for the body and slightly darker or lighter shades for the mane, tail, muzzle, and legs.
For a more artistic design, forget realistic horse colors and explore colorful patchwork. Florals, geometric prints, dots, small checks, and solids can be combined within the horse. Keeping a consistent color family helps separate the animal visually from the background.
Choose a background fabric with enough contrast. If the horse contains dark or highly saturated fabrics, a cream, white, pale blue, or other light background can work beautifully. For a pale horse, consider a darker background.
Gather a rotary cutter, self-healing cutting mat, acrylic rulers, sewing machine, coordinating thread, pins or clips, and an iron. A small quilting ruler is useful for checking individual units before they become part of the larger horse block.
Before cutting all your fabric, study the horse layout and divide it into sections. Depending on your version, the design can use squares, rectangles, half-square triangles, and other angled units. Labeling cut pieces by section—such as head, body, legs, mane, and background—will make assembly considerably easier.
How to Sew the Patchwork Horse Quilt Pattern Step by Step
Start with the smaller units required to create the horse quilt block. Half-square triangles are particularly useful for forming angled areas such as the ears, muzzle, neck, legs, or transitions between the horse and background.
To create a basic half-square triangle, place two squares right sides together and mark a diagonal guideline. Sew according to the method and dimensions required by your layout, cut the unit apart if appropriate, then press and trim it accurately before assembly.
Construct the horse’s head as a separate section whenever possible. Arrange the required rectangles, squares, and angled units on your work surface first. Check the orientation of the ears, face, and neck before sewing neighboring pieces together.
Next, assemble the main body. Larger rectangles or patchwork sections can represent the torso, while contrasting pieces can add variation and dimension. If using several prints, distribute them carefully so one fabric does not unintentionally dominate the entire Patchwork Horse.
Prepare the legs, mane, and tail according to your chosen layout. These narrower sections require accurate seam allowances because small discrepancies can become more noticeable when they are joined to larger pieces. Press each completed section before continuing.
Finally, arrange all finished horse sections with their corresponding background units. Compare the layout with your original plan and confirm that every piece faces the correct direction. Once satisfied, begin joining the sections systematically rather than attempting to sew the entire horse together at once.
Assembling the Horse Block and Creating the Quilt Top
Join the smaller sections into larger rows or rectangular units. Use a consistent quarter-inch seam allowance and check important intersections before sewing. Pins can be helpful where several seams need to meet precisely.
Press seams after every stage. Where possible, press neighboring seams in opposite directions so they can nest when the sections are joined. This technique often creates cleaner intersections and reduces shifting under the sewing machine.
As the sections come together, the Patchwork Horse Quilt Pattern will become increasingly recognizable. Periodically place the partially completed block on a flat surface and verify that the horse silhouette remains balanced and that no unit has accidentally been rotated.
After assembling the complete horse block, measure it horizontally, vertically, and diagonally. Check that it is square before trimming. Remove only the minimum amount required because excessive trimming could reduce seam allowances around important points.
A single horse block can become a mini quilt or wall hanging, but you can also repeat the design for a larger project. Try alternating horse colors or reversing the direction of selected blocks to create a herd-inspired quilt layout.
When creating a full horse quilt, arrange all completed blocks on a design wall or clean floor before joining them. Optional sashing can separate the horses and give each block additional visual space. Sew blocks into rows, press carefully, and then join the rows to finish the quilt top.
Quilting, Finishing, and Creative Horse Quilt Ideas
Once the quilt top is finished, prepare the quilt sandwich. Cut the batting and backing slightly larger than the top. Position the backing wrong side up, place the batting over it, and center the Patchwork Horse Quilt top with the right side facing upward.
Smooth all three layers carefully before basting. Begin near the center and work toward the edges to remove wrinkles. Secure the layers with your preferred quilting basting technique so they remain stable while stitching.
Straight-line quilting is an approachable choice for this pattern. Horizontal or diagonal lines can add texture without competing with the horse design. You can also quilt near major patchwork seams to emphasize the geometric construction.
For additional detail, consider quilting the horse and background differently. Gentle lines following the shape of the animal can reinforce its silhouette, while a denser background texture can visually bring the patchwork horse forward.
After quilting, trim away the excess batting and backing. Prepare your binding strips, join them into one continuous length, and attach the binding around the quilt perimeter. Take your time at the corners to create a clean, durable finish.
The design can also inspire smaller projects. One Patchwork Horse Quilt Block can become a decorative pillow, tote bag panel, wall hanging, or mini quilt. Changing the fabrics and scale allows the same basic concept to suit rustic, traditional, colorful, or modern décor.
FAQ About the Patchwork Horse Quilt Pattern
Is the Patchwork Horse Quilt Pattern suitable for beginners?
A confident beginner can make this project, especially if the horse is constructed from straightforward geometric units. Familiarity with accurate cutting and quarter-inch seams will make the process easier.
What fabric works best for a Patchwork Horse Quilt?
Quilting cotton is generally the most convenient choice because it is stable, easy to cut, and easy to press.
What colors should I use for the horse?
Brown, tan, cream, black, gray, and white create realistic horses, but there are no strict rules. Colorful prints can produce an equally beautiful artistic version.
Can I make a scrappy Patchwork Horse?
Yes. This project is ideal for using fabric scraps. Try selecting scraps from a coordinated color family so the horse remains clearly defined against the background.
What is a half-square triangle?
A half-square triangle, often abbreviated HST, is a square patchwork unit divided diagonally into two fabric triangles. These units are useful for creating angled portions of the horse.
How can I keep all the pieces organized?
Label the pieces according to their location in the design and arrange them on a flat surface before sewing. Taking a photograph of the complete layout can also provide a useful reference.
Why doesn’t my finished horse block lie flat?
Distortion can result from inaccurate cutting, inconsistent seam allowances, excessive stretching, or aggressive pressing. Sew accurately and press gently after each construction stage.
How do I keep the horse visible when using many prints?
Maintain strong value or color contrast between the horse fabrics and the background. Even a scrappy horse should visually separate from the surrounding pieces.
Can I add borders around the horse block?
Absolutely. Borders can frame the design and increase the finished project size. A simple border can be especially effective around a detailed horse block.
Can I add sashing between multiple horse blocks?
Yes. Quilt sashing gives each horse additional space and can help unify blocks made with different fabric combinations.
What quilting design works well with a horse quilt?
Straight lines, gentle curves, outline-inspired quilting, and simple free-motion textures can all complement the design. Avoid overly complicated quilting if you want the patchwork horse to remain the primary focus.
Can I make horses facing different directions?
Depending on the construction method, reversing the layout can create horses facing opposite directions. Pay careful attention to asymmetric pieces and directional fabrics when planning a mirrored block.
Can this pattern be used for a baby quilt?
The horse theme can work beautifully for a baby or children’s quilt. Select suitable washable materials and ensure that all construction and decorative details are securely sewn.
How can I personalize a Patchwork Horse Quilt?
Experiment with favorite colors, western-inspired prints, florals, scrap fabrics, borders, and different quilting designs. You can also create several horses with distinct color combinations.
Conclusion
The Patchwork Horse Quilt Pattern demonstrates how ordinary geometric fabric pieces can come together to create a recognizable and expressive quilt design. By breaking the horse into smaller sections and assembling them systematically, a seemingly complicated motif becomes a manageable patchwork project filled with creative possibilities.
Throughout this tutorial, you learned how to select quilting fabrics, organize the horse and background pieces, construct half-square triangles and other units, assemble the head and body sections, maintain a consistent quarter-inch seam allowance, press and square the block, create a complete quilt top, prepare the quilt sandwich, quilt the layers, and finish the project with binding. Organization and accurate piecing are especially valuable because they help the horse silhouette remain crisp and recognizable.

