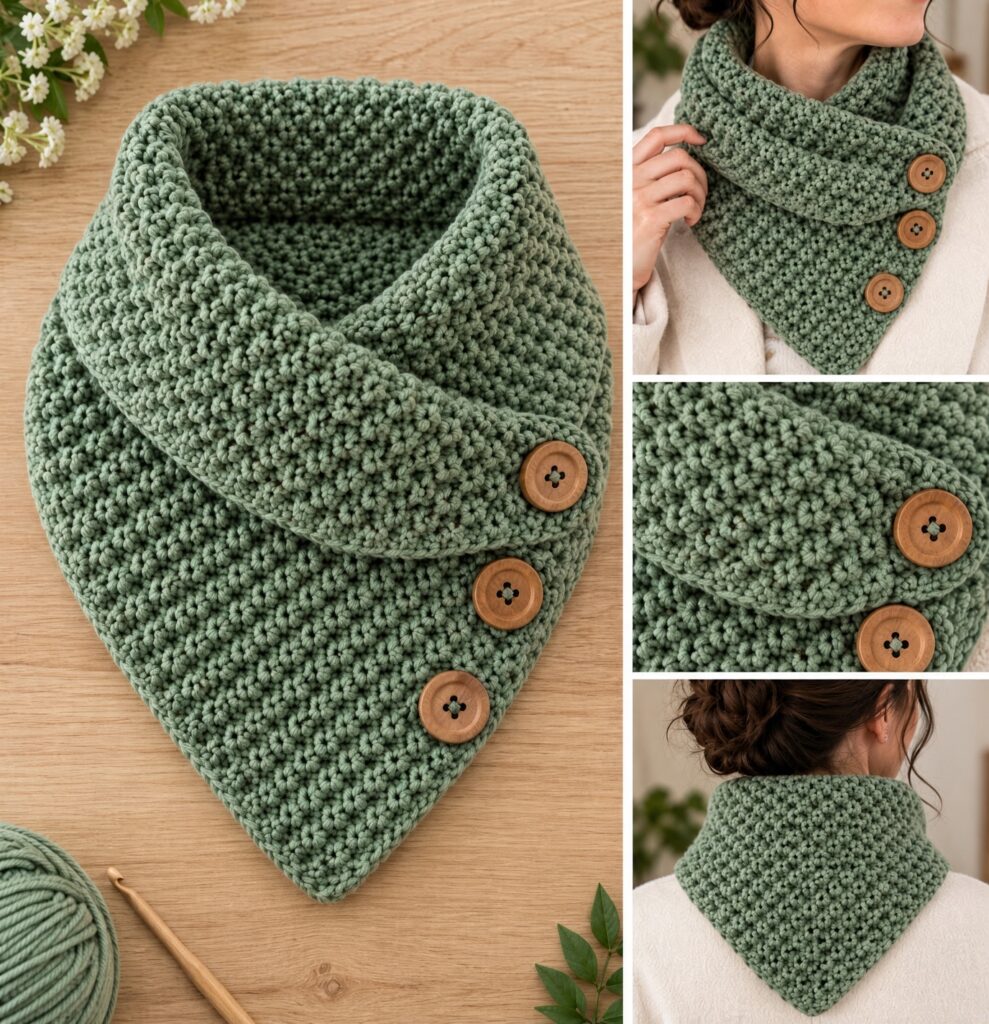
The Crochet Scarf Pattern is one of the most enjoyable and practical projects for anyone who loves working with yarn. A handmade scarf combines comfort, creativity, and personal style, making it a wonderful accessory for colder days and a thoughtful gift for someone special. Whether you are just beginning your crochet journey or already have experience with different stitches, creating a crochet scarf offers an opportunity to practice essential techniques while producing something beautiful and useful.
One of the greatest advantages of following a Crochet Scarf Pattern is the flexibility it provides. Unlike projects that require precise shaping or complicated measurements, scarves can easily be adjusted in length, width, and texture. You can make a lightweight scarf for mild weather, a thick winter accessory for extra warmth, or a decorative piece that adds personality to everyday outfits.
Learning how to make an easy crochet scarf is also an excellent way to improve your confidence with fundamental crochet techniques. This project introduces important skills such as creating a foundation chain, maintaining consistent tension, working in rows, counting stitches, and finishing yarn ends neatly. These techniques are useful for many other crochet projects, including blankets, shawls, and decorative accessories. The scarf explained in this tutorial uses a simple combination of single crochet and double crochet stitches to create a soft, textured fabric suitable for beginners.
Essential Materials and Basic Stitches for a Crochet Scarf Pattern
Before beginning your Crochet Scarf Pattern, selecting suitable materials is an important first step. Medium-weight yarn, commonly known as worsted-weight yarn, is an excellent choice for beginners because it is easy to handle and produces clearly defined stitches. Acrylic, wool, and blended fibers are all suitable options, depending on the desired warmth, texture, and washing requirements. Choose yarn that feels comfortable against your neck and does not irritate sensitive skin.
For this easy crochet scarf tutorial, you will need approximately 300–450 yards of worsted-weight yarn, a 5.5 mm crochet hook, scissors, a yarn needle, and a measuring tape. The exact amount of yarn depends on the scarf dimensions, stitch tension, and yarn thickness. A stitch marker can also be helpful for identifying the first and last stitches of each row, especially when learning to maintain straight edges.
Understanding the basic crochet stitches will make the project easier. The chain stitch (ch) creates the starting foundation, while the single crochet (sc) produces a dense and structured fabric. The double crochet (dc) is taller and creates a softer, more flexible texture. Combining these stitches allows you to produce an attractive scarf without relying on complicated techniques or advanced stitch patterns.
This tutorial uses US crochet terminology, which differs from British crochet terminology. In American instructions, a single crochet is called a double crochet in the United Kingdom, while an American double crochet corresponds to a British treble crochet. Understanding these differences helps prevent confusion when following crochet instructions and ensures that the finished scarf matches the intended design.
Choosing the correct crochet hook size is another important consideration. A 5.5 mm hook generally works well with many worsted-weight yarns, but individual tension can affect the finished fabric. If your stitches feel too tight, try a slightly larger hook. If the fabric appears excessively loose, consider using a smaller hook. The goal is to create a scarf that drapes naturally without becoming stiff.
Before starting the full project, make a small crochet gauge swatch using the selected yarn and stitch combination. This allows you to evaluate the texture, width, and flexibility of the fabric. Although scarves are more forgiving than fitted garments, checking your gauge can help estimate yarn requirements and ensure that your finished accessory has the appearance and dimensions you prefer.
Step-by-Step Instructions for Making an Easy Crochet Scarf
Begin your Crochet Scarf Pattern by creating a foundation chain of 31 stitches using your chosen yarn and crochet hook. This starting chain will produce a scarf approximately 7–8 inches wide, depending on your yarn and tension. If you prefer a wider scarf, add more chains in multiples of two. Make sure the foundation chain remains relaxed and does not become tighter than the following rows.
For Row 1, work one single crochet into the second chain from the hook. Continue working one single crochet into each remaining chain across the foundation. You should have 30 single crochet stitches at the end of the row. Chain one and turn your work. This first row creates a stable foundation and helps establish straight edges for the beginner crochet scarf pattern.
For Row 2, work one single crochet into the first stitch, followed by one double crochet into the next stitch. Continue alternating single crochet and double crochet stitches across the entire row. Since the row contains 30 stitches, you will finish with a double crochet. Chain one and turn. This alternating combination creates a gentle textured surface that looks attractive on both sides of the scarf.
For Row 3, repeat the same sequence by working one single crochet into the first stitch and one double crochet into the next. Continue alternating across the row, working into the tops of the stitches from the previous row. Chain one and turn. Repeat this process for every subsequent row, maintaining 30 stitches throughout the crochet scarf tutorial.
Continue crocheting until the scarf reaches your preferred length. A common adult scarf measures approximately 60–70 inches long, although you can adjust this according to your height and personal preference. For a shorter accessory, stop around 55 inches. If you prefer a longer scarf that can wrap comfortably around your neck, continue until it measures approximately 72 inches.
Once your handmade crochet scarf reaches the desired length, complete the final row and fasten off, leaving a yarn tail of approximately 6 inches. Thread the tail through a yarn needle and weave it securely through several stitches on the wrong side of the fabric. Repeat this process for any additional yarn ends. Gently smooth the scarf and check that both edges are even before adding optional decorative details.
Creative Stitch Variations and Helpful Tips for a Beautiful Crochet Scarf
One of the most enjoyable aspects of the Crochet Scarf Pattern is the ability to experiment with different colors and textures. Neutral shades such as cream, beige, gray, and brown create timeless accessories that coordinate with many outfits. Bright colors like mustard yellow, emerald green, burgundy, and royal blue can transform a simple scarf into a statement piece. Choosing colors that complement your wardrobe makes the finished project even more practical.
If you prefer a more decorative appearance, consider using variegated yarn that changes colors naturally as you crochet. This type of yarn creates interesting patterns without requiring frequent color changes. You can also create a striped crochet scarf by switching yarn colors every few rows. For a balanced design, repeat the same color sequence throughout the project or alternate between two complementary shades.
Different stitch combinations can completely change the appearance of your easy crochet scarf. The moss stitch creates a soft woven texture, while the half double crochet stitch produces a slightly denser fabric. The shell stitch introduces decorative curves, and the ribbed crochet technique creates an elastic appearance similar to knitted accessories. Beginners can start with simple stitches and explore more detailed patterns as their confidence grows.
Maintaining consistent tension is essential for creating a professional-looking crochet scarf pattern for beginners. If your stitches become tighter or looser during the project, the scarf may develop uneven edges or changes in width. Try to hold the yarn comfortably and avoid pulling excessively after completing each stitch. Taking short breaks can also help maintain relaxed hand movements during longer crochet sessions.
Another helpful technique involves counting stitches regularly. Accidentally adding or skipping stitches can cause the scarf edges to widen or narrow unexpectedly. Place a stitch marker in the first and last stitches of each row if you find it difficult to identify them. Checking the stitch count every few rows helps prevent mistakes and reduces the need to undo large sections of work.
For a personalized finish, consider adding crochet scarf fringe to both ends. Cut several strands of yarn to equal lengths, fold them in half, and attach them through the edge stitches using a crochet hook. Trim the fringe evenly for a neat appearance. You can also add a simple single crochet border around the scarf to create a clean edge and highlight the overall design.
Finishing Techniques, Styling Ideas, and Caring for Your Crochet Scarf
After completing your Crochet Scarf Pattern, inspect the entire accessory carefully. Look for loose yarn ends, uneven stitches, and any areas that may require adjustment. A well-finished scarf should have consistent width, comfortable flexibility, and neatly secured ends. Small finishing details can make a significant difference in the overall appearance of your handmade project.
Blocking is a useful technique for improving the shape and drape of your handmade crochet scarf. Depending on the yarn fiber, you may gently dampen the scarf and lay it flat on a clean surface. Arrange the edges evenly and allow the fabric to dry completely. Always follow the yarn manufacturer’s care instructions, as certain fibers require special handling or should not be exposed to excessive heat.
Styling your crochet winter scarf can be as creative as making it. A long scarf can be wrapped around the neck once or twice for additional warmth, while a shorter scarf can be draped loosely over a sweater or jacket. Neutral-colored scarves work beautifully with everyday clothing, while brightly colored designs can add contrast to simple outfits. The soft texture of crochet makes these accessories suitable for both casual and more polished looks.
If you are making a crochet scarf as a gift, consider the recipient’s favorite colors, preferred clothing style, and local climate. A thick wool scarf may be ideal for cold winters, while a lightweight cotton blend is better suited to milder temperatures. Adding a handmade gift tag with simple washing instructions can make the present feel even more thoughtful and personal.
Proper washing helps maintain the softness and shape of your crochet scarf. Many acrylic yarns are machine washable, while wool and delicate blends may require handwashing. Use mild detergent and avoid excessive twisting or stretching. When possible, dry the scarf flat rather than hanging it, since the weight of wet yarn can cause the fabric to stretch.
Storing your handmade crochet accessories correctly can extend their lifespan. Fold the scarf loosely and place it in a clean, dry drawer or storage container. Avoid leaving it exposed to direct sunlight for extended periods, as some yarn colors may fade. With appropriate care, your handmade scarf can remain comfortable and beautiful for many seasons, making it a lasting reminder of your creativity and craftsmanship.
Conclusion
The Crochet Scarf Pattern is a wonderful project for anyone who enjoys creating beautiful, practical accessories with yarn. Its simple construction, flexible dimensions, and endless customization possibilities make it suitable for beginners and experienced crocheters alike.
Throughout this guide, you learned how to choose the right materials, understand essential crochet stitches, create a foundation chain, work textured rows, adjust the scarf dimensions, and finish the project neatly. You also discovered creative ways to personalize your handmade crochet scarf through color combinations, stitch variations, decorative borders, and fringe.