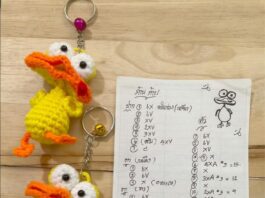
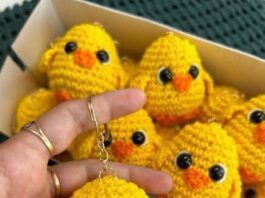
Amigurumi dolls are adorable crochet or knitted creations that delight people of all ages.
Among the countless amigurumi options, “Grandma’s Doll” is one of the favorites, thanks to its nostalgic charm and the simplicity of its making.
In this article, we’ll explore the fascinating world of amigurumi and offer a free pattern so you can create your own “Grandma Doll” amigurumi, full of personality and warmth.

The Charm of Amigurumi
Amigurumi is a Japanese crochet or knitting technique that focuses on creating small creatures and cute objects, usually shaped like dolls or animals.
The word “amigurumi” is a combination of the Japanese words “ami” (meaning to knit or crochet) and “nuigurumi” (meaning stuffed doll).
These adorable creations have gained popularity around the world due to their enchanting appearance and almost unlimited customization possibilities.
What makes amigurumi so special is the ability to bring unique and captivating characters to life through an artisanal process
. Each piece is unique, and artisans have the freedom to choose colors, textures and details that express their creativity. It’s a wonderful way to turn yarn into art and share handmade gifts with loved ones.
Necessary materials
Before we dive into the free “Grandma’s Doll” amigurumi pattern, it’s important to gather all the necessary materials. Here’s what you’ll need:
Crochet Yarn: Choose crochet yarn in colors that match the “Grandma’s Doll” you want to create. You will need colors for the body, clothes, hair, eyes and mouth.
Crochet Hook: Use a crochet hook suitable for the size of the yarn you chose.
Stuffing: You will need stuffing to give your doll shape and volume. Cotton batting is a common choice.
Safety Eyes: For the doll’s eyes, you can use plastic safety eyes or embroider the eyes with black thread.
Tapestry Needle: A tapestry needle is used to sew together parts of the doll and hide loose ends of thread.
Scissors: Have scissors on hand to cut yarn and thread as needed.
Now that you have all the necessary materials, let’s dive into the free “Grandma’s Doll” amigurumi pattern.

Free “Grandma’s Doll” Amigurumi Pattern
This “Grandma’s Doll” amigurumi pattern is suitable for crafters of all skill levels. If you are a beginner, it may be helpful to review some basic crochet stitches before you begin. Now, let’s go to the pattern:
Head
Part 1: Head Body
Magic Ring (AM): Start with a magic ring.
Round 1 (R1): Make 6 double crochets in the magic ring. (6 points)
Round 2 (R2): Increase each single crochet (2 stitches in each stitch). (12 points)
Round 3 (R3): 1 single crochet, 1 increase (repeat 6 times). (18 points)
Rounds 4 to 8 (R4-R8): Work 18 single crochets in each round. (18 points)
Round 9 (R9): 1 single crochet, 1 decrease (repeat 6 times). (12 points)
Stuff the head: Fill the head with stuffing until firm, but don’t overdo it.
Round 10 (R10): Decrease each single crochet (decrease 6 times). (6 points)
Finishing: Cut the thread, leaving a long end for sewing. Close the top of the head and sew to ensure the filling doesn’t come out.
Part 2: Doll’s Face
Eyes: Sew safety eyes or embroider eyes with black thread to the front of the head. Make sure you position your eyes the appropriate distance apart.
Mouth: Use red or pink thread to embroider a small smiling mouth on the front of the head.
Body and Legs
Part 3: Doll Body
Head to Body: Join the head to the body, making sure the transition is smooth. Sew around the head opening to securely attach it to the body.
Dress: Choose a color for the doll’s dress and start from the top of the body. Make a chain of 30 stitches and close in a circle. Work in circular rows with single crochets until the dress is the desired length.
Part 4: Legs
Legs (make 2): Make 6 double crochets in a magic ring. (6 points)
Rounds 2 to 7 (R2-R7): Make 6 single crochets in each round. (6 points)
Finishing: Cut the thread, leaving a long end for sewing. Stuff the legs with stuffing until they are firm. Sew the legs to the bottom of the body.

Arms and Hair
Part 5: Arms
Arms (make 2): Make 5 single crochets into a magic ring. (5 points)
Rounds 2 to 4 (R2-R4): Make 5 single crochets in each round. (5 points)
Finishing: Cut the thread, leaving a long end for sewing. Stuff the arms with stuffing until they are firm. Sew the arms to the sides of the body.
Join our VIP list and receive exclusive free patterns. You’ll have daily access to the best designs, delivered straight to your device. Don’t miss this chance to get inspired and improve your projects with new and amazing patterns!
Part 6: Hair
Hair: Choose a color for the doll’s hair and create long crochet strands that resemble the hair. Sew the threads to the doll’s head.
Now that you have completed all the parts of your “Grandma Doll” amigurumi, simply assemble it by sewing the pieces together as described.
Remember to use the tapestry needle and corresponding thread to ensure everything is attached well and securely.
Personalization and Creativity
One of the best things about amigurumi is the opportunity to personalize your creation.
You can choose different colors, add accessories like hats or bags, or even create a unique story and personality for your “Grandma Doll”. Let your imagination run wild and create something truly special.
Creating your own “Grandma Doll” amigurumi is a charming way to delve into the world of amigurumi and crochet.
This free pattern provides a wonderful opportunity for crafters of all skill levels to create a doll full of personality and warmth.

As you work on the different parts of the doll and assemble it, you will see how the simple act of creating something with your own hands can bring joy and satisfaction.
Gift your “Grandma Doll” to someone special or keep it as a reminder of your craftsmanship.


