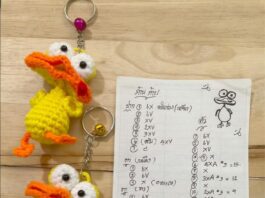
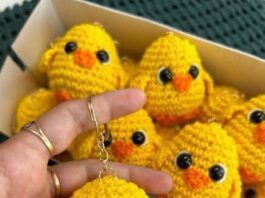
If you’re looking to add a touch of ocean cuteness to your keyring or bag, learning how to crochet a Baby Sea Turtle is an adorable and rewarding project. This lovely Amigurumi pattern creates a tiny turtle that’s perfect for beginners and makes a heartfelt gift for friends, loved ones, or you!
Crafting this Amigurumi turtle keychain combines simple stitches with fun shaping, and you only need a few small yarn scraps and basic supplies. In just an hour or two, you’ll have a charming, plush-themed accessory that brings smiles and compliments wherever it goes.
In this tutorial, we’ll walk you through every stage—from materials and yarn cuts to step-by-step rounds, keychain assembly, and final styling tips. Your journey to crochet a mini aquatic pal starts here—let’s get hooking!

🧶 Materials & Yarn Cuts for Your Baby Sea Turtle
Before crocheting the Amigurumi turtle, prepare your materials and pre-cut yarn lengths. This makes your crafting process smoother and more efficient.
-
Yarn Colors
-
Use sport or DK-weight cotton or acrylic yarn.
-
Shell color: Sea‑green (approx. 10g / 12 m).
-
Body color: Light green or sandy beige (approx. 8g / 10 m).
-
Optional eye accent (white/black): tiny scraps 1–2 m each.
-
-
Crochet Hook
-
Recommended: 3.0 mm (C/2).
-
Adjust to 2.75 mm for tighter stitches.
-
-
Keychain Hardware
-
One split keyring or lobster clasp.
-
A 10 cm yarn loop to attach.
-
-
Toy‑Making Tools
-
Five‑piece stitch marker set.
-
Tapestry needle.
-
Small polyester fiberfill.
-
Optional: plastic safety eyes (4 mm) or embroidery thread.
-
-
Pre‑Cut Yarn Pieces
-
Shell: 12 m sea‑green.
-
Head/legs: 10 m light green.
-
Underside & tail: 5 m beige.
-
Sparkles: Scrap pieces for eyes or spots.
-
-
Finished Size
-
Completed turtle: ~1.5″ (4 cm) long without keyring.
-
Keychain length with clasp: ~3.5″ (9 cm).
-
H2: Crocheting the Turtle Shell & Underside
The shell forms the bulk of your Amigurumi pattern. Start by creating two halves, then assemble them neatly.
-
Shell Top
-
With sea‑green yarn: magic ring, 6 sc. (Round 1)
-
Round 2: 2 sc in each st. (12)
-
Round 3: 1 sc, inc around. (18)
-
Round 4: 2 sc, inc around. (24)
-
Round 5: 3 sc, inc around. (30)
-
Fasten off, but leave a long tail for joining later.
-
-
Shell Underside (Belly)
-
Using beige: magic ring, 6 sc.
-
Round 2: inc in each st (12)
-
Round 3–4: 1 sc in each st (12)
-
Fasten off, again leaving a tail.
-
-
Join Shell Halves
-
With right sides facing outward, sew top to underside edge using whip stitch.
-
Leave a 2 cm opening before completely closed.
-
-
Stuff Inside
-
Gently fill the shell with fiberfill.
-
Stuff until it feels plush but still soft.
-
-
Finish Sewing
-
Close the remaining opening and weave in tail securely.
-
-
Optional Shell Pattern
-
Embroider lines or spots with darker green for a patterned shell.
-
H2: Head, Flippers, and Tail – Shaping Your Turtle
Now you’ll add personality to your turtle through its head, flippers, and tail. These are simple small pieces, but bring the plush to life.
-
Head
-
With light green: magic ring, 6 sc. (R1)
-
R2: inc in all stitches (12)
-
R3–4: 1 sc around (12)
-
Stuff lightly, sew closing, and leave a tail for attachment.
-
-
Front Flippers (make 2)
-
Magic ring, 6 sc, fasten off with tail.
-
Flatten and attach to the sides near front of shell.
-
-
Back Flippers (make 2)
-
Magic ring, 6 sc, increase evenly to 8 sc.
-
Flatten and sew to rear sides.
-
-
Tail
-
With beige or green: chain 4, sc back along the chain.
-
Fasten off. Attach centered at rear bottom.
-
-
Finish Head Assembly
-
Sew head to front top of shell.
-
Orient slightly forward—like turtle peeking out.
-
-
Weave Ends
-
Tidy all yarn ends inside shell body for a clean look.
-
H2: Detailing, Keychain Setup & Final Tips
Your turtle is almost complete—let’s add the eyes, attach the keychain loop, and finalize details.
-
Eyes
-
Use 4 mm plastic safety eyes inserted at sides of head, about 3 stitches back.
-
OR embroider eyes using black and white thread for safe toddler toy.
-
-
Mouth Line
-
Lightly stitch a small curve under eyes using single strand black embroidery.
-
-
Surface Spots (optional)
-
Use contrasting yarn to stitch tiny spots on shell surface for added charm.
-
-
Keychain Loop
-
Cut 10 cm of yarn or a matching cord.
-
Securely stitch through the top shell center, forming a loop.
-
Attach ring or clasp.
-
-
Tidy Up
-
Double-check all sewn seams are secure—especially the loop attachment.
-
Trim stray fibers for a smooth finish.
-
-
Quality Control
-
Give the turtle a gentle tug and squish—ensuring stuffing stays intact and the loop holds tight.
-
H2: Styling, Gifting, and Pattern Variations
You’ve made an adorable Amigurumi turtle keychain—here’s how to present, use, and customize it!
-
Color Options
-
Try pastel greens, baby blues, or beige for soft neutral turtles.
-
Use variegated yarn for a speckled, sea-like effect.
-
-
Gifts & Presentation
-
Pair with a mini beach tote, seashells, or ocean‑themed card.
-
Package in clear box with cotton nest and attach a tag: “Handmade with love.”
-
-
Pattern Variants
-
Make a family: larger adult turtle, smaller baby turtle keychains.
-
Stitch in tiny detail differences (e.g., zig-zag shell).
-
-
Selling Tips
-
Use photos on backpacks, keys, backpack zippers.
-
Keywords: “crochet sea turtle,” “Amigurumi turtle keychain,” “gift for beach lovers.”
-
-
Care Advice
-
Spot clean with damp cloth and mild soap.
-
Avoid submerging in water to preserve shape and fasteners.
-
-
Skill Growth
-
After this turtle, try adding hexagonal turtle shells or textured backs.
-
Experiment with other baby sea creatures—starfish, whales, seahorses!
-
🎉 Final Thoughts
You’ve just completed a darling How to Crochet Baby Sea Turtle using a beginner-friendly Amigurumi pattern. It’s a compact project packed with personality—perfect for keychains, bag charms, or gifts. In just two steps and four parts, you’ve created something ocean-inspired and delightful.
Remember: sales, gifting, or enjoying your new plush companion, this turtle carries your creativity and handmade warmth. Keep exploring other sea life amigurumi—sky is your ocean!
Happy crocheting—and let your turtle bring seaside joy wherever it travels! 🐢


