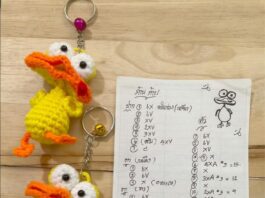
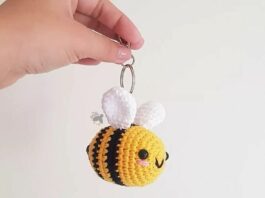
If you’re looking for a fun and adorable project, this guide on how to crochet Chibi Chick amigurumi easy is the perfect choice. Whether you’re a seasoned crocheter or a beginner, creating this tiny chick will bring joy to your crafting sessions and make a delightful handmade gift for spring, Easter, or any time of year. This small but sweet amigurumi project uses minimal yarn and stitches, making it both beginner-friendly and fast to complete.
In this tutorial, we’ll walk you through everything you need to create a cute Chibi Chick from start to finish. We’ll include all the materials you’ll need, essential stitch instructions, stuffing tips, and detailed step-by-step directions. By the end, you’ll have a lovable little chick to add to your amigurumi collection or give as a gift.
This amigurumi pattern is made with simple shapes that are sewn together to create a charming character. You’ll make a round head and body, small wings, feet, and a beak. With the right yarn colors and a bit of embroidery, this chick will come to life with personality. Let’s dive into the process and learn how to make your very own Chibi Chick amigurumi!

Materials, Yarn, and Crochet Tools
Before starting your Chibi Chick amigurumi pattern, gather all your materials. Having everything ready ensures a smooth, enjoyable crocheting experience. This section covers yarn choices, hook sizes, and stuffing recommendations.
Yarn Selection
Use worsted weight (category 4) or DK (category 3) yarn for the body and details. For the chick’s body, choose soft yellow yarn. Use orange or light brown for the beak and feet, and black yarn or safety eyes for the eyes. Cotton yarn gives a firm structure, while acrylic yarn creates a soft finish.
Recommended Crochet Hook
For this amigurumi pattern, use a 2.5 mm to 3.5 mm crochet hook. The smaller hook size helps create tight stitches that prevent stuffing from showing through the fabric. Be consistent with tension to ensure your chick looks symmetrical.
Other Supplies You’ll Need
-
Fiberfill stuffing
-
Yarn needle (for sewing parts)
-
Stitch marker (helpful for working in rounds)
-
Scissors
-
Safety eyes (6 mm or 8 mm) or black yarn for embroidered eyes
-
Optional: blush or pink thread for cheeks
Approximate Yarn Amounts
-
Yellow yarn: 25–30g
-
Orange yarn: 5g
-
Black yarn: small amount for eyes (if not using safety eyes)
-
Pink yarn or thread for blush (optional)
Cut and Prep (For Felt or Fabric Details)
While this is primarily a yarn-based project, if you’d like to embellish with felt (like tiny wings or accessories), cut two small wing shapes (~1″ wide) from matching felt. However, this is optional and not needed for the basic amigurumi structure.
Crochet Chibi Chick Body and Head
The head and body of your Chibi Chick amigurumi are worked in one continuous piece, shaped like a large sphere. Working in a spiral, you’ll increase, maintain, and decrease stitches to form a rounded shape.
Start with a Magic Ring
Make a magic ring and crochet 6 single crochet (sc) into the ring. Pull tight to close. This creates the base of the head. Always use a stitch marker to keep track of the start of each round, especially when working in a continuous spiral.
Increase for Head and Body
For the next few rounds, increase evenly. Typically, you’ll:
-
Round 2: 2 sc in each stitch (12)
-
Round 3: (1 sc, inc) repeat around (18)
-
Round 4: (2 sc, inc) repeat (24)
Continue increasing until you reach about 42 stitches (or a size you like). This forms the head and upper body.
Maintain the Round Shape
Work several rounds even (e.g., Rounds 10–17: sc in each stitch around) to build height. This is the main body section of your amigurumi pattern. Ensure your tension remains tight and even throughout.
Add Eyes and Stuffing
Insert safety eyes between rounds 9 and 10, spacing them about 7 stitches apart. If using yarn for the eyes, embroider small Xs or circles. Once the body is about 80% complete, begin stuffing with fiberfill. Add stuffing firmly but don’t overpack.
Shape the Bottom
Begin decreasing:
-
Round 18: (5 sc, dec) repeat (36)
-
Round 19: (4 sc, dec) repeat (30)
-
Continue until you reach 6 sc. Fasten off, leaving a long tail.
Use the yarn needle to weave the tail through remaining stitches and pull tight to close. Weave in the end securely.
Optional Tip
To give the chick a slightly flat base so it stands upright, gently press the bottom after stuffing and sew a small felt circle underneath.
Making the Wings, Beak, and Feet
Now that the body is done, it’s time to crochet the chick’s charming details. These small parts are what give your amigurumi character its signature cuteness.
Crochet the Wings (Make 2)
-
Round 1: Magic ring with 6 sc
-
Round 2: (1 sc, inc) repeat (9)
-
Rounds 3–4: sc in each stitch around (9)
Fasten off, leaving a long tail. Flatten the wing without stuffing it. Sew one wing to each side of the chick’s body.
Crochet the Beak
Use orange yarn:
-
Round 1: Magic ring with 4 sc
-
Round 2: (1 sc, inc) repeat (6)
-
Round 3: sc in each stitch (6)
Fasten off, leaving a tail for sewing. Lightly stuff if desired, or flatten before attaching to the center below the eyes.
Crochet the Feet (Make 2)
Use orange yarn:
-
Chain 4, turn
-
sc in 2nd ch from hook and next 2 (3 sc)
-
Fasten off and leave a tail.
Sew both feet flat against the bottom of the chick, close to the edge, angled slightly outward for a cute stance.
Add Blush or Cheeks
Using pink yarn or embroidery thread, add tiny stitches below each eye to create a blushing cheek. You can also use soft pink blush and a cotton swab to add color.
Secure All Parts
Be sure to double knot and securely weave in the ends of every sewn-on piece. This ensures durability—especially important if the chick is a gift or toy.
Customize Your Chick
Want your chick to wear a bow tie, hat, or tiny backpack? Add accessories with yarn or felt! Get creative with your amigurumi pattern and make each chick unique.
Final Assembly, Finishing Touches, and Gift Ideas
Once all parts are complete and attached, it’s time to bring your amigurumi chick to life. Final finishing touches make all the difference in the personality of your crochet creation.
Double Check Assembly
Inspect all stitched parts to ensure they are aligned. Adjust wing placement if they seem uneven. Make sure feet help balance the chick so it can sit or stand.
Embroider Details
Use black thread to embroider eyelashes or closed smiling eyes. A little embroidery goes a long way in enhancing your amigurumi pattern and giving it expressive charm.
Secure the Stuffing
Give your chick a gentle squeeze to test firmness. If it feels too soft, add a little more stuffing through a hidden stitch before closing completely.
Final Shaping
Roll the body between your palms to even out the shape. Lightly steam with an iron or handheld steamer (do not press) to smooth yarn fuzz if necessary.
Creative Display Ideas
Display your Chibi Chick with seasonal decorations like Easter eggs, grass, or flowers. It also makes a great desk companion, keychain (if you attach a ring), or small plush toy.
Gift Ideas
Package your amigurumi chick in a mini gift box or basket. Add a hand-written tag with a fun message like “You’re egg-cellent!” It’s a perfect gift for friends, kids, or even baby showers.
Conclusion
Learning how to crochet Chibi Chick amigurumi easy is a joyful and rewarding experience. This compact amigurumi pattern offers the perfect balance of simplicity and cuteness, making it ideal for crocheters of all skill levels. With a few basic stitches, a little yarn, and a touch of imagination, you can bring this tiny chick to life in just an afternoon.
Not only does this amigurumi project help grow your crochet skills, but it also results in a delightful handmade creation that spreads happiness wherever it goes. You can personalize it with colors and accessories to match any occasion or season.
So grab your hook, pick your favorite yellow yarn, and let’s crochet a Chibi Chick that’s sure to warm hearts. Whether for Easter, birthdays, or a cheerful decoration, this project will always deliver a dose of handmade charm. Happy crocheting!


