If you’re looking to create something fun, quirky, and perfect for any time of year (especially Halloween), then a spider in amigurumi pattern is the ideal crochet project. This charming eight-legged creature may look spooky, but making it is a delightful experience for both beginner and experienced crocheters. Using just a few materials, some basic stitches, and your creativity, you can bring a cute crochet spider to life.
The crochet spider pattern offers endless customization options. You can create your spider in classic black, go colorful and playful, or even give it personality with embroidered eyes or tiny accessories. This versatility is part of what makes crochet patterns so popular among crafters worldwide. Whether you want to gift it, use it as a decoration, or simply enjoy the process, this pattern is for you.
Before we jump into the step-by-step instructions on how to make your own spider in amigurumi, let’s look at the materials you’ll need, the importance of choosing the right yarn, and how to plan your work so it flows smoothly. Getting organized from the start helps avoid mistakes and keeps your project enjoyable.
Materials and Preparations
To get started on your crochet spider pattern, you will need some standard crochet supplies. The good news is, most of these materials are commonly found in a crafter’s stash. Here are the basics:
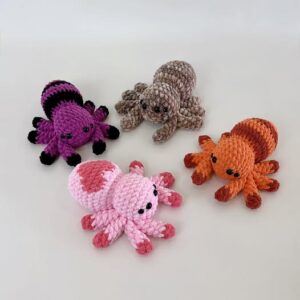
You will need medium-weight yarn in the color of your choice. Black or gray works great for a traditional spider look, but don’t be afraid to use pink, purple, or multicolored yarn for a fun twist. Make sure the yarn is not too fuzzy to keep your stitches visible.
Use a 3.5mm or 4mm crochet hook, depending on your yarn thickness. This hook size gives your stitches a tight enough weave to hold stuffing well, which is essential for amigurumi.
You will also need safety eyes or black embroidery thread to create expressive eyes for your spider. Safety eyes should be inserted before the spider is stuffed.
Other supplies include a yarn needle for sewing the legs and weaving in ends, stitch markers to keep track of your rounds, polyester stuffing to fill the body and legs, and scissors.
A printable crochet pattern or a digital guide can be helpful, especially if this is your first amigurumi. There are many free and paid versions available online that detail row-by-row instructions.
Lastly, set up a clean, well-lit workspace and dedicate some uninterrupted time to focus. Patience and attention to detail will bring your crochet spider to life beautifully.
Crocheting the Spider Body
Start by crocheting the main body of the spider. Most amigurumi crochet patterns use a magic ring and single crochet (sc) to form a tightly stitched base. This gives your spider a rounded, plush body that’s perfect for hugging or display.
To begin, make a magic ring and crochet 6 sc into the ring. Pull it tight and place a stitch marker at the beginning of the round. This is your first round.
In round two, increase in each stitch by doing 2 sc in every stitch (total 12 stitches). In round three, alternate 1 sc and 2 sc in the next stitch (total 18). Continue increasing evenly until your circle reaches the desired width.
Once you reach the widest point, continue crocheting 1 sc in each stitch for several rounds to build the spider’s body height. For a medium-sized spider, you might continue for about 10-12 rows.
To start closing the body, begin decreasing by doing sc2tog (single crochet two stitches together) every few stitches. Alternate decrease and regular sc until only a small hole remains.
Before the hole closes entirely, stuff your spider body with polyester fiberfill. Make sure it’s firm but not overly tight. Then finish closing with your decrease stitches and fasten off.
Making the Legs and Attaching
The legs of the spider are what give it its distinct and adorable look. You can create straight or slightly bent legs depending on your style preference. Typically, you will make eight identical tubes for the legs.
To make a leg, start with a magic ring and make 6 sc. Crochet in rounds without increasing to form a thin tube. The leg can be 10 to 15 rounds long, depending on how long you want them.
Once you complete each leg, lightly stuff it or insert pipe cleaners for flexible legs. Pipe cleaners work well if you want the legs to hold a pose.
Create all eight legs using the same pattern, and fasten off each one with a long tail. This will help you sew them onto the body later.
Use pins to position the legs symmetrically on both sides of the spider’s body. Four legs on each side is the standard layout.
Sew the legs firmly onto the body using a yarn needle. Secure them tightly to ensure they stay in place with use or play. Knot the thread inside the body to hide loose ends.
Creating the Eyes and Face
Facial expressions make each spider unique. Use either crochet patterns for small circles or safety eyes to give your spider its personality. Placement of the eyes makes a big difference in the overall look.
If using safety eyes, insert them before you close up the spider’s body entirely. They should be evenly spaced and aligned for a cute symmetrical appearance.
You can also crochet small circles to sew on as eyes. Use white yarn for the base and black for the pupils. Stitch them on with a yarn needle.
Use black embroidery thread to create a smile, frown, or even little fangs. This part allows for creative expression and gives your spider a finished look.
To make your spider even more unique, consider adding accessories like a bow, top hat, or mini scarf. These tiny additions make your amigurumi stand out.
Once the eyes and face are complete, give your spider a final check. Trim any yarn ends, fluff the stuffing evenly, and straighten the legs.
Final Touches and Display Ideas
Your spider is now complete, but there are plenty of ways to use or display it. Whether you’re decorating for Halloween, gifting it, or simply adding to your collection, a handmade amigurumi spider is sure to be a hit.
One popular idea is to attach a keyring or loop to turn the spider into a bag charm or Halloween accessory. Choose a sturdy ring and sew it into the back or head.
Another fun use is to hang your spider using invisible thread or fishing line. This works great for seasonal decorations or children’s rooms.
Make a group of spiders in different sizes and colors for a playful set. Display them on a table, bookshelf, or desk to bring a smile to anyone who sees them.
You can also add your spider to a mobile or garland. Combine with other crochet patterns like pumpkins, bats, or stars for a full festive look.
Finally, consider gifting your crochet spider. Handmade gifts are appreciated for the time, effort, and care they represent. Package it in a small box with a custom tag.
A spider in amigurumi pattern is not only fun to make but also offers a great opportunity to practice and perfect your crochet skills. From shaping the body and legs to adding personality with facial features, every step is a rewarding experience. Use your imagination, personalize your spider, and most importantly, enjoy the process. Happy crocheting!


