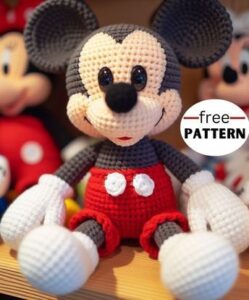
Are you ready to embark on a magical crocheting adventure? This step-by-step guide will walk you through the process of creating a crochet Mickey Amigurumi.
Whether you’re a fan of Disney or simply love crocheting adorable characters, this project is perfect for you. With clear instructions and recommended techniques, you’ll have your very own Mickey Mouse amigurumi in no time.
Let’s get started!
Materials and Preparations
To begin your crochet Mickey Amigurumi, you will need some basic materials. Here’s a list of everything you’ll need to gather before starting your project:
- Yarn: Choose a soft cotton or acrylic yarn in black, red, white, yellow, and skin-tone colors. For a standard-sized Mickey, medium weight (worsted weight) yarn is recommended.
- Hook: A 3.5 mm (E) crochet hook works best for a compact amigurumi look.
- Stuffing: Polyester fiberfill or similar material is essential for shaping Mickey.
- Stitch markers, embroidery floss, and a tapestry needle: These tools are handy for detailing and assembling your Mickey.
Once you have all your supplies, familiarize yourself with basic stitches like the single crochet (sc), slip stitch (sl st), and magic ring. Additionally, understand how to perform an increase and decrease in stitches, as these will be essential for shaping the body parts.
Using the right tension is also critical when working on amigurumi projects. Keep your stitches tight to prevent the stuffing from peeking through the crochet fabric. Adjust your hook size if necessary to achieve the right gauge for a polished look.
Crocheting the Head
The first part of the Mickey amigurumi to crochet is the head. Start with your black yarn and create a magic ring. Work 6 single crochets (sc) into the ring and pull it tight to close. From here, you’ll increase in each round to shape the spherical head.
Continue by increasing in the next round to 12 sc, then 18 sc, and so on until you have a total of 36 sc in the round. Be sure to use a stitch marker to mark the beginning of each round to keep track of your progress. After reaching the desired size for the head, you will continue working even rounds without increases.
Once the head reaches a suitable size (around 25-30 rounds, depending on your tension), begin decreasing. Decrease evenly until the hole is small enough to close tightly. Before fully closing, stuff the head with fiberfill, making sure it is firm but not too tight. Finish off the head by weaving in the ends.
Crocheting the Ears
The ears are iconic features of Mickey Mouse, and they’re also easy to crochet. Using black yarn, create a magic ring and work 6 sc into it, just as you did with the head. Increase evenly in the following rounds until you reach 18 stitches.
Once you have 18 stitches, work several rounds without increases to form the flat, circular shape of the ear. When you finish the last round, leave a long tail of yarn for sewing the ears onto the head. Make two ears following this pattern.
Before attaching the ears, position them on the head to ensure correct placement. Use the long yarn tail to sew the ears securely onto the top of the head, around rounds 5 to 7. Make sure they are symmetrical and firmly attached.
Crocheting the Body
For the body, switch to red yarn to mimic Mickey’s famous red shorts. Begin with a magic ring and 6 sc, gradually increasing to form the base of the body. Once you’ve reached 24 stitches in the round, continue working even rounds to build up the cylindrical shape of Mickey’s torso.
After completing the red portion of the body, switch to black yarn and continue crocheting upward. This will form the top part of Mickey’s body and the arms. Work even rounds until the body is approximately 20 rounds tall. Stuff the body with fiberfill before closing the top.
Make sure the stuffing is evenly distributed, and finish by sewing the head onto the top of the body. Secure it tightly so that Mickey’s head stays in place during display or play.
Crocheting the Legs and Shoes
To create Mickey’s legs, use black yarn for the top part of the legs. Begin with a magic ring and 6 sc, gradually increasing to 12 stitches in the round. Continue crocheting even rounds until you have a tube approximately 10 rounds long. This will form the leg’s upper portion.
Switch to yellow yarn to start Mickey’s iconic shoes. Continue crocheting in the round, increasing in the first few rounds to shape the shoe’s base. Once you’ve reached the desired width, work even rounds before decreasing to close the shoe’s toe. Stuff the leg lightly before finishing it off.
Repeat the process to create the second leg and shoe. Once both legs are completed, sew them securely to the bottom of the body. Ensure that they are positioned evenly and can support the amigurumi when sitting.
Crocheting the Arms
Mickey’s arms are similar in construction to the legs but shorter. Using black yarn, begin with a magic ring and 6 sc. Increase in the first few rounds, then continue working even rounds until the arm is around 8-10 rounds long.
At the end of the arm, switch to white yarn to create Mickey’s gloves. Crochet a few even rounds in white, then increase in the next round to create the cuff of the glove. Finish by decreasing and closing the glove.
Create a second arm following the same instructions, and sew both arms onto the sides of the body. Ensure that they are symmetrical and attached firmly.
Finishing Touches
Now that the body, head, legs, arms, and ears are assembled, it’s time to add the final touches to bring your crochet Mickey Amigurumi to life. Use black embroidery floss to create small stitches for the nose and eyes. You can also sew on small black buttons or felt pieces for added detail.
For Mickey’s signature shorts, embroider two small white circles onto the red part of the body to represent his buttons. This small detail makes your Mickey instantly recognizable.
If you’d like, you can also crochet a small tail using black yarn. Attach it to the back of Mickey’s body to complete the look. Make sure all pieces are securely sewn on and that no loose ends remain.
Displaying and Gifting Your Mickey Amigurumi
Congratulations! You’ve completed your crochet Mickey Amigurumi. This adorable creation can be proudly displayed on a shelf, gifted to a Disney fan, or used as a playful toy. The compact size and softness of amigurumi make it perfect for little hands to hold.
If you’re planning on gifting your Mickey, consider adding a personal touch by crocheting a small accessory, like a scarf or hat, to make the gift even more special. Mickey can also be part of a larger amigurumi collection, alongside other Disney characters that you crochet.
Don’t forget to take pictures of your finished amigurumi to share on social media or in your crochet community. Other crocheters will appreciate the time and skill you’ve put into this iconic piece, and you’ll inspire them to try making their own crochet Mickey Amigurumi!
Creating a crochet Mickey Amigurumi is a delightful project that combines creativity and craftsmanship. With the right materials, techniques, and attention to detail, you can bring this beloved Disney character to life. Whether you’re making it for yourself, a loved one, or a Disney-themed display, this amigurumi is sure to bring joy and smiles to everyone who sees it. Happy crocheting!
By following this guide, you’ve mastered another incredible croche project. Now you can confidently explore more croche patterns to expand your collection. Enjoy your crocheting journey!

