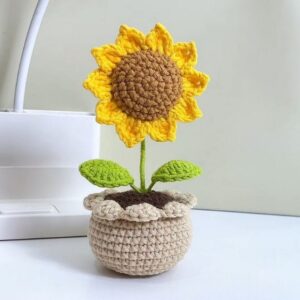
If you’re looking for a cheerful and creative project, the 🌟 crochet flower pot is a perfect choice! Especially if you’re a fan of sunflowers, you’ll fall in love with this vibrant DIY home decor idea. Learning how to crochet sunflower pot for beginners is a fun and rewarding way to enhance your crochet skills while crafting something adorable and decorative.
In this tutorial, we will guide you through the complete process of making a sunflower in a pot using basic crochet techniques. With just a few materials and a little time, you can make your very own crochet sunflower pot that will brighten up any space. This project is suitable for beginners, yet enjoyable for advanced crafters too.
Incorporating key crochet patterns and simple stitching techniques, you will learn how to bring your sunflower to life. By following these step-by-step instructions, you’ll soon have your own handmade, blooming sunflower that never needs watering!
H2: Materials Needed to Crochet a Sunflower Pot
To start your crochet sunflower pot, you’ll need a few basic materials that are readily available in craft stores or online. Choose high-quality yarns to give your flower pot a polished look and longer durability.
- Yarn: Choose cotton or acrylic yarn in green (for leaves and stem), yellow (for petals), brown (for the flower center), and terra cotta or light brown (for the pot).
- Crochet hook: A size 2.5mm to 3.5mm hook is ideal for this pattern. Make sure it matches the recommended size for your yarn.
- Stuffing: Use polyester fiberfill to give shape to the pot and flower.
- Stitch markers: These will help you keep track of your rounds.
- Scissors and yarn needle: For cutting yarn and weaving in ends.
- Optional: Safety eyes and embroidery floss for adding facial features to your sunflower if you’d like a cute, amigurumi-style pot.
Make sure you gather all materials before beginning. This will help you stay organized and focused as you work through the pattern. Don’t forget that using the right yarn and hook size is key to achieving a clean and compact stitch look.
When choosing yarn, consider the texture. Smooth yarns are better for beginners as they make it easier to see stitches. Cotton yarn tends to hold its shape well and is ideal for structured items like pots.
Using stitch markers helps keep your rounds aligned, which is especially important when you’re crocheting in spirals. They’re a small investment that makes a big difference in accuracy.
H2: Step-by-Step Instructions for the Flower Pot Base
The flower pot is the base of your crochet flower pot project. It gives structure and support to the flower. Start from the bottom and work your way up using a simple increase and round technique.
- Round 1: Start with a magic ring. Make 6 single crochets (sc) into the ring.
- Round 2: Make 2 sc in each stitch around (12 sts).
- Round 3: 1 sc in next stitch, 2 sc in the next repeat around (18 sts).
- Continue increasing by 6 stitches per round until your base is about 2.5 to 3 inches in diameter.
- Sides of the pot: Work even (1 sc in each stitch around) without increasing to build height. Repeat for 12-15 rounds depending on your desired height.
- Finishing the pot: Fasten off and weave in the ends. Use stuffing to fill the base slightly, leaving room for the flower.
You can adjust the pot size by increasing or decreasing the number of rounds. The shape should resemble a plant pot, with a rounded base and straight sides.
Ensure your stitches are tight to avoid holes in the structure. A tighter tension creates a sturdier pot that holds its shape well.
Color choice can enhance realism. A terracotta shade gives it an authentic plant pot look, while a neutral tone creates a minimalist design.
Stuffing should be firm but not overly packed. This allows you to insert the sunflower stem later without distorting the pot.
H2: Creating the Sunflower Head
The sunflower head is the most eye-catching part of the crochet sunflower pot. Use vibrant yellow for the petals and dark brown for the center.
- Center (Brown):
- Start with a magic ring, 6 sc into the ring.
- Increase each round by 6 sts until you reach 24 sts.
- Fasten off and weave in the ends.
- Petals (Yellow):
- Chain 6, skip 1, sc in next 5, turn.
- Decrease 1 stitch each row until you have 1 stitch left.
- Repeat 12-14 times to make multiple petals.
- Join petals around the brown center by sewing them evenly spaced.
- Second layer: Optional, add another round of petals behind the first layer for a fuller look.
- Stuffing: Add a little stuffing behind the brown center to give the flower a slight 3D puff.
- Secure the flower by stitching the bottom of the petals together, forming a firm base.
The number of petals can vary based on your preference. More petals give a lush appearance.
Always align petals symmetrically. Uneven petal placement can make the flower look unbalanced.
For a cartoon-like style, embroider a smile or attach safety eyes to the center.
Using two tones of yellow can add a realistic depth to the petals. Try alternating shades in each layer.
Ensure the base is tightly closed before attaching it to the stem. This adds durability.
H2: Assembling the Flower and Final Touches
Now it’s time to connect the sunflower to the pot and complete your beautiful crochet sunflower pot.
- Stem:
- Use green yarn. Chain 16, sc back down the chain, turn.
- Repeat 2 more rows to make a sturdy stem.
- Leaves:
- Chain 8, skip 1, sc in next 6, sl st in last.
- Shape the edge with picots or a pointed tip.
- Make two leaves.
- Assemble flower:
- Sew the bottom of the flower head to the top of the stem securely.
- Attach the leaves to either side of the stem.
- Insert stem into pot:
- Push the bottom of the stem into the center of the stuffed pot.
- Stitch securely around the base of the stem to attach it to the pot.
- Final decorations:
- Use pink embroidery floss to add cheeks.
- Optionally add beads, ribbons, or buttons for added charm.
- Finishing touches:
- Weave in all remaining yarn ends.
- Shape the sunflower gently with your hands to make it stand upright.
Make sure the stem is firmly attached so it stands without leaning.
Adjust the leaf position to balance the overall look. They should look natural on either side.
Using a floral wire inside the stem is optional but helps with firmness.
The completed crochet flower pot can be used as decor, a gift, or a desk companion.
You can make several sunflowers with slight variations for a fuller pot.
H2: Tips and Tricks for Beginners
Even if this is your first time trying a crochet flower pot, there are several tips that can help you get the best results.
- Practice with scrap yarn before starting the actual project.
- Follow stitch diagrams or video tutorials to better visualize the steps.
- Count stitches each round to avoid mistakes in shaping.
- Use contrasting colors for learning, then switch to sunflower tones once you’re confident.
- Take breaks to avoid hand fatigue and maintain tension consistency.
- Block the flower by lightly steaming it to make petals lay flat.
Remember, mistakes are part of the process. Don’t be discouraged if your first flower isn’t perfect.
Joining online crochet groups can provide support and ideas for variations.
Keep your tools organized to avoid losing small items like needles and stitch markers.
Try different crochet patterns later to expand your skills and create other flower types.
Making a crochet sunflower is not only a fun project but also a delightful gift that will be cherished.
With patience and practice, even a beginner can master the art of creating a crochet flower pot that brings joy and sunshine to any corner of the home.


