
The Bunny Ear Basket Crochet Pattern is a charming and practical project that perfectly captures the playful spirit of Easter while offering a functional storage solution. Whether you want to create a festive basket for egg hunts, organize small items, or decorate your home, this adorable crochet design is a wonderful choice. With its signature floppy or upright ears, this basket instantly becomes a standout handmade piece.
Creating a Bunny Ear Basket Crochet Pattern is not only enjoyable but also highly rewarding. It allows you to explore basic crochet techniques while producing something useful and visually appealing. The combination of structure and softness makes this project ideal for crafters who want to balance aesthetics with durability.
Another great aspect of the Bunny Ear Basket Crochet Pattern is its versatility. You can customize it in countless ways—changing colors, adjusting size, or adding decorative details to match your personal style. In this complete guide, you will learn everything you need to know, from materials and step-by-step instructions to creative ideas and expert tips.
Materials Needed for Bunny Ear Basket Crochet Pattern
To start your Bunny Ear Basket Crochet Pattern, selecting the right materials is essential for achieving a sturdy and well-shaped basket. Yarn choice plays a crucial role in determining the final look and durability of your project. Cotton yarn is highly recommended because it provides excellent structure and helps the basket maintain its shape.
Using a medium to bulky weight yarn is ideal for the Bunny Ear Basket Crochet Pattern, as it creates a firm and stable fabric. If you prefer a softer basket, you can use acrylic yarn, but keep in mind that it may not hold its shape as well as cotton.
You will also need a crochet hook that matches your yarn weight. Typically, a 4.5 mm to 6.0 mm hook works well. Using a slightly smaller hook than recommended can help create tighter stitches, which improves the basket’s structure.
Additional tools include a yarn needle for weaving in ends, stitch markers to keep track of rounds, and scissors for trimming yarn. These basic tools are essential for completing your Bunny Ear Basket Crochet Pattern efficiently.
To enhance stability, you may choose to use a reinforcement material such as a plastic canvas or an extra layer of crochet at the base. This is optional but can significantly improve the durability of your basket.
Finally, consider adding decorative elements like ribbons, bows, or small pom-poms. These finishing touches can elevate your Bunny Ear Basket Crochet Pattern and make it even more festive.
Step-by-Step Guide to Bunny Ear Basket Crochet Pattern
Creating the base is the first step in your Bunny Ear Basket Crochet Pattern. Begin with a magic ring and work single crochet stitches in the round. Gradually increase each round to form a flat circle that will serve as the bottom of your basket.
Continue increasing until you reach your desired base size. Once the base is complete, stop increasing and start working in even rounds. This will cause the sides of the basket to rise naturally, forming the body of your Bunny Ear Basket Crochet Pattern.
Maintain consistent tension throughout this process to ensure your basket stands upright. Tight stitches are especially important for keeping the structure firm and stable.
After reaching the desired height, you can finish the top edge with a decorative stitch such as a crab stitch or simple slip stitch edging. This adds a polished look to your Bunny Ear Basket Crochet Pattern.
Next, create the bunny ears. Chain a foundation and work rows of single crochet or half double crochet to form long ear shapes. You can make them pointed or rounded depending on your preference.
Attach the ears securely to the inside or edge of the basket. Position them evenly to maintain symmetry. This step is what transforms your basket into a recognizable Bunny Ear Basket Crochet Pattern.
Optionally, you can add a handle by crocheting a long strip and attaching it to both sides. This makes the basket easier to carry, especially for children during Easter egg hunts.
Creative Customization Ideas
One of the most exciting parts of making a Bunny Ear Basket Crochet Pattern is customizing it to suit your style. You can experiment with different colors to create a unique and eye-catching design.
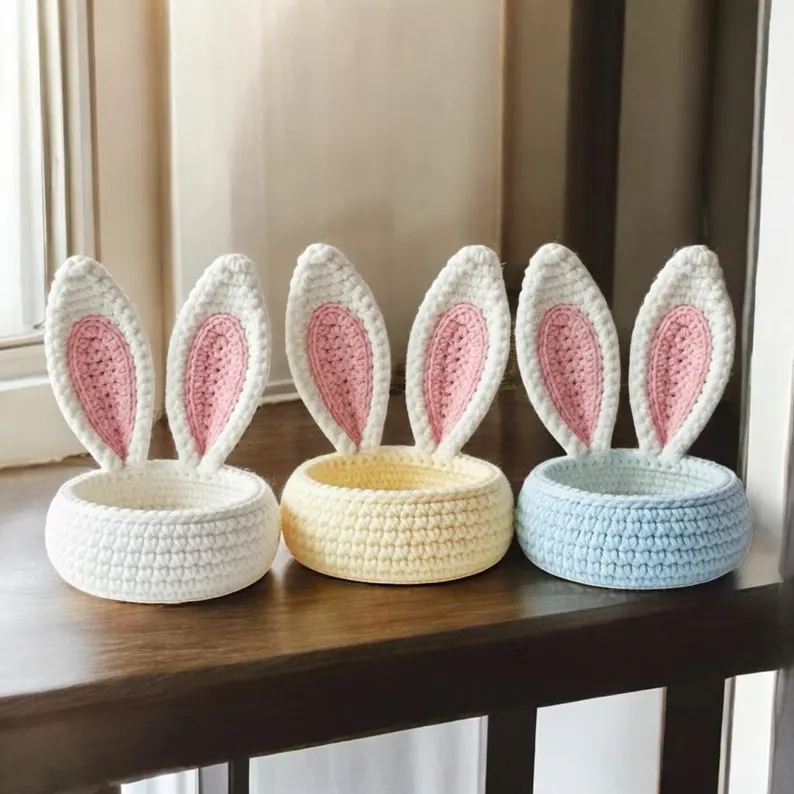
Pastel shades like pink, blue, yellow, and mint green are classic choices for Easter. However, you can also use bold or neutral tones for a more modern look. Color combinations can dramatically change the appearance of your Bunny Ear Basket Crochet Pattern.
You can add a cute bunny face by embroidering eyes, a nose, and whiskers onto the basket. This simple detail adds personality and charm to your project.
Another idea is to use textured stitches such as the bobble stitch to create a fluffy or playful effect. This works especially well for adding dimension to your Bunny Ear Basket Crochet Pattern.
Consider making baskets in different sizes. Smaller versions can be used for table decorations, while larger ones are perfect for storage or gift baskets.
Adding a lining fabric is another creative option. It not only enhances the appearance but also adds extra durability to your basket.
Finally, you can personalize your basket by adding names or initials. This makes your Bunny Ear Basket Crochet Pattern a thoughtful and unique handmade gift.
Tips for Beginners and Common Mistakes to Avoid
If you are new to crochet, the Bunny Ear Basket Crochet Pattern is a great project to build your skills. However, there are a few tips that can help you achieve better results.
Always use tight stitches when working on the basket. Loose stitches can cause the basket to collapse or lose its shape. Using a smaller hook can help maintain firmness.
Keep track of your stitch count, especially when increasing the base. Uneven increases can result in a warped or uneven bottom for your Bunny Ear Basket Crochet Pattern.
When attaching the ears, make sure they are evenly spaced and securely fastened. Loose or uneven ears can affect the overall look of your basket.
Avoid skipping finishing steps like weaving in ends. Proper finishing ensures your project is durable and looks professional.
If your basket feels too soft, consider reinforcing it with an extra layer or using a stiffer yarn. This can significantly improve the structure of your Bunny Ear Basket Crochet Pattern.
Lastly, take your time and enjoy the process. Crochet is meant to be relaxing, and patience will help you achieve a beautiful final result.
FAQ About Bunny Ear Basket Crochet Pattern
Is this pattern beginner-friendly?
Yes, the Bunny Ear Basket Crochet Pattern is suitable for beginners who know basic stitches like single crochet.
What type of yarn is best?
Cotton yarn is recommended because it provides structure and durability.
How long does it take to complete?
It usually takes a few hours depending on size and experience.
Can I wash the basket?
Yes, but hand washing is recommended to maintain shape and quality.
Can I make it larger?
Absolutely. Increase the base and continue adding rounds to adjust the size.
Do I need special tools?
No, basic crochet tools are sufficient.
Can I sell finished baskets?
Yes, handmade baskets are popular and can be sold if you create your own version.
How do I make the basket sturdier?
Use tight stitches, thicker yarn, or add reinforcement to the base.
Conclusion
The Bunny Ear Basket Crochet Pattern is a delightful and practical project that combines creativity with functionality. Throughout this guide, you learned how to choose the right materials, follow a step-by-step process, explore customization ideas, and avoid common mistakes.
This pattern is perfect for adding a festive touch to your home or creating a thoughtful handmade gift. Its versatility allows you to experiment with different styles and designs, making each basket unique.

