
Creating a Christmas Cat Crochet Pattern is one of the most charming and heart-warming ways to celebrate the holiday season. Whether you’re an experienced crocheter or just beginning your crafting journey, this festive project brings joy, creativity, and a personal touch to your holiday décor..
A handmade crochet cat with Christmas details brings comfort, personality, and a unique artistic value to your home. Many crafters love this project because it allows them to express creativity while also gifting something special to friends, children, and fellow cat lovers.
This tutorial aims to help all crocheters—from absolute beginners to experienced makers—understand the materials, basic stitches, shaping techniques, and assembly instructions required for creating a festive cat design.
Essential Materials for a Christmas Cat Crochet Pattern
Choosing the right materials plays a major role in the quality and appearance of your project. For your Christmas Cat Crochet Pattern, selecting soft yarns and the proper hook size ensures a polished final piece. Beginners especially benefit from using medium-weight yarn because it is easier to see the stitches clearly.
Cotton and acrylic yarn are great choices for crafting a sturdy and well-formed crochet cat. Cotton offers a clean, crisp texture, while acrylic provides warmth and flexibility. Colors such as red, green, white, and gray match the Christmas theme beautifully.
A standard 4.0 mm to 5.0 mm crochet hook works well for most medium-weight yarns. If you prefer tighter stitches, choose a smaller hook. Remember that consistency is key for your project’s final shape.
You will also need fiberfill stuffing to shape your crochet cat properly. Good stuffing helps the figure maintain structure without collapsing or deforming over time.
Stitch markers are extremely helpful, especially for beginners. They help you keep track of your rounds and ensure your increases and decreases stay aligned.
Finally, safety eyes or embroidered eyes can be used to give your cat its final expression. Embroidered eyes are ideal for children’s toys or items intended for young recipients.
Basic Stitches and Techniques for the Pattern
To successfully follow a Christmas Cat Crochet Pattern, you must be comfortable with a few essential stitches. These include the magic ring, single crochet, increase, and decrease. These basic techniques make up the main structure of most amigurumi-style crochet projects.
The magic ring is used to start your project with a tight and clean center. This technique prevents gaps in the final design, especially on the cat’s head and body.
Single crochet is the primary stitch used in amigurumi. It creates a strong, tight fabric that keeps stuffing from coming out. This stitch also makes shaping your cat much easier.
Increases help you expand the shape of the head, body, and arms. Working two single crochets in the same stitch gradually widens the piece and defines your pattern.
Decreases are just as important because they help shape the narrow areas of your crochet cat. Invisible decreases are ideal for amigurumi because they give a smooth and polished look.
Working in continuous rounds is a common technique used in amigurumi patterns. This method helps avoid visible seams and gives your project a smooth, rounded appearance.
Lastly, maintaining even tension is vital. Consistent tension ensures a balanced and neat final piece, especially when working on smaller parts such as ears, tail, or tiny Christmas accessories.
Shaping the Cat and Adding Christmas Details
The shaping process is where your Christmas Cat Crochet Pattern comes to life. Each part, such as the head, ears, body, and tail, is crocheted separately and then sewn together. This creates a well-defined and expressive design.
Start with the head, which is usually the largest piece. Gradually increase your stitches until you reach the desired width, then decrease to close the shape. Stuff the head firmly for best results.
The ears are made with small triangles. You can crochet them in classic cat colors or choose festive Christmas colors for a playful touch. Slightly folding them before attachment adds character.
Next, crochet the body using continuous rounds and shaping through increases and decreases. A firmer stuffed body helps the cat sit upright and hold its accessories.
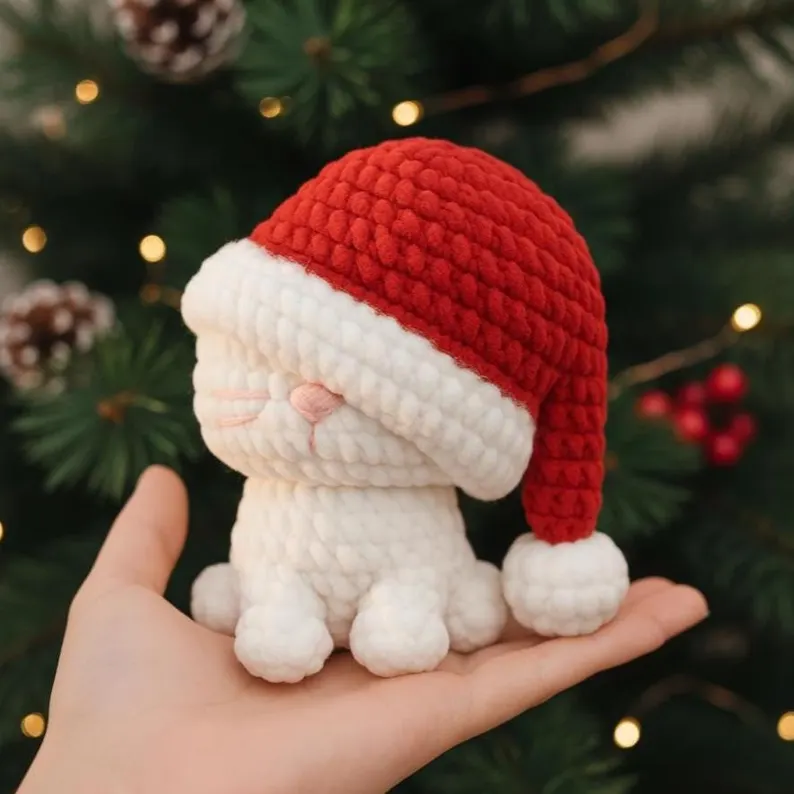
Christmas elements such as a scarf, a tiny Santa hat, or a festive ribbon add personality. These accessories make your cat look ready for holiday celebrations and give you room to experiment with creativity.
The tail is usually a long, simple tube that can be positioned in different ways. Some crafters prefer a curled tail, which is easy to shape with tighter decreases.
Finally, embroider whiskers, add ornaments, or include surface stitch decorations to give your Christmas Cat Crochet Pattern even more charm and personality.
Final Assembly and Finishing Touches
Assembly is the final and most delicate step in your Christmas Cat Crochet Pattern. This is where your project transforms from separate pieces into a cohesive and adorable Christmas-themed cat.
Begin by attaching the head to the body. Position the head carefully so it sits straight and securely. Sewing slowly and with tight stitches ensures stability.
Next, attach the arms and legs symmetrically. Aligning them properly is important for the cat to sit naturally and maintain balance. Use pins to hold the position before sewing.
After that, attach the tail. Depending on your design, you can position the tail slightly curved or straight. A well-stuffed tail helps maintain shape.
Add your Christmas accessories, such as the scarf or hat. These small items bring holiday warmth and make your crochet piece festive.
Use embroidery thread to add the facial features. The nose, mouth, and whiskers give your cat personality and charm. Take your time with this step to create a clean look.
Finally, review your entire project and trim any loose yarn ends. This step ensures a tidy and professional finish, giving your crochet cat a polished final appearance.
FAQ – Christmas Cat Crochet Pattern
1. Is a Christmas Cat Crochet Pattern beginner-friendly?
Yes! Most designs are simple enough for beginners, especially if they already know single crochet, increases, and decreases.
2. What type of yarn is best for this pattern?
Medium-weight acrylic or cotton yarn works well. Both are beginner-friendly and create a sturdy final piece.
3. Can I personalize my Christmas cat?
Absolutely. You can change colors, add accessories, and adjust details to match your holiday décor.
4. Do I need safety eyes?
Safety eyes look great, but embroidered eyes are safer for young children and pets.
5. How long does this project take?
Depending on experience, it takes between 3 to 8 hours to complete your Christmas Cat Crochet Pattern.
6. Can I sell the finished toys I make?
Yes, you can sell your handmade items. Just make sure you write your own instructions if selling the pattern.
Conclusion
Creating a Christmas Cat Crochet Pattern is a delightful way to bring holiday charm into your home. In this article, you learned about essential materials, basic stitches, shaping techniques, and assembly methods to help you craft a beautiful festive cat. If you enjoyed this guide, please leave your honest opinion and share any suggestions you have for future tutorials. Your feedback helps make each guide even more helpful and inspiring for the crochet community.

