If you love creating textured and decorative stitches, then the Clover Stitch Free Pattern is perfect for your next project. Whether you’re crafting a cozy blanket, a stylish scarf, or even a set of handmade dishcloths, the clover stitch brings charm and elegance to any piece. This guide will walk you through how to crochet the clover stitch, and help you master this beautiful design.
Learning new crochet patterns like the clover stitch not only improves your skills but also makes your work stand out. With its floral-like motif, the clover stitch is a delightful addition to any crocheter’s stitch library. Its repetitive texture makes it ideal for both beginners and advanced crafters.
In this comprehensive tutorial, you’ll find everything you need: stitch instructions, required materials, fabric measurements, and clear step-by-step directions. We’ll also explore helpful tips to ensure your stitches stay consistent and even. Let’s dive into the magic of the clover stitch and enhance your next crochet project!
What is the Clover Stitch?
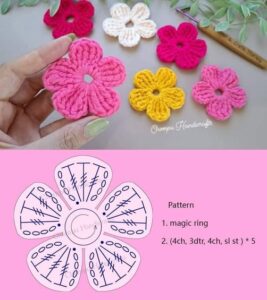
The clover stitch is a decorative crochet stitch that resembles tiny flowers or clovers stacked side by side. It’s known for its dimensional texture and delicate appearance.
This stitch uses basic crochet techniques like chains and double crochets, making it accessible for beginners who want to try something new. It’s perfect for projects where both beauty and texture matter.
While it may look complex, the clover stitch follows a simple repetitive pattern. After learning the basic repeat, you’ll find it incredibly meditative and enjoyable to work on.
One of the great things about the clover stitch is its versatility. You can use it for making scarves, pillow covers, baby blankets, and more.
Because of its slightly open structure, it’s ideal for lighter-weight yarns, making it a great choice for spring and summer accessories.
Understanding the structure of the clover stitch helps make your crochet patterns more uniform and professional. Let’s explore what you’ll need before we start crocheting.
Materials and Measurements
Before you start your clover stitch free pattern, gather the essential materials. It’s best to use soft, lightweight yarns that showcase the stitch definition beautifully.
Materials needed:
- Yarn: Light or medium weight (cotton or acrylic yarn recommended)
- Crochet hook: Size H/5.0 mm or appropriate for your yarn
- Scissors
- Yarn needle for weaving in ends
- Stitch markers (optional)
For a basic swatch, your fabric cut should measure approximately 10″ x 10″ (25.4 cm x 25.4 cm) once completed. Adjust measurements based on your project needs.
If you’re creating a scarf, for example, you may want a final piece that’s 8″ wide by 60″ long (20 cm x 152 cm). Always make a swatch first to calculate how many clover stitches fit per inch.
Tension plays an important role in the final texture. Make sure to test your tension and adjust your hook size if needed to maintain consistency.
Step-by-Step Instructions
Now that you have your materials ready, let’s begin the clover stitch free pattern step-by-step. Follow each round carefully, and remember that practice makes perfect.
Step 1: Create a foundation chain
- Start with a multiple of 4 + 2 chains. For a sample swatch, you can begin with 22 chains.
Step 2: Row 1 (Base Row)
- In the third chain from hook, make 1 single crochet (sc).
- Chain 1, skip 1 chain, then sc into the next chain. Repeat this sequence across the row.
- Turn your work.
Step 3: Row 2 (First Clover Stitch Row)
- Chain 3 (counts as first double crochet).
- Yarn over, insert hook into the next chain-1 space, pull up a loop, yarn over and pull through 2 loops. Repeat this 3 times in the same space.
- You’ll have 4 loops on your hook. Yarn over and pull through all 4 loops.
- Chain 1 to close the clover. Repeat this pattern across the row.
Step 4: Row 3 (Alternate Clover Stitch Row)
- Chain 3 and repeat clover stitches in the chain-1 spaces created in the previous row.
- This staggered pattern creates a lovely floral texture across your fabric.
Step 5: Continue Repeating Rows 2 and 3
- Repeat these rows until your piece reaches the desired length.
- Remember to keep your edges straight by chaining correctly at the beginning of each row.
Step 6: Finishing
- Once finished, fasten off and weave in your yarn ends with a yarn needle.
- Lightly block your piece if needed to maintain shape and show off the stitch pattern.
Tips for Success
Achieving perfect results with the clover stitch free pattern takes some practice, but a few tricks can make the process easier.
Use a stitch marker at the beginning of each row to help track your stitches, especially if you’re new to textured patterns.
Choose yarns with good stitch definition. Avoid fuzzy yarns or novelty threads for this pattern, as they can hide the beautiful clover effect.
Maintain even tension throughout the project. Uneven stitches can make your clovers look messy or inconsistent.
Practice on a small swatch before committing to a larger project. This lets you test your tension and make adjustments to your hook size if necessary.
Count your stitches often. Skipping a chain or adding extras can throw off the entire row.
Don’t forget to block your finished piece. Wet or steam blocking can enhance the stitch definition and even out any tension irregularities.
Creative Uses for the Clover Stitch
Once you’ve mastered the clover stitch, there are endless possibilities for applying it to different crochet patterns.
Try using the clover stitch to make baby blankets—it’s soft, airy, and has a gentle texture that’s perfect for little ones.
The stitch also works beautifully for dishcloths and spa sets. Use cotton yarn for maximum durability and absorbency.
Fashion accessories like scarves, cowls, and shawls gain a unique flair with this textured pattern. Choose gradient or solid color yarns to show off the detail.
Pillows and throws are another popular choice. You can alternate the clover stitch with other stitch patterns to create interesting textures.
Combine the clover stitch with other motifs in patchwork-style afghans or tote bags. The floral appearance adds whimsy to functional items.
For gifts, the clover stitch can be a standout element in handmade items, showing off your creativity and skill.
Conclusion
The Clover Stitch Free Pattern offers both visual appeal and crafting enjoyment. Its intricate appearance belies its simple execution, making it a satisfying project for crocheters at all skill levels. Whether you’re creating a gift or treating yourself, the clover stitch adds elegance and charm to any crochet project.
Remember to use lightweight yarns, practice your tension, and follow the instructions carefully for the best results. With a little practice, you’ll be incorporating this beautiful stitch into your favorite crochet patterns in no time.
Try it out today and bring a touch of floral finesse to your handmade creations!


