
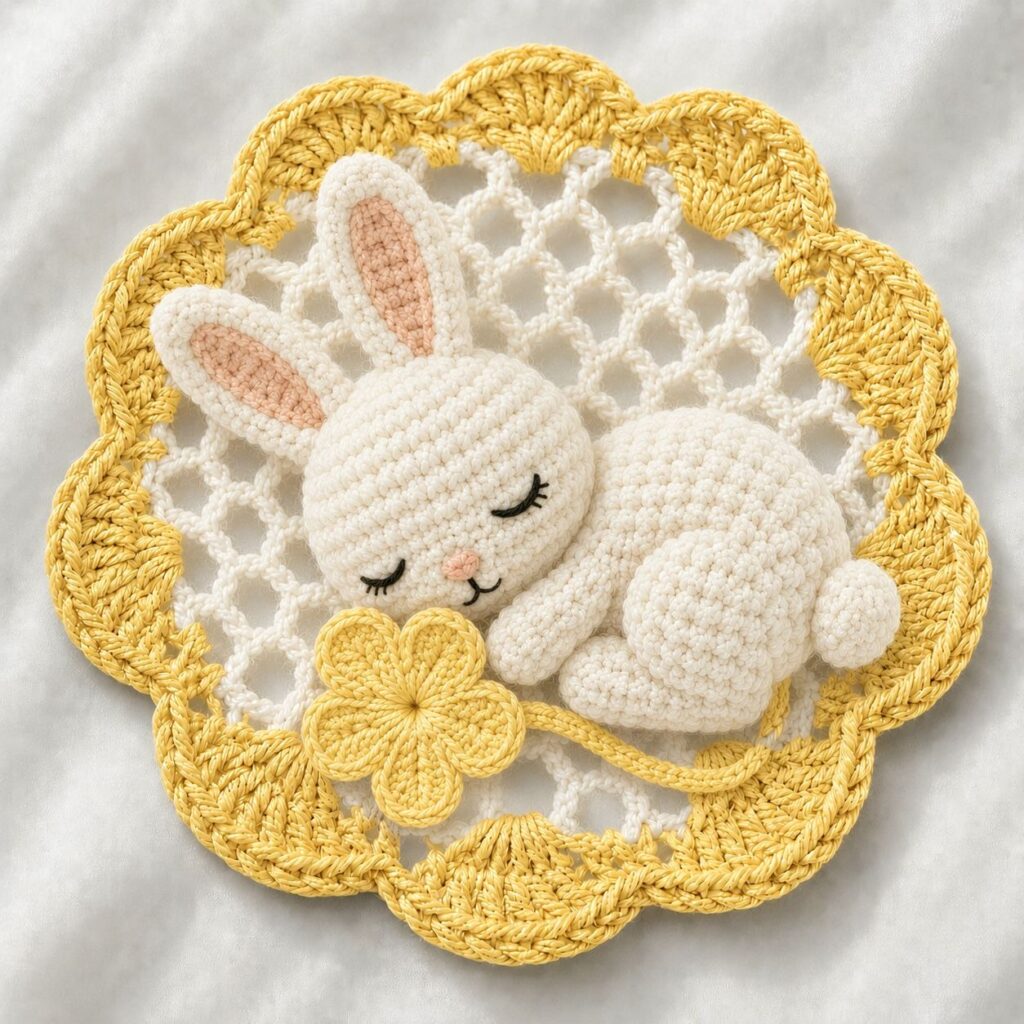
Crochet Bunny Coaster Pattern is a charming and enjoyable project that combines creativity with everyday practicality. Whether you are looking to decorate your dining table, prepare adorable seasonal decorations, or create thoughtful handmade gifts, this project is an excellent choice for crocheters of every skill level. The Crochet Bunny Coaster Pattern uses simple crochet stitches to transform a small amount of yarn into an attractive coaster shaped like a cute bunny. Throughout this guide, you will learn each step of the process using standard US crochet terminology, making it easy to follow whether you are a beginner or an experienced crochet enthusiast.
One of the reasons why bunny coasters have become so popular is their versatility. They are perfect for spring decorations, Easter celebrations, children’s parties, farmhouse kitchens, and everyday home décor. Since the project is relatively small, it can usually be completed within a few hours, making it an ideal weekend craft or a relaxing evening project. Even better, these coasters require very little yarn, making them an excellent way to use leftover cotton yarn from previous crochet projects while creating something beautiful and functional.
Before starting your Crochet Bunny Coaster Pattern, it is helpful to understand how the project is constructed. The coaster generally begins with a circular base that forms the bunny’s face. After the base is complete, the ears are crocheted separately or directly onto the circle, depending on the design. Finally, decorative details such as embroidered facial features, a small bow, rosy cheeks, or a tiny flower can be added to personalize the finished coaster. Working through each stage carefully ensures a neat, symmetrical, and durable finished project that will brighten any table setting.
Choosing the Best Materials for the Crochet Bunny Coaster Pattern
Selecting quality materials is the first step toward creating a beautiful Crochet Bunny Coaster Pattern. Cotton yarn is highly recommended because it is absorbent, durable, easy to clean, and provides excellent stitch definition. Cotton also helps the coaster remain flat while protecting surfaces from moisture.
Choose a crochet hook that matches the weight of your cotton yarn. Most coaster projects use a hook that creates firm stitches, ensuring the coaster keeps its shape and does not become too flexible during everyday use.
Prepare your crochet supplies before beginning the project. You will need scissors, a yarn needle, stitch markers, measuring tape, and optional embroidery floss if you plan to add facial details or decorative accents.
Color selection allows you to personalize your bunny coaster. White, cream, gray, beige, and soft brown create classic bunny designs, while pastel pink, baby blue, lavender, mint green, and yellow are wonderful choices for spring-themed decorations.
Decorative accessories such as tiny bows, embroidered flowers, or safety-free stitched facial features can make every bunny unique. Since coasters are frequently washed, sewn embellishments often last longer than glued decorations.
Taking a few minutes to organize your materials before crocheting makes the entire process smoother and helps you enjoy every step of creating your handmade coaster.
Step-by-Step Crochet Instructions
Begin your Crochet Bunny Coaster Pattern with a magic ring. Crochet the required number of single crochet (sc) stitches into the ring and tighten the center securely. This creates the solid foundation for the bunny’s face.
Continue working in continuous rounds, increasing evenly during each round until the coaster reaches the desired diameter. Count your stitches carefully to maintain a perfectly round shape with smooth edges.
Once the circular base is complete, finish the final round using slip stitches (sl st) or single crochet to create a neat border. This edge helps strengthen the coaster while giving it a polished appearance.
Next, crochet the bunny ears. Each ear usually begins with a small foundation chain followed by rows of single crochet, half double crochet (hdc), and double crochet (dc) to create a gently rounded shape. Make two identical ears for a balanced design.
Sew the completed ears securely onto the top portion of the coaster using a yarn needle. Reinforce the attachment by weaving the yarn through several stitches to ensure the ears remain firmly attached after repeated use.
Finish the coaster by embroidering simple facial features such as closed eyes, a tiny nose, whiskers, or rosy cheeks. These final touches bring the bunny to life while allowing you to personalize every coaster you create.
Creative Ideas for Personalizing Your Bunny Coaster
One of the most enjoyable features of the Crochet Bunny Coaster Pattern is how easily it can be customized. Even small design changes allow you to create an entirely different finished look.
Try using multiple yarn colors to create realistic bunny fur patterns. White ears with pink centers or gray faces with cream details add extra visual appeal without increasing the difficulty of the project.
Crochet tiny flowers or leaves and attach them near one ear for a spring-inspired design. Floral embellishments are especially popular for Easter decorations and seasonal table settings.
Small bows made from ribbon or crocheted yarn can also be added beneath the bunny’s face. This simple accessory gives the coaster an elegant handmade appearance while remaining practical for everyday use.
Create matching coaster sets by using different pastel colors while keeping the same overall bunny design. Coordinated sets make wonderful gifts for birthdays, holidays, housewarming parties, or baby showers.
You can also experiment with different edging styles such as crab stitch, picot edging, or simple scalloped borders to give every coaster its own distinctive personality.
Helpful Crochet Tips for Perfect Results
Maintain consistent stitch tension throughout the entire Crochet Bunny Coaster Pattern. Even tension helps the coaster remain flat while giving the finished project a clean, professional appearance.
Count your stitches at the end of every round. Accurate stitch counts ensure the circular base stays symmetrical and prevents unwanted ripples or curling.
If your coaster curls upward, gently block the finished piece according to the recommendations for your chosen yarn. Blocking helps flatten the coaster and improves the overall appearance.
Secure every yarn tail carefully using a yarn needle. Weaving the ends through multiple stitches in different directions prevents unraveling even after repeated washing.
Practice crocheting the ears separately before attaching them if you are new to shaping techniques. Once both ears are identical, sewing them onto the coaster becomes much easier.
Most importantly, enjoy the creative process. Handmade crochet projects reflect patience, creativity, and craftsmanship, making every finished bunny coaster unique and meaningful.
FAQ
Is the Crochet Bunny Coaster Pattern suitable for beginners?
Yes. Beginners who know basic crochet stitches such as chain, single crochet, half double crochet, and double crochet can successfully complete this project with a little practice.
What yarn works best for bunny coasters?
Cotton yarn is the preferred choice because it is absorbent, durable, easy to wash, and maintains its shape well during everyday use.
How long does it take to make one coaster?
Most crocheters complete a bunny coaster within one to three hours depending on their experience and the amount of decorative detail they choose to add.
Can I wash crochet bunny coasters?
Yes. Hand washing with mild detergent is generally recommended for cotton coasters. Lay them flat to dry so they maintain their original shape.
Which crochet stitches are commonly used?
Most versions use chain (ch), single crochet (sc), half double crochet (hdc), double crochet (dc), slip stitch (sl st), and a magic ring for starting the circular base.
Can I make larger bunny coasters?
Absolutely. Simply continue adding increase rounds before completing the circular base to create a larger coaster suitable for mugs, bowls, or decorative centerpieces.
Are bunny coasters good handmade gifts?
Yes. They are popular gifts for Easter baskets, birthdays, baby showers, housewarming celebrations, and anyone who appreciates handmade home décor.
Can I sell bunny coasters made from this pattern?
Many crocheters sell handmade coasters at local craft fairs and online marketplaces. If following another designer’s published instructions, always respect any copyright or licensing conditions that accompany the original pattern.
Conclusion
The Crochet Bunny Coaster Pattern is a fun and rewarding crochet project that combines practical use with adorable handmade charm. Throughout this guide, you learned how to select the best materials, crochet a sturdy circular base, shape and attach bunny ears, personalize your coaster with decorative details, and apply helpful finishing techniques that improve both durability and appearance. By mastering these simple crochet methods, you can create beautiful bunny coasters in a wide variety of colors and styles that brighten your home or become thoughtful handmade gifts for family and friends. Whether you make a single coaster or an entire matching collection, each finished piece reflects your creativity, patience, and crochet skills. If you enjoyed this tutorial, please leave your honest opinion and share your suggestions for future crochet projects. Your feedback is greatly appreciated and helps inspire even more creative ideas for the crochet community.

