Creating a Crochet Cat Head Pattern is a delightful project for both beginner and experienced crafters. This small yet adorable piece can be used as a keychain, appliqué, stuffed toy, or even part of a larger amigurumi animal. If you’re passionate about crochet or looking to explore new crochet patterns, this step-by-step guide will walk you through everything you need to make your own cat head from start to finish.
The beauty of crocheting lies in its flexibility and creative freedom. With just a hook and yarn, you can transform simple stitches into charming shapes. The Crochet Cat Head Pattern is a great way to practice fundamental techniques like magic ring, increasing, and shaping. Plus, the end result makes a perfect handmade gift for any cat lover.
In this article, we’ll cover all the materials you’ll need, a complete tutorial on how to crochet a cat head, customization options, and tips for assembling and finishing your piece. Whether you want to make one or a dozen, this guide ensures your project will be both fun and rewarding.
Materials and Tools You Will Need
To start your Crochet Cat Head Pattern, gather the right tools and materials. These essentials will ensure your project goes smoothly.
- Yarn Selection: Choose a soft, medium-weight (worsted weight) yarn. Cotton or acrylic yarns work well and come in a variety of colors for customization.
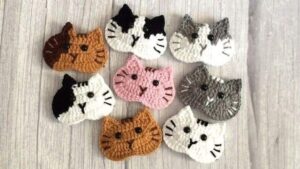
- Yarn Colors: You will need at least two yarn colors—one for the main head and another for features like the nose or inner ears. Popular choices include gray, white, tan, and black.
- Crochet Hook: Use a 3.5 mm to 4 mm crochet hook for tight and even stitches. Make sure the hook matches your yarn weight.
- Stuffing: Polyester fiberfill is ideal for stuffing the head if you’re making a 3D amigurumi version. You can also use leftover yarn scraps as eco-friendly stuffing.
- Safety Eyes or Embroidery Floss: Use 6mm or 8mm safety eyes for a realistic look or embroider the eyes with black yarn or thread.
- Stitch Markers and Scissors: A stitch marker helps track your rounds, and a sharp pair of scissors is a must for trimming yarn ends.
Step-by-Step Instructions for Crochet Cat Head Pattern
The following step-by-step guide outlines how to crochet a simple and cute cat head using basic crochet techniques.
- Start with a Magic Ring: Begin your crochet cat head pattern with a magic ring and work 6 single crochet (sc) stitches into the ring. Pull it tight to close.
- Increase Rounds: Work 2 sc in each stitch around (12 sts). Continue increasing each round evenly until you reach 36 stitches.
- Create the Head Shape: Once you reach 36 sts, continue working even (1 sc in each st) for about 5 rounds to form the body of the head.
- Start Decreasing: Begin decreasing with single crochet two together (sc2tog) evenly around to taper the shape. Continue until you have 12 sts.
- Stuff the Head: Fill the head with stuffing material before the hole gets too small. Keep stuffing firm but not too tight.
- Close and Finish: Decrease until 6 sts remain. Fasten off and weave the tail through the last stitches to close the hole securely.
Making the Ears, Nose, and Other Features
Adding facial features brings your crochet cat head to life. Here’s how to make each part step by step.
- Crocheting the Ears:
- Make 2 ears.
- R1: Magic ring with 4 sc (4 sts)
- R2: 2 sc in each stitch (8 sts)
- R3: 1 sc around (8 sts)
- Fasten off and leave a tail for sewing.
- Attaching the Ears: Fold each ear slightly and sew them to the top sides of the cat head using the yarn tail and a tapestry needle.
- Creating the Nose: Use pink yarn to embroider a small triangle in the center of the face, just below where the eyes will go.
- Adding the Eyes: Attach safety eyes evenly spaced on either side of the nose, or embroider round eyes using black thread.
- Optional Whiskers: Use black embroidery thread to stitch a few whiskers on each side of the nose.
- Final Touches: Gently press the cat head to shape it and trim any loose yarn ends for a clean finish.
Customization and Creative Variations
Now that you know how to make the basic crochet cat head pattern, it’s time to get creative! Here are some fun ideas to personalize your project.
- Different Yarn Textures: Experiment with fuzzy yarn or variegated yarn to give your cat head a unique texture or color gradient.
- Color Combinations: Try stripes, patches, or color-blocked designs to mimic real cat breeds or create your own fantasy feline.
- Add Accessories: Crochet a tiny bow tie, collar, or hat for your cat head to give it more character.
- Create a Keychain or Magnet: Attach a keychain ring or magnet to the back for a functional item that makes a great gift.
- Use for Appliqué: Flatten the head and skip stuffing to use it as an appliqué for bags, clothing, or blankets.
- Combine with Other Patterns: Make a full amigurumi cat by adding a body, legs, and tail using compatible crochet patterns.
Tips for Success and Finishing Touches
As with any crochet project, practice and patience are key. Here are some helpful tips to ensure your cat head turns out beautifully.
- Maintain Consistent Tension: Keeping your stitches uniform ensures a smooth and professional-looking shape.
- Count Your Stitches: Use a stitch marker and count each round to avoid mistakes, especially when increasing or decreasing.
- Use Light-Colored Yarn: If you’re a beginner, lighter yarn helps you see stitches more clearly.
- Secure Attachments Well: Make sure all parts are sewn or secured tightly, especially if the piece will be used by children.
- Washable Yarn: Choose machine-washable yarn for ease of cleaning and durability.
- Label and Gift: If giving as a gift, include a handmade tag with care instructions. Personal touches make all the difference.
- PATTERN HERE
Creating your own Crochet Cat Head Pattern is a fun and fulfilling way to explore the world of crochet patterns. With a few simple materials and this easy-to-follow guide, you can make a charming and customizable piece that will delight both you and anyone who receives it. Happy crocheting!


