Creating a crochet cup cover is a delightful and practical project that brings charm and functionality to your everyday items. Whether you want to protect your hands from hot beverages or add a cozy, decorative touch to your favorite mug, a crochet cup cover is the perfect solution. Using beginner-friendly crochet patterns, you can craft your own cup cover in no time.
The appeal of making a crochet cup cover lies in its simplicity and versatility. You can experiment with various colors, textures, and patterns to suit your personal style or to create thoughtful handmade gifts. Additionally, cup covers are eco-friendly, reusable, and an excellent alternative to disposable coffee sleeves.
In this step-by-step guide, you will learn how to make a crochet cup cover with precise instructions, fabric measurements, and useful tips to ensure your project is successful. Let’s dive into this creative journey together and explore the joy of making beautiful and functional crochet accessories.
Materials and Measurements for Crochet Cup Cover
Selecting the Perfect Yarn
- Choosing the right yarn is essential for crafting a crochet cup cover that is both functional and stylish. Cotton yarn is highly recommended because it is heat-resistant and easy to wash.
- Cotton yarns offer durability and provide a comfortable grip around hot or cold cups.
- Opt for medium-weight (worsted) yarn to achieve a balanced thickness that ensures both flexibility and structure.
- Using textured or variegated yarns can add unique visual interest to your crochet patterns.
- Bright colors or neutral tones can be selected based on your preference or the intended gift recipient.
- Avoid using synthetic yarns that may melt or become damaged when exposed to heat.
Choosing the Right Crochet Hook Size
- For a crochet cup cover, a 4.0 mm (G-6) crochet hook is typically a good fit for medium-weight yarn.
- Using the recommended hook size helps achieve the right stitch tension for a snug fit.
- Smaller hooks can make tighter stitches, which provide a firmer grip on the cup.
- Larger hooks may create a looser, more flexible fabric but can result in a less secure fit.
- Always check the yarn label for the suggested hook size and adjust according to your desired texture.
- Proper hook selection ensures the finished cup cover holds its shape and fits comfortably around your cup.
Accurate Cup Measurements
- Measure the circumference and height of the cup you wish to cover.
- For a standard coffee cup, the circumference is typically around 10 inches, and the height is about 4 inches.
- Add approximately half an inch to each measurement to allow for stretch and comfortable placement.
- Aim for a finished cup cover size of about 10.5 inches in circumference and 4.5 inches in height.
- Accurate measurements help ensure your crochet cup cover fits securely and doesn’t slide off.
- Use a flexible measuring tape to obtain precise dimensions, which is especially important when following crochet patterns.
Additional Supplies Needed
- Gather basic crochet supplies, including scissors, a yarn needle, and stitch markers.
- Stitch markers help you track your rounds and stitches, especially if working in the round.
- A yarn needle is necessary for weaving in ends and securing seams neatly.
- Optional embellishments include buttons, appliques, or embroidery for added style.
- Consider adding a small loop and button closure to make the cup cover adjustable.
- Keeping your supplies organized enhances your workflow and makes the process more enjoyable.
Selecting the Right Crochet Patterns
- Choose simple crochet patterns that use basic stitches like single crochet, half-double crochet, or double crochet.
- Patterns worked in the round create seamless designs that wrap smoothly around the cup.
- Look for patterns that include stitch counts and clear step-by-step instructions for best results.
- Decorative stitches like the bobble or shell stitch can add texture and style to your cup cover.
- Beginners should start with straightforward patterns that focus on stitch repetition and minimal shaping.
- Using beginner-friendly crochet patterns ensures success and builds confidence in your crochet skills.
Preparing Your Workspace
- Set up a clean, well-lit workspace with your materials and pattern instructions within reach.
- Use a project basket or small container to keep your supplies organized.
- Ensure your workspace is comfortable and free from distractions to fully enjoy the crafting process.
- Keep a notebook or phone nearby to track your stitch counts and adjustments.
- Having a printed or digital version of your crochet patterns readily accessible helps you stay on track.
- A dedicated, tidy workspace allows you to focus and create a beautiful crochet cup cover efficiently.
Step-by-Step Instructions: How to Make a Crochet Cup Cover
Starting the Foundation Chain
- Begin your crochet cup cover by making a slip knot and chaining enough stitches to match your cup’s circumference.
- For a cup with a 10-inch circumference, chain approximately 30 stitches.
- Join the chain with a slip stitch to form a loop, making sure the chain is not twisted.
- Work the first round of single crochet stitches into each chain to create a solid base.
- Continue working in the round, using a stitch marker to keep track of the beginning of each round.
- Building a strong foundation ensures that your cup cover fits snugly and securely around the cup.
Building the Body of the Cup Cover
- Continue crocheting in rounds, using single crochet, half-double crochet, or your chosen stitch pattern.
- Work evenly around, maintaining a consistent stitch count to keep the cover uniform.
- For added texture, consider alternating stitch heights or incorporating decorative patterns like shells or bobbles.
- Check the height regularly by placing the cover on your cup to ensure a good fit.
- Typically, the body of the cover should reach about 4 inches in height.
- Consistent tension and careful stitching create a smooth, attractive cup cover that hugs the cup well.
Creating the Top Edge and Finishing
- Once you reach the desired height, complete the final round with slip stitches to create a neat edge.
- Optionally, add a decorative border such as a picot edge or scalloped trim for extra flair.
- Fasten off the yarn and use a yarn needle to weave in all loose ends securely.
- Check the fit of your crochet cup cover and make minor adjustments if needed.
- If you want an adjustable fit, crochet a small loop and attach a button to the top edge.
- Finishing touches like these ensure your cup cover is both functional and stylish.
Optional Embellishments and Customization
- Add small crochet flowers, appliques, or embroidered designs to personalize your cup cover.
- Consider using contrasting yarn colors to create stripes or color block designs.
- Attach buttons or charms that complement your cup cover’s theme or intended use.
- For a festive touch, create seasonal cup covers with themed colors and decorations.
- Personalizing your cup cover makes it a thoughtful, one-of-a-kind gift for friends and family.
- Customization transforms a simple project into a unique expression of your creativity.
Customizing Your Crochet Cup Cover
Exploring Yarn Colors and Textures
- Use bright, cheerful yarn colors to make your crochet cup cover stand out.
- Experiment with variegated or gradient yarns to create interesting color transitions.
- Consider textured yarns like boucle for a unique, soft finish.
- Coordinating yarn colors with your kitchen or office decor adds a personal touch.
- Mixing colors or creating patterns like stripes can give your cup cover a modern, trendy look.
- Customizing the color scheme ensures your cup cover complements your style and space.
Adjusting the Size for Different Cups
- Measure various cups in your home to create crochet cup covers in multiple sizes.
- Adjust the foundation chain length to match each cup’s circumference.
- You can create smaller cup covers for espresso cups or larger ones for travel mugs.
- Following crochet patterns while adapting stitch counts allows you to make covers for any cup size.
- Custom sizing ensures a snug and practical fit for all your favorite cups.
- Versatile patterns enable you to crochet a full set of matching cup covers for your household.
Adding Functional Features
- Include a small loop and button closure to make the cup cover adjustable for various cup sizes.
- Add a heat-resistant lining for extra insulation and protection against hot beverages.
- Consider making a matching coaster to pair with your crochet cup cover for a coordinated set.
- Incorporate textured stitches that provide additional grip, preventing the cover from slipping.
- Functional features enhance the usability and durability of your handmade cup cover.
- Practical design elements ensure your cup cover is both beautiful and efficient.
Creating Themed Designs
- Design seasonal or holiday-themed crochet cup covers using festive colors and motifs.
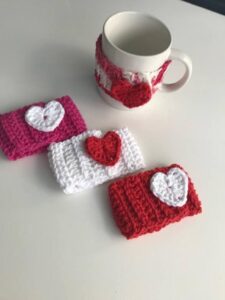
- Create covers featuring hearts for Valentine’s Day, pumpkins for Halloween, or snowflakes for winter.
- Themed designs make excellent gifts and can brighten up any coffee or tea ritual.
- Consider creating a set of cup covers for different holidays throughout the year.
- Themed projects allow you to explore new crochet patterns and techniques.
- Seasonal covers add a touch of celebration and warmth to your daily routine.
Making Cup Covers for Gifts and Sales
- Handmade crochet cup covers make thoughtful, practical gifts for coffee and tea lovers.
- Consider crafting personalized covers with initials or favorite colors for a meaningful touch.
- Small, quick projects like cup covers are perfect for selling at craft fairs or online shops.
- Market your cup covers as eco-friendly alternatives to disposable coffee sleeves.
- Offering customization options like color choices or added embellishments can attract buyers.
- Creating cup covers for gifts or sales helps you share your passion for crochet with a wider audience.
Experimenting with Different Crochet Patterns
- Explore a variety of crochet patterns to create unique textures and designs for your cup covers.
- Try using stitches like the moss stitch, basket weave, or ribbing for different looks.
- Combining various stitch patterns in one project can create eye-catching effects.
- Experimenting with new patterns helps you develop your crochet skills and creativity.
- Different patterns can offer varying levels of stretch, texture, and visual appeal.
- Each new pattern provides an opportunity to refine your technique and create beautiful, functional accessories.
Final Thoughts on Crochet Cup Cover
Making a crochet cup cover is a fun, easy, and rewarding project that combines practicality with creativity. Using simple crochet patterns, you can craft a cozy accessory that not only protects your hands from hot beverages but also adds a personal, decorative touch to your daily cup.
The customization possibilities are endless, from color choices and stitch patterns to embellishments and themed designs. Whether you’re creating cup covers for yourself, as gifts, or for sale, this project allows you to showcase your crochet skills in a functional way. Enjoy the process, and take pride in every stitch as you make your own beautiful crochet cup cover!


