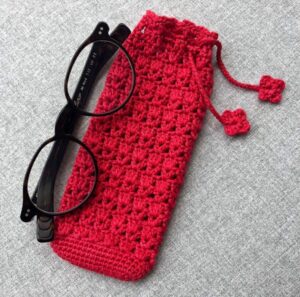
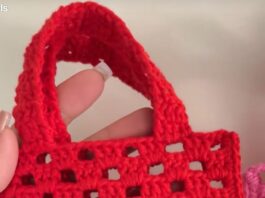
is a delightful project combining practicality and charm. If you’re tired of scratched lenses or misplacing your eyeglasses, this crochet eyeglass bag – step by step tutorial will teach you how to create a stylish, protective pouch. Whether you wear reading glasses, sunglasses, or blue-light eyewear, this bag keeps them safe and looks cute. You’ll feel proud carrying something you made yourself, and it’s also a thoughtful gift idea for friends and family.
This crochet eyeglass bag – step by step tutorial uses basic stitches like single crochet and half double crochet, making it beginner-friendly yet satisfying. With just a small skein of yarn and a single hook, you’ll be on your way within minutes. The project allows customization in size, color, and embellishments, so you can fit any eyeglass style or personal preference. Plus, there’s no lining required, keeping it simple and quick.
In this tutorial, you’ll also find helpful tips for proper fit, yarn choices, stitch tension, and optional closures. We’ll walk you through each step—from chain foundation to finishing edge—so your finished crochet eyeglass bag is neat, durable, and photogenic. Let’s gather materials and get started on this charming accessory.

Materials and Sizing Guide
To begin creating your crochet eyeglass bag – step by step tutorial, you need just a few basic supplies. This makes it a convenient stash-busting or on-the-go project that’s perfect for crafters of all levels.
Choose a worsted weight cotton or acrylic yarn—cotton provides structure while acrylic offers a softer finish. For most glasses, 30-40 grams (about 60–80 yards) is sufficient. If you want to make it more protective or padded, use sport weight with more coverage.
The recommended hook size is 4.0 mm or 4.5 mm. For tighter stitches (better for scratch resistance), choose the smaller size. For a softer feel, use a slightly larger hook. A stitch marker helps track rounds if you’re working in spirals.
You’ll also need scissors and a tapestry needle to weave in ends and finish off neatly. Optionally, you may want a ribbon or button if you’d like to add a closure or embellishment.
To determine size, measure your glasses case or the glasses themselves folded together. A typical eyeglass bag might be 7 inches wide and 3 inches tall. Your crochet eyeglass bag should be roughly 1 inch taller and wider for easy access and removal.
Keep good lighting and an ergonomic workspace to avoid strain. Once your materials are ready, it’s time to begin crafting the bottom foundation.
Constructing the Base and Front Flap
Start this crochet eyeglass bag – step by step tutorial with a foundation chain. Chain 25 stitches. This gives approximately 7 inches width, but adjust your chain count if you need more or less room.
Row 1: Single crochet (sc) into the second chain from hook and across. Chain one and turn. You’ll have 24 sc stitches. Row 2: sc in each stitch across, chain one and turn. Repeat until you reach desired height for the front panel—usually 14 rows (about 3.5 inches).
Make Row 15 only halfway: sc across 12 stitches and chain one without turning. This begins the flap. Now you’ll crochet just across those 12 stitches to build the flap over the front when folded. Continue working until the flap measures 2.5 inches tall (about 8–9 rows).
Once flap height is reached, break yarn leaving long tail for weaving. Fold the panel so the flap overlaps the front base by about 1.5 inches, then stitch the sides closed using your tapestry needle and tails. Weave in ends neatly.
This forms the body of your crochet eyeglass bag, with a flap that folds down to protect the glasses inside. Now let’s move to shaping the top edge for a polished finish.
Creating the Top Edge and Closure
Now that the body is assembled, it’s time to define the top edge and optionally add a closure. This elevates your crochet eyeglass bag – step by step tutorial from functional to stylish.
Attach yarn at one side of the flap’s bottom. sc evenly around the flap edge and along one side seam. Chain one at corners to keep the fabric flat. Continue around the base, even though the flap overlaps only the front portion.
Slip stitch across the top of the front panel to junction point where flap meets base. At the intersection, chain 6 to form a button loop. Join to the opposite side seam with a slip stitch, then continue sc around the rest of the edge. This chain forms the closure loop.
Fasten off, weave in all ends, and press the bag flat. For a closure, sew a small button on the flap’s front to anchor the loop. Choose a flat or decorative button depending on your style.
This final edging step ensures your flap folds snugly and the button loop closure secures the glasses inside. Your crochet eyeglass bag now looks finished and professional.
Customization and Decorative Ideas
The true delight of this crochet eyeglass bag – step by step tutorial is personalization. You can make each bag unique with decorative additions and creative touches.
Add stripes by changing yarn color at row boundaries while building the front panel. You can also make color-block bags or create ombré effects using graded yarn.
Decorate the flap with surface crochet or embroidery. Small flowers, initials, or stitched lines give character. Secure embroidery threads well to avoid shifting.
Consider attaching an appliqué—like a star, heart, or leaf—using leftover yarn scraps. Simply stitch it onto the flap or body for added dimension.
For extra padding or structure, slip in a thin fabric lining before stitching the sides closed. Use lightweight cotton or flannel, cutting to shape and hand-stitching inside.
Make matching smaller pouches or a set of eyeglass bags in varied sizes. This works well for sets to give as gifts or to hold different optical accessories.
FAQ about Crochet Eyeglass Bag – Step by Step Tutorial
- Is this crochet eyeglass bag suitable for beginners?
Yes – it uses basic stitches (sc, chain, slip stitch) and simple shaping, ideal for new crocheters. - How do I adjust the size for different glasses?
Measure glasses width and fold, adding about an inch for wiggle room. Adjust chain foundation and front panel height accordingly. - Can I use yarn scraps?
Absolutely – this is a great stash project. Just ensure your chosen yarn works with your hook size for consistent tension. - Is a button closure necessary?
No – you can finish simply with the flap tucking in. Button adds security and decorative appeal, but it’s optional. - Can this be machine washed?
If you use machine-washable yarn, hand wash or use a gentle cycle. Avoid the button loop getting caught. - How long does it take to crochet one bag?
Approximately 45–60 minutes for an experienced crocheter. Beginners may take longer for first attempts. - Can I sell crochet eyeglass bags made from this tutorial?
Yes! Handmade eyewear pouches are popular and useful items at craft fairs and online stores. - Any suggestions for embellishments?
Small buttons, beads, ribbons, appliqués, or embroidery designs personalize each bag beautifully. - How to keep the flap edges neat?
Work tight stitches for edging and sew seams carefully. Blocking lightly after assembly helps flatten and finish. - Can I make a fleece lining?
Yes, cut fleece to match interior and sew inside before closing seam for added protection.
Conclusion
By following this crochet eyeglass bag – step by step tutorial, you’ve created a functional, protective, and stylish pouch for your eyewear. This project is quick, uses minimal materials, and allows plenty of creativity through color and embellishment. From foundation chain to flap, edging, and closure, every step helps you build confidence in your crochet skills.
Whether for yourself, a gift, or to sell, this bag adds handmade charm to everyday life and keeps your glasses safe and scratch-free. Please share your honest feedback or questions below and let us know how your crochet eyeglass bag turned out. Your suggestions help shape future tutorials and inspire fellow crafters.


