is a charming and creative way to combine your love for reading with your passion for crochet. These adorable floral bookmarks serve both as a decorative item and a practical solution for marking your pages. Whether you’re crafting one for yourself or making a set to give as thoughtful handmade gifts, the result is always delightful. With just a small amount of yarn, a hook, and your imagination, you can bring a bit of beauty and softness into your reading routine.
What makes the crochet flower page label- Step by Step Tutorial even more appealing is its accessibility to all skill levels. Beginners will enjoy practicing their stitches on a quick, manageable project, while experienced crocheters can explore different petal styles, color combinations, and yarn textures. Each flower offers an opportunity to express creativity and add personal flair. The final product is lightweight, durable, and can easily slip between the pages without damaging them—making it perfect for books of all sizes.
In this detailed guide, you will find everything needed to create a stunning crochet flower page label. From required materials and stitch abbreviations to flower assembly and finish, every step is designed to make your crafting experience smooth and enjoyable. So, pick up your hook and let’s get started with this delightful crochet flower page label- Step by Step Tutorial that blends practicality and beauty in one handmade piece.

Materials Needed for the Crochet Flower Page Label
To begin this crochet flower page label- Step by Step Tutorial, it’s important to gather all necessary supplies. The good news is, you don’t need much to make one! A few yarn scraps and your favorite crochet hook are enough to create a beautiful page label.
Use light worsted weight cotton yarn for best results. Cotton holds shape well and doesn’t stretch much, making it ideal for this type of project. Choose two or three colors—one for the flower petals, another for the center, and optionally, a green yarn for a leaf or stem.
A 3.5 mm to 4 mm crochet hook is commonly used with cotton yarn. If your yarn is thicker or thinner, adjust your hook size accordingly. You want your stitches to be tight enough to hold shape but not so tight that it’s difficult to work.
You’ll also need a tapestry needle for weaving in ends, and scissors for trimming yarn. Optional materials include a small button for the flower center or stiffener spray if you want your flower to retain a firmer shape.
Each crochet flower page label begins with a flower head. This is the eye-catching part that will peek out from the book’s top. You’ll crochet a simple circle for the center, then build out your petals using either basic chains or puff stitches, depending on your style.
The flower is then attached to a tail, typically a narrow crocheted strip or chain stitch string, which lays flat between the book’s pages. A small leaf can be added at the end of the tail, making the label look even more like a natural stem.
With your materials ready, you’re well-prepared to start crafting your own unique and lovely crochet flower page label that’s both functional and visually appealing.
Step-by-Step: Crocheting the Flower Head
Begin with a magic ring using the color you chose for the flower center. This is the base where your petals will grow. Chain 1 and make 6 single crochets into the ring. Pull it tight and join with a slip stitch to the first stitch.
For the petal row, switch to your petal color. Chain 2 (counts as first half double crochet), make 2 more half double crochets in the same stitch. Skip a stitch, slip stitch in the next. Repeat around until you have 6 evenly spaced petals.
To make fuller petals, you can try double crochets or even use the puff stitch. This creates a more textured flower that pops off the page and adds dimension to your label.
Fasten off your yarn and weave in any loose ends. If you want a more structured flower, lightly steam it or use fabric stiffener spray. This helps the petals stay flat and defined.
At this point, you can add a decorative button or bead in the center if you like. Secure it tightly using a needle and matching thread or yarn. This gives the flower a finished, professional look.
Your flower is now complete and ready to be attached to the stem of the crochet flower page label.
Creating the Stem and Leaf
To make the stem, attach yarn to the back of your flower and chain about 30-40 stitches, depending on how long you want the label to be. This chain will rest inside your book.
After completing your chain, turn and single crochet back down the chain. This gives the stem more structure and thickness, making it more durable for repeated use.
To make a small leaf, chain 6 and then work the following into the chain: 1 single crochet in second chain from hook, 1 half double crochet, 1 double crochet, 1 half double crochet, 1 single crochet. Slip stitch into the last chain and fasten off.
Sew or crochet the leaf to the end of the stem. Position it so that it lays flat and aligns with the direction of the stem, creating a balanced look.
Weave in all remaining ends using your tapestry needle. Be sure there are no loose threads that might snag on book pages or unravel over time.
Congratulations—you now have a complete crochet flower page label that is both pretty and practical!
Tips for Personalizing Your Page Label
One of the best parts of making a crochet flower page label is how easy it is to customize it. You can change the flower type by modifying the petal shape, or even add multiple layers of petals for a fuller design.
Color choice plays a big role in how your label looks. Try using ombré yarn for a gradient effect, or mix complementary colors to make the flower stand out more.
If you want a softer and more whimsical look, try using lace yarn or a fine cotton blend. This gives the petals a delicate appearance perfect for romantic or vintage-themed books.
For a sturdier design, especially if the label will be used often or gifted to a child, consider using acrylic yarn or a yarn blend that won’t wear out easily.
Add decorative touches like small buttons, beads, or even a touch of embroidery. A tiny embroidered smiley face in the flower center adds a cute, personal element.
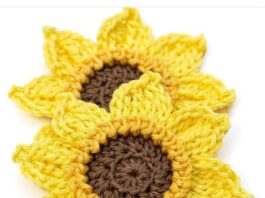
You can also create a set of these labels using different flowers: roses, sunflowers, daisies, or tulips—making each book in your collection bloom with color.
FAQ about Crochet Flower Page Labels
What type of yarn is best for a crochet flower page label?
Cotton yarn is best because it holds its shape well and doesn’t stretch, making it perfect for delicate crochet projects like flower bookmarks.
Can beginners make a crochet flower page label?
Yes! This project is beginner-friendly and a great way to practice basic stitches like single crochet, half double crochet, and slip stitch.
How long does it take to make one?
It usually takes 30 to 45 minutes to complete one, depending on your crochet speed and how detailed your flower is.
Do I need to stiffen the flower?
It’s optional. You can use fabric stiffener or steam it gently if you want the petals to lay flat and hold their shape better.
Can I wash the page label?
Yes, if made with washable yarn. Hand wash gently and let it air dry flat to preserve the shape.
What size should the label be?
The flower should be about 2–3 inches in diameter, and the stem can be 8–10 inches long. Adjust based on your book size.
Conclusion
In this crochet flower page label- Step by Step Tutorial, we explored every detail you need to craft a beautiful, handmade page marker that’s as charming as it is practical. From selecting the right yarn and hook size to crocheting petals and assembling the leaf-tipped stem, each part was designed to be both easy and fun. This project is perfect for all skill levels and offers plenty of room for creative expression.
These adorable flower bookmarks not only brighten your reading time but also make heartfelt handmade gifts. Whether you’re making them for yourself or for loved ones, each label carries a bit of your time and care stitched into it.
I hope you enjoyed this crochet flower page label- Step by Step Tutorial as much as I enjoyed creating it for you. If you tried the pattern, please leave a sincere opinion in the comments! I’d also love to hear your suggestions or creative twists on the design.


