If you’re looking for a creative, fun, and practical home décor project, this crochet frog doorstop pattern is exactly what you need! Not only does it add a quirky touch to any room, but it also serves a useful purpose—keeping doors open or closed while making everyone smile. Whether you’re a seasoned crocheter or just picking up your hook for the first time, this project is a joyful way to express your skills.
The best part of this crochet pattern is how adaptable it is. You can easily customize the size, color, or expression of your frog to match any space in your home. Plus, it’s a great project for using up leftover yarn and fabric scraps. We’ll guide you step-by-step, so you won’t need to guess at any point.
In this article, we’ll walk you through everything: the materials needed, the measurements and cuts, and the full crochet tutorial. By the end, you’ll have a cute and sturdy crochet frog doorstop that’s as fun to make as it is to display. Let’s get started!
Materials and Measurements
Before diving into the actual crochet pattern, it’s important to gather all your supplies and understand what materials you’ll be working with. This will help make the process smoother and more enjoyable from start to finish.
To make this adorable crochet frog doorstop, you will need:
-
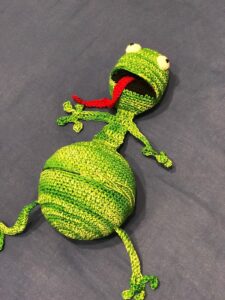
Worsted weight yarn in green (main color), white (eyes), black (pupils), and red (mouth/tongue).
-
A 4.0 mm (G) crochet hook.
-
Polyester fiberfill for stuffing.
-
Small weighted filling (like rice, pebbles, or beans) in a sealed bag to add weight.
-
Stitch markers, scissors, and a yarn needle for finishing.
-
Optional: felt for embellishments, fabric scraps, or safety eyes.
Yarn quantity breakdown:
-
Green: ~120g for the body, legs, and head.
-
White: ~10g for the eyes.
-
Black: ~5g for pupils or details.
-
Red: ~5g for the smile or tongue.
Fabric cuts (if lining the base for extra strength):
-
One circle of felt or canvas measuring 4.5 inches (11.5 cm) in diameter.
-
One small fabric pouch (4″ x 4″) to hold your weighted material securely.
Now that you’re all set with your materials, let’s jump into the first part of the actual crocheting process—the body!
Creating the Frog’s Body
The body is the foundation of your crochet frog doorstop and will house the weighted insert. We’ll begin by creating a wide, squat base that is both stable and charming in shape.
Start with a magic ring, then:
-
Round 1: 6 single crochets (sc) into the ring.
-
Round 2: Increase in each stitch (12 sc).
-
Round 3: (1 sc, inc) repeat around (18 sc).
-
Continue increasing until the base is approximately 4.5 inches (11.5 cm) wide—around 60 stitches.
-
Work even rounds (60 sc) for the next 15–18 rows to build up the body’s height.
-
Insert your sealed pouch of weight in the bottom, then begin decreasing to shape the top dome.
Continue decreasing:
-
Round 1: (8 sc, dec) repeat around.
-
Next rounds: decrease evenly until about 12 stitches remain.
-
Stuff with fiberfill as you go, then fasten off and weave in the ends.
The key to a successful body is proper stuffing and symmetry. The bag of weighted filler should sit snugly at the base, while the fiberfill shapes the rest of the frog. This makes your doorstop solid and practical.
Making the Head, Eyes, and Legs
Now let’s bring the frog to life with a cheerful head, bulging eyes, and floppy legs. This section adds character and charm to your crochet pattern.
For the head:
-
Magic ring with 6 sc.
-
Increase evenly to reach about 36 sc.
-
Work even rounds for 10 rows.
-
Begin to decrease and stuff with fiberfill.
-
Sew the finished head to the top of the body, tilted slightly for personality.
For the eyes (make 2):
-
Magic ring with 6 sc in white.
-
Increase to 12 sc.
-
Make a smaller black pupil piece (or use safety eyes).
-
Sew or glue the pupil onto the white part.
-
Attach both eyes to the top of the head.
For the legs (make 4 total):
-
Chain 10, work 9 sc back.
-
Turn and make 2 more rows of 9 sc each.
-
Shape the foot by increasing to 12 sc for 2 rows.
-
Fasten off and sew to the sides and front of the body for a “sitting frog” look.
Adding the limbs gives the frog that unmistakable cartoon style that is both friendly and amusing. The amphibian appeal is irresistible!
Final Details and Customization
With the base, head, and limbs complete, it’s time to add finishing touches to your crochet frog doorstop pattern. This is the fun part where your frog takes on its unique personality.
Facial features:
-
Use red yarn to embroider a wide grin on the frog’s face.
-
Add a pink or red felt tongue if desired.
-
Optional: embroider small black nostrils just above the mouth.
Extra decoration:
-
Sew on small green bumps or ridges down the back.
-
Create a lily pad base from dark green felt or crochet.
-
Add a bow tie or a small crown for a prince frog theme!
Functional enhancements:
-
Add a non-slip base with rubber fabric or grippy dots.
-
Sew a name tag on the underside for gifting.
-
Stitch down the legs more firmly if young children are around.
These little choices let you personalize the frog and make it your own. Whether you want a classic, cartoonish, or elegant version, the crochet pattern allows for full creativity.
Why This Crochet Frog Doorstop is Worth Making
Not only is this crochet frog doorstop pattern a joy to create, but it also has practical benefits for your home. It combines functionality with creativity, making it a great project for both new and experienced crocheters.
Reasons to love this project:
-
It’s beginner-friendly yet allows for complex details if you want to challenge yourself.
-
It uses basic stitches like single crochet, increase, and decrease, which are great for practicing.
-
You get to use up leftover yarns and small fabric scraps, making it budget-friendly.
-
It’s a cute way to keep doors open without boring rubber wedges.
-
Kids and guests love its playful look—it’s a conversation starter!
-
It makes a wonderful handmade gift for friends, neighbors, or anyone who appreciates unique decor.
Most importantly, it’s satisfying to create something that serves a real purpose while also adding a warm, whimsical feel to your space. The mix of artistry and function is what makes this one of our favorite crochet home décor ideas.
Final Thoughts
This Crochet Frog Doorstop Pattern is more than just a fun weekend project—it’s a charming piece of homemade décor that will serve you every day. Whether placed in your kitchen, hallway, nursery, or even a patio door, this frog is always welcome.
To recap:
-
You gathered your materials and prepared precise measurements.
-
You crocheted the base body and filled it with weight.
-
You added a cheerful head, quirky eyes, and fun legs.
-
You customized it with personal touches and made it functional for your space.
We hope you had fun following this crochet pattern and that your frog brings smiles wherever it sits. Be sure to bookmark this tutorial and share it with fellow crafters—especially those who adore animal-themed designs.
Happy crocheting! 🐸🧶


