
Crochet Scarf – Tutorial is a practical and enjoyable project for anyone who wants to create a comfortable handmade accessory while developing essential crochet skills. A scarf is one of the most versatile crochet projects because its basic construction can be adapted to almost any style. You can make it narrow or wide, short or long, lightweight for transitional weather, or warm and substantial for colder days. With the right combination of yarn, hook size, stitch pattern, and color, a simple crochet scarf can become a personalized accessory that reflects your creativity while remaining useful and wearable.
Another advantage of following a Crochet Scarf – Tutorial is that the project can be approachable for beginners without becoming boring for experienced crocheters. A straightforward scarf can be created by repeating basic stitches across rows, allowing new crocheters to practice tension, turning chains, straight edges, and consistent stitch counts. More experienced makers can introduce stripes, textured stitches, decorative borders, or color changes. Since a scarf does not usually require complicated shaping, most of the attention can be focused on achieving neat stitches and creating a fabric with the right balance of warmth, softness, and drape.
This crochet scarf pattern can also be customized according to the yarn already available in your collection. Soft acrylic, wool blends, cotton blends, and other suitable yarns can all create different results, so it is important to consider how the finished scarf will be worn before beginning. Throughout this tutorial, you will learn how to choose yarn and a compatible hook, create the foundation chain, work the main scarf body, maintain straight edges, add optional color and texture, finish the ends, and personalize the project. The instructions use common US crochet terms, making the techniques easy to recognize and apply to future crochet projects.
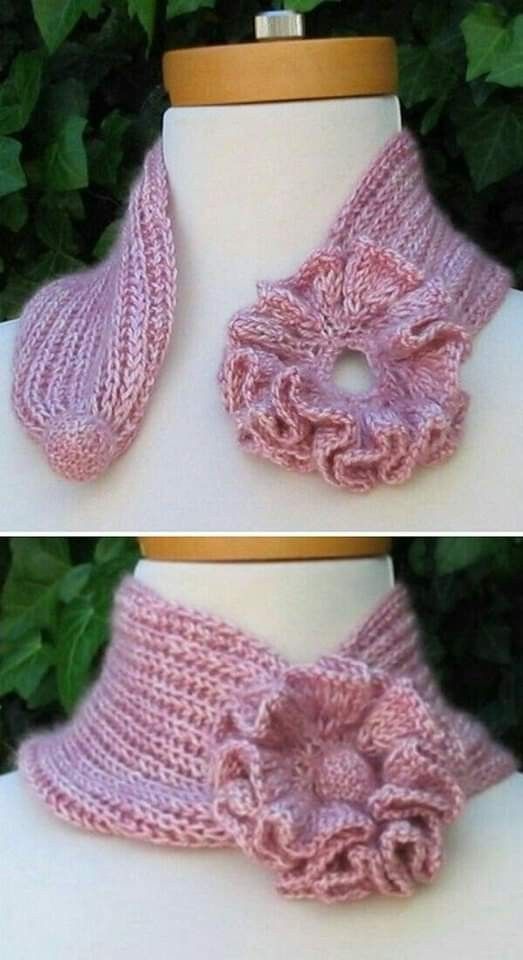
Materials and Basic Stitches for the Crochet Scarf
Begin your Crochet Scarf – Tutorial by selecting yarn that feels comfortable against the skin. Because a scarf is normally worn around the neck, softness is particularly important. Medium-weight yarn is a convenient starting point because it provides noticeable stitch definition without being excessively thin or bulky.
Check the yarn label for the manufacturer’s recommended crochet hook range. This provides a useful starting point, although you may need to adjust the hook according to your personal tension and desired fabric. A larger hook generally creates more open stitches and additional drape, while a smaller hook can create a denser fabric.
Gather a crochet hook, scissors, yarn needle, measuring tape, and optional stitch markers. Stitch markers can be placed at the first and last stitch of each row, helping beginners recognize the edges and avoid accidentally increasing or decreasing the scarf width.
The chain stitch (ch) creates the foundation for many scarf patterns. Begin with a slip knot on your hook, yarn over, and pull the yarn through the existing loop. Continue repeating this motion until the foundation reaches the approximate width you want.
Single crochet (sc) creates a compact, warm fabric. Insert the hook into the appropriate stitch, yarn over and pull up a loop, then yarn over again and pull through both loops on your hook. This stitch is particularly useful for borders and dense scarves.
Half double crochet (hdc) is another excellent choice. Yarn over, insert the hook into the stitch, yarn over and pull up a loop, then yarn over and pull through all three loops on the hook. It is taller than single crochet and creates a comfortable balance between texture and flexibility.
How to Crochet the Scarf Step by Step
Begin by making a small gauge swatch using your selected yarn and stitch. Although an exact gauge is not always essential for a scarf, a test swatch allows you to evaluate the texture, width calculations, and drape before committing to the entire crochet scarf pattern.
Create your foundation chain according to the desired scarf width. Instead of relying on one universal number, measure the chain gently without stretching it. Remember to account for any additional turning chains required by your selected stitch.
For an approachable version, work half double crochet across the foundation. Insert the hook into the appropriate chain, complete one hdc, and continue across. Count the stitches at the end of the row so you have a reference for all subsequent rows.
Create the necessary turning chain, turn your work, and crochet back across the row. Pay particular attention to the first and last stitches. Missing an edge stitch can gradually make the scarf narrower, while accidentally working extra stitches can make it wider.
Continue repeating the row until the Crochet Scarf reaches your preferred length. Place the scarf on a flat surface periodically and measure it without stretching. You can also gently check how it drapes to determine whether additional rows are needed.
Maintain relaxed and consistent tension while crocheting. If the stitches suddenly become much tighter or looser, the scarf width may change. If you stop working and return later, crochet a few stitches slowly while paying attention to tension before continuing at your normal pace.
Adding Texture, Colors, Borders, and Decorative Details
Once you understand the basic construction, experiment with texture. Alternating single crochet and half double crochet can create subtle surface variation without making the stitch pattern difficult. You can also work into selected loops to produce raised horizontal lines.
Color changes are another simple way to personalize the Crochet Scarf – Tutorial. Create wide stripes using two colors, alternate several coordinated shades, or use a contrasting color only at the ends. Plan the sequence before starting if you want the stripes to appear symmetrical.
To change colors neatly, begin the final stitch of the current color but stop before completing its last yarn-over. Use the new yarn color to finish the stitch, then continue crocheting normally. Secure and weave the yarn tails carefully during finishing.
A simple border can make the scarf look more polished. Attach yarn at one corner and work single crochet stitches evenly around the perimeter. Place additional stitches at the corners when necessary so the border lies flat rather than pulling inward.
Fringe can provide a traditional decorative finish. Cut equal lengths of yarn, group several strands together, fold them in half, and attach them evenly along the scarf ends. Trim the fringe only after all groups have been attached so the final length remains consistent.
You can also create small tassels, crocheted edging, or a contrasting final row. Avoid adding too many different details to the same handmade crochet scarf. A simple stitch pattern with one attractive finishing feature often creates a cleaner and more balanced result.
Finishing, Blocking, and Customizing Your Crochet Scarf
When your scarf reaches the desired length, finish the final stitch and cut the yarn while leaving a tail long enough for secure weaving. Pull the tail through the remaining loop and tighten gently without distorting the edge.
Thread the yarn tail onto a yarn needle and weave it through several nearby stitches. Change direction and continue weaving before trimming the excess. Repeat this process with all yarn ends created by color changes or additional yarn balls.
Blocking can improve the appearance of the finished crochet scarf by helping straighten edges and relax uneven stitches. Always use a blocking method appropriate for your yarn fiber and follow the yarn manufacturer’s care recommendations.
Lay the scarf flat after blocking and check the edges. If you added a border, make sure it is not causing the fabric to ripple or pull inward. Uneven borders can sometimes be corrected by adjusting the number or spacing of stitches.
Personalization does not need to involve complicated crochet. Different yarn colors, stripe widths, textures, borders, and dimensions can completely transform the same basic Crochet Scarf Pattern. Neutral shades can create a versatile everyday scarf, while brighter combinations can produce a bold statement accessory.
Before wearing or gifting the scarf, inspect the finished project carefully. Check that all yarn ends are secure and that decorative additions are firmly attached. Keep the yarn label or record the fiber information so the scarf can be cleaned according to the appropriate care instructions.
FAQ About the Crochet Scarf – Tutorial
Is this Crochet Scarf – Tutorial suitable for beginners?
Yes. A basic scarf is one of the most approachable projects for learning crochet because it can be constructed with repeated rows and requires relatively little shaping.
What is the easiest stitch for a crochet scarf?
Single crochet and half double crochet are both beginner-friendly. Single crochet creates a denser fabric, while half double crochet works up more quickly and generally provides additional drape.
What yarn should I use for a crochet scarf?
Choose yarn that feels comfortable against the skin and provides the warmth and texture you want. Medium-weight yarn is a versatile option for many beginner scarf projects.
How wide should a crochet scarf be?
There is no mandatory width. A narrower scarf creates a lightweight accessory, while a wider scarf provides more coverage. Adjust the foundation chain according to your preferred dimensions and gauge.
How long should I make my crochet scarf?
The ideal length depends on personal preference, styling, and the intended wearer. Measure the project periodically rather than relying only on a predetermined number of rows.
Why is my crochet scarf getting narrower?
You are probably skipping stitches near the row edges. Count your stitches regularly and consider marking the first and last stitch with stitch markers.
Why is my scarf becoming wider?
Extra stitches are likely being added at the beginning or end of rows. Learn to identify the correct final stitch and keep the same stitch count throughout the project.
Why are the edges of my scarf uneven?
Uneven edges can result from inconsistent turning chains, missed stitches, extra stitches, or changing tension. Stitch markers can make the edge stitches easier to identify.
Can I make a scarf using only single crochet?
Absolutely. A single crochet scarf is simple, warm, and ideal for practicing consistent tension and stitch placement.
Can I use multiple colors?
Yes. Stripes are one of the easiest ways to customize a scarf. You can use two contrasting colors or several coordinated shades.
How do I make a crochet scarf softer?
Start with a soft yarn and avoid using a hook that makes the fabric excessively dense. Proper washing and blocking according to the yarn care instructions can also help the stitches relax.
Should I block my finished scarf?
Blocking is often helpful because it can improve drape, straighten the edges, and make the stitch pattern appear more consistent. The correct method depends on the fiber.
Can I add fringe to my scarf?
Yes. Fringe is a classic finishing option. Cut strands evenly and attach them consistently along both short ends of the scarf.
How can I make the scarf look more professional?
Consistent tension, straight edges, securely woven yarn ends, careful color changes, and neat finishing make a significant difference in the final appearance.
Conclusion
The Crochet Scarf – Tutorial demonstrates how a simple foundation and repeated crochet stitches can become a comfortable and attractive handmade accessory. By beginning with a carefully measured chain, working consistent rows, maintaining straight edges, and finishing the yarn ends neatly, you can create a scarf without relying on complicated shaping or advanced techniques.
Throughout this tutorial, you learned how to choose suitable yarn and a crochet hook, create a foundation chain, work single crochet and half double crochet, maintain consistent tension, recognize edge stitches, change colors, add stripes, create borders and fringe, weave in yarn ends, and block the finished project. These fundamental techniques are useful far beyond scarves and provide an excellent foundation for many future crochet patterns.

