The Crochet Sock – Step by Step Tutorial is a perfect project for anyone who loves creating handmade, cozy, and stylish accessories. Crochet socks are not only functional for keeping your feet warm but also allow you to personalize your footwear with colors, textures, and designs that reflect your style. This project is great for beginners looking to learn new techniques and for experienced crocheters who want a relaxing yet rewarding pattern to make.
Making crochet socks is a wonderful way to create unique, custom-fit pieces that can be gifted to loved ones or kept as a special handmade treat. Unlike store-bought socks, crochet socks can be made with different yarn types and sizes, giving you control over how warm, soft, or breathable they are. They can be designed for everyday wear or for special occasions.
In this tutorial, you will learn everything you need to know to create a pair of crochet socks from start to finish. The guide includes materials, instructions, and tips for achieving the perfect fit. At the end of the article, you will also find a FAQ section with answers to common questions and a conclusion to wrap up everything you have learned.

Materials Needed for Crochet Sock
To begin this Crochet Sock – Step by Step Tutorial, you will need lightweight or sock-weight yarn, a 3mm to 3.5mm crochet hook, a yarn needle, scissors, and a measuring tape. The yarn you choose will determine the final feel of the socks—cotton yarn for breathability, wool for warmth, or acrylic for durability.
Sock yarn is highly recommended because it is designed to be durable and soft, making it ideal for footwear. Many sock yarns also have a bit of elasticity, which helps the sock hold its shape.
A smaller hook size will create tighter stitches, making the socks more durable and comfortable to wear. A yarn needle will be used for weaving in ends after you finish crocheting.
You may also want to have stitch markers to keep track of the beginning of each round, especially when working in the round for the toe and heel sections.
Before starting, it’s helpful to measure your foot length and circumference to ensure the best fit. This will allow you to adjust the number of stitches if necessary.
Once you have gathered all the materials, you are ready to start working on your crochet sock.
Crocheting the Toe and Foot
To start the Crochet Sock – Step by Step Tutorial, you will begin by making the toe. Create a magic ring and crochet 6 single crochet (sc) stitches into it. Pull the ring tight and join with a slip stitch (sl st).
Increase evenly around in the next few rounds until you have the desired number of stitches to fit the width of your foot. For example, increase by 6 stitches in each round until you reach 36 stitches for a small adult foot.
Once the toe circle is wide enough, stop increasing and continue working in the round to build the foot length. Use single crochet (sc) or half double crochet (hdc) stitches for a dense and comfortable fabric.
Continue crocheting until the sock reaches the base of your ankle. Be sure to try it on as you go to ensure a snug fit.
You can add stripes or color changes to personalize your sock. Just be sure to carry the yarn neatly inside to avoid bulkiness.
At this point, your sock foot section is complete, and you are ready to create the heel.
Making the Heel and Ankle
The heel is an important part of the Crochet Sock – Step by Step Tutorial as it gives the sock shape and structure. Begin by working back and forth in rows on half of your stitches to form a heel flap.
Once the flap is long enough, you will decrease stitches to create the heel turn. This forms the curved shape that cups the heel.
After shaping the heel, pick up stitches along the edges of the flap and continue working in the round again. This connects the heel back to the foot.
As you work up the ankle, you can decide on the height of your sock—ankle-length, mid-calf, or even knee-high. Add more rows for taller socks.
For a snug fit, use ribbing stitches like front post double crochet (fpdc) and back post double crochet (bpdc) for the final rows around the leg.
Once you reach the desired length, finish with a slip stitch and fasten off the yarn, weaving in all loose ends neatly.
Customizing Your Crochet Socks
This Crochet Sock – Step by Step Tutorial allows for endless customization. You can use self-striping yarn to create colorful patterns without changing yarns manually.
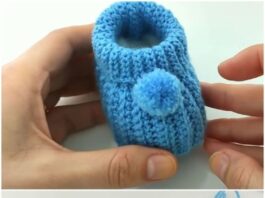
Add embellishments like pom-poms, buttons, or bows to give your socks a playful touch.
For colder weather, use thicker yarn and a larger hook to make cozy slipper socks. Add non-slip fabric paint to the soles for extra safety.
You can also experiment with textured stitches like bobbles or shells for a more decorative look.
If you are making socks as gifts, personalize them with the recipient’s favorite colors or themes.
Crochet socks are also great for selling at craft fairs or online shops because they are unique and handmade, making them highly desirable.
FAQ – Crochet Sock
1. What type of yarn is best for crochet socks?
Sock-weight yarn with a mix of wool and nylon is ideal because it is durable and elastic.
2. Can I make crochet socks if I’m a beginner?
Yes, as long as you know basic stitches like chain, single crochet, and slip stitch.
3. How long does it take to make a pair of socks?
Depending on your skill level, a pair can take anywhere from 4 to 8 hours.
4. Will crochet socks stretch out over time?
If you use the right yarn with some nylon or elastic, they will hold their shape well.
5. Can I machine wash crochet socks?
Yes, but always check the yarn label. Most sock yarns are machine washable on a gentle cycle.
6. How do I adjust the size for different feet?
Simply add or subtract stitches in the toe increase rounds and adjust the foot length as needed.
Conclusion
The Crochet Sock – Step by Step Tutorial is a versatile and rewarding project that lets you create cozy, personalized socks for yourself or as gifts. You learned about the materials, how to crochet the toe, foot, heel, and ankle, and tips for customizing your socks.
Crochet socks are not only practical but also a fun way to express your creativity. They can be made in any size, color, or style, making them a fantastic handmade accessory.
We hope you enjoyed this tutorial! Please share your thoughts, experiences, and suggestions in the comments—we’d love to hear about your crochet sock creations!


