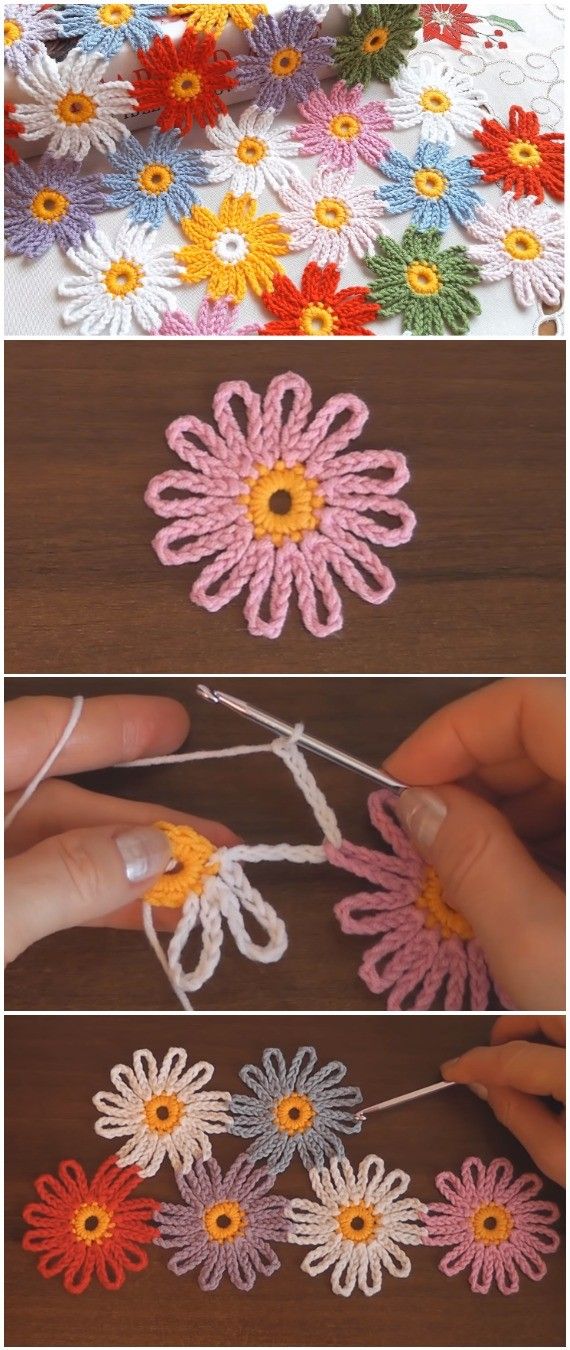
If you’re passionate about crafting and want to add a lovely handmade touch to your projects, this easy crochet flower for application – step by step tutorial is perfect for you. Crochet flowers are timeless, versatile, and can brighten up everything from hats to bags, blankets, and garments. Whether you’re a seasoned crocheter or just starting out, this flower pattern is quick, beginner-friendly, and rewarding.
Creating an easy crochet flower for application doesn’t require a lot of materials or time, but it delivers a beautiful result. It’s the kind of project that allows you to use leftover yarns creatively and gives you freedom in color, size, and design. In just a few steps, you’ll have a charming flower you can sew onto anything or even turn into a pin or hair accessory.
In this comprehensive step by step tutorial, we’ll cover the materials needed, stitch types, how to build the base of the flower, how to add petals, and how to finish your work cleanly. By the end, you’ll not only have made your first flower, but you’ll also be inspired to create dozens more. Let’s begin by preparing our materials and tools.

Materials Needed and Choosing the Right Yarn
To start your easy crochet flower for application, you need only a few basic tools that are often already in a crocheter’s stash. The simplicity of this project makes it accessible for beginners and perfect for quick crafting sessions.
The most important element is your yarn. For most flower applications, use lightweight yarn like cotton or DK (double knit). Cotton yarn is ideal because it provides structure and stitch definition, which are essential for the crisp look of a flower.
Choose a crochet hook that matches your yarn’s weight. If you’re using DK yarn, a 3.5 mm or 4 mm hook works well. For a tighter stitch and firmer flower, you can size down slightly. Always check the yarn label for recommended hook sizes.
You’ll also need scissors and a yarn needle to weave in the ends once your flower is complete. If you plan to attach the flower to another item, a sewing needle and matching thread or additional yarn will help with that.
Optional but helpful tools include stitch markers to track your starting point and a small blocking mat if you want your finished flower to lay perfectly flat.
If you’re crafting multiple flowers for a larger project—like a garland or blanket—consider using coordinating colors and keeping your petals the same size for uniformity.
Finally, prepare your workspace with good lighting and a flat surface, especially if you’re working with small stitches or dark yarn colors.
How to Crochet the Center of the Flower
The center of your easy crochet flower for application sets the foundation for the entire piece. It’s usually worked in the round, starting with a magic ring or chain circle.
Start by creating a magic ring or chaining four and joining to form a loop. This creates a closed circle where your first round of stitches will be placed.
Into this loop, work 10–12 single crochet stitches (or half double crochet for a puffier center), depending on how full you want the flower. Join the round with a slip stitch.
You can change yarn colors after this round if you’d like the petals to contrast with the center. This adds a lovely pop of color and makes each flower unique.
The next step is to chain a base for your petals. Chain three or four (depending on petal height) and slip stitch into every second stitch of the previous round. This forms loops to build your petals on.
Finish the round of loops, fasten off the center color if changing, and begin working the petal layer using the new yarn. Each loop will hold one petal.
Before continuing, use your yarn needle to weave in the center tail end. This prevents unraveling and gives the center a clean look.
Forming the Petals and Layering
The petals are what bring life to your easy crochet flower for application, and you can easily customize them with different stitch heights and yarn textures.
To form petals, insert your hook into the first loop from the previous round. Work stitches like single crochet, half double crochet, double crochet, and back down to single crochet to shape a petal.
Repeat this petal pattern in every loop around. For instance, one petal could be: SC, HDC, DC, HDC, SC. Adjust the height of the stitches for larger or smaller petals.
If you want fuller flowers, consider adding a second petal layer behind the first. Chain slightly larger loops behind the existing ones and repeat the same stitch sequence.
You can alternate petal colors or add a third row for a layered 3D effect. This gives the flower depth and makes it stand out when sewn onto other projects.
After finishing the petals, slip stitch into the base and fasten off. Weave in all loose ends using a yarn needle and trim excess yarn.
For extra embellishment, sew a button, bead, or pearl into the flower’s center. This adds a professional look and adds sparkle or texture to your design.
Attaching the Flower and Project Ideas
Once your easy crochet flower for application is complete, you’re ready to attach it to your chosen item. Depending on your intended use, there are several methods for doing this.
If you’re sewing the flower onto a hat, headband, or bag, use a yarn needle and the same yarn color to whip stitch around the center and edges to secure it firmly.
For more flexibility, attach a pin backing or safety pin to make the flower removable. This is great for items you want to reuse or reposition.
Hot glue can be used for items that don’t need to be washed—like hair clips, gift tags, or home décor. It’s fast, effective, and keeps the flower in place.
You can use multiple flowers to create stunning arrangements. Attach them to a string for a garland, or add them to a plain pillow for a handmade accent.
Crochet flowers also look beautiful on handmade cards or gift wraps. Simply glue or stitch them onto paper or fabric for a rustic, personal touch.
If you’re selling your creations, bundling several easy crochet flower pieces together can add value and appeal. Package them in sets by color or size for market-ready products.
FAQ – easy crochet flower for application – Step by Step Tutorial
Can beginners follow this crochet flower pattern?
Absolutely. This easy crochet flower for application tutorial uses basic stitches and includes detailed steps perfect for those just starting out.
What type of yarn works best for crochet flowers?
Cotton yarn is ideal for structure and definition, but you can experiment with any leftover yarn you have. Just adjust your hook size accordingly.
How long does it take to crochet one flower?
On average, it takes 15–30 minutes to complete one flower, depending on your stitch speed and the complexity of the design.
Can I wash the flower once it’s sewn onto an item?
Yes, if your yarn is machine washable. Use a gentle cycle and avoid high heat. Avoid machine washing items with glued-on flowers.
How can I make the flower larger or smaller?
To increase the size, use thicker yarn, a larger hook, or add more petals. For smaller flowers, reduce your stitch height and use lighter yarn.
Can I use these flowers for selling or as part of my business?
Yes! Handmade crochet flowers are popular in markets, online stores, and as embellishments for custom products. Just be sure to market them clearly.
Conclusion
This easy crochet flower for application – step by step tutorial has shown you how to create a beautiful, versatile accessory using simple materials and techniques. From crafting the center and petals to attaching the final flower to various surfaces, the entire process is beginner-friendly yet full of creative possibilities.
Whether you’re using these flowers to decorate clothing, accessories, or home décor, their charm and handmade appeal never go out of style. They’re also great for practicing stitch control and exploring color combinations. With endless customization options, you can make every flower unique.
If you found this tutorial helpful, please leave a sincere opinion and share your project results. We’d love to know how you used your easy crochet flower for application and hear any suggestions you might have for future tutorials!


