If you’re looking for a stylish and practical summer accessory, How to Crochet a Beautiful Striped Sun Hat is the perfect project for you. This delightful DIY offers a blend of beauty and function, keeping you cool under the sun while letting you show off your crafting skills. Whether you’re a beginner or an experienced maker, this guide will walk you through each step of the process.
The charm of this hat lies in its simplicity and the endless possibilities of crochet patterns. By mixing colors and using lightweight yarns, you can create a customized sun hat that’s perfect for beach days, garden strolls, or simply lounging in your backyard. Plus, making your own accessories is a rewarding way to expand your wardrobe while exploring your creativity.
Before we jump into the step-by-step instructions, it’s important to understand what materials you’ll need, how to choose the right yarn, and what crochet stitches work best for this pattern. Keep reading to discover all the essential information and master crochet techniques to make your very own striped sun hat.
Materials and Measurements
To begin with, you’ll need a few basic supplies that are easy to find in any craft store or online. Choosing the right materials is key to achieving a lightweight, breathable, and durable sun hat that’s comfortable to wear.
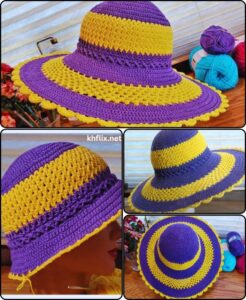
Start by selecting a cotton or cotton-blend yarn. Cotton is ideal for sun hats because it’s breathable, holds shape well, and comes in a variety of vibrant colors. For this striped design, choose at least three different shades to create eye-catching stripes.
Use a 3.5 mm to 4.0 mm crochet hook, depending on your yarn weight. You can always refer to your yarn label to match the hook size for the best tension. You’ll also need stitch markers, scissors, a yarn needle, and a flexible measuring tape.
The hat is made in multiple parts: the crown, the body, and the brim. The crown diameter should be around 6.5 inches (16.5 cm), the body height around 5 inches (13 cm), and the brim between 3.5 to 4.5 inches (9-11.5 cm), depending on personal preference.
Don’t forget to check your gauge. A standard gauge would be about 20 stitches and 20 rows per 4 inches (10 cm) in half double crochet. Adjust your hook size if needed to match the gauge.
Having your materials and measurements ready helps avoid surprises during the project. Organizing your yarn by stripe order also ensures a smooth crocheting process.
Crochet Techniques for the Striped Hat
Understanding the crochet techniques required is essential. The good news is this pattern primarily uses basic stitches, making it accessible for beginners.
Start with a magic ring, a common method for working in the round. This helps form a tight center, which is ideal for the crown of the hat. If you’re not comfortable with the magic ring, you can chain 4 and join to form a loop.
You’ll work in spiral rounds without joining at the end of each round. This technique avoids visible seams and creates a clean, continuous look. Use a stitch marker to mark the first stitch of each round.
The main stitches used are single crochet (sc), half double crochet (hdc), and slip stitch (sl st). These stitches provide the texture and firmness needed for a structured sun hat. Alternate them strategically to control the hat’s shape.
To create the stripes, simply switch yarn colors every few rounds. A popular stripe pattern might be 2 rounds per color, repeated in sequence. Make sure to carry the unused yarn inside the stitches neatly, or fasten off and rejoin.
Shaping the brim involves increasing stitches gradually. This prevents the brim from flopping or curling too much. You might use a technique like: sc in next 4 sts, 2 sc in next st, repeated around.
Blocking the finished hat with a steamer or iron (use a pressing cloth) will help even out stitches and shape the brim. Avoid high heat to protect the yarn.
Step-by-Step Pattern Instructions
Now that you’re familiar with the stitches and materials, let’s go step-by-step through How to Crochet a Beautiful Striped Sun Hat. Each stage builds upon the last to create a seamless result.
Step 1 – Crown:
Make a magic ring. Work 10 hdc into the ring. Place a stitch marker in the first hdc to mark your rounds. In each round, increase evenly by 10 stitches (e.g., 2 hdc in each st for round 2, 1 hdc in next st, 2 hdc in next for round 3, etc.) until the circle reaches about 6.5 inches in diameter.
Step 2 – Body:
Work even (1 hdc in each stitch) for 12–14 rounds, depending on your desired body height. This will give you a snug but comfortable fit over the head. Alternate yarn colors every 2 rounds for a clean striped effect.
Step 3 – Brim:
Start increasing again by adding stitches every few stitches. For example, work 2 hdc in every 5th stitch. Continue increasing every round for 5–6 rounds. Then, work 2 rounds even to stabilize the brim’s edge.
Step 4 – Finishing:
Fasten off, weave in all loose ends using a yarn needle. Lightly block the hat using steam and shape the brim outward. Allow it to cool and dry in the desired shape.
This method creates a firm crown, a structured body, and a stylish brim that holds its shape. Feel free to adjust the number of rounds for a longer or shorter hat.
Tips for Customization and Style
One of the best things about crochet projects is the ability to customize them. You can personalize your striped sun hat in many ways to suit your style.
Consider experimenting with different stripe widths. Try one row per color for a candy stripe look or use thicker bands for a more classic effect. Combining bold and neutral tones also adds visual contrast.
Add embellishments such as crocheted flowers, buttons, or ribbons. Sew them onto the side of the hat for a touch of personality. Be careful not to overload the hat and affect its balance.
If you prefer a looser, more relaxed fit, switch to a larger hook size or add extra rounds to the body. For a tighter fit, reduce your stitch count slightly or use a smaller hook.
To make your hat travel-friendly, consider inserting a plastic or wire edge into the final row of the brim. This will help retain the hat’s shape when packed.
You can also modify the pattern to make a child-size or baby version. Simply reduce the crown diameter and adjust the height accordingly. Always measure head circumference before starting.
Lastly, create a matching accessory set using the same crochet patterns—a bag, belt, or beach pouch in the same colors for a coordinated summer look.
Conclusion: Crochet a Beautiful Striped Sun Hat with Confidence
Now that you’ve learned How to Crochet a Beautiful Striped Sun Hat, you’re ready to create your own sunny-day essential. With just a few materials, some colorful yarn, and basic crochet skills, you can craft a hat that’s both functional and fashionable.
This pattern is perfect for personal use or as a handmade gift. It’s also a great way to experiment with color combinations and develop your skills using crochet patterns. The repetitive stitches and structured rounds offer a relaxing and satisfying project.
Don’t forget to take your time, enjoy the process, and customize your hat to your liking. Whether you stick to traditional summer hues or go for a bold twist, your striped sun hat will be uniquely yours.
We hope this tutorial has inspired you to get creative. Grab your hook, pick your colors, and start crocheting your new favorite summer accessory today!


