If you’re searching for a fun, practical, and beginner-friendly project, learning how to crochet a tumbler cover tulip design is the perfect start. Not only will this project protect your favorite drinkware from scratches and heat, but it also adds a personal, charming touch. This easy crochet pattern brings together functionality and beauty with a floral twist, making it ideal for gifts, market stalls, or your personal crochet collection.
Crocheted tumbler sleeves are especially helpful for insulating cold or hot drinks while reducing the use of disposable cup sleeves. Plus, making one with a tulip crochet pattern allows you to practice color changes and textured stitches in a simple format. Whether you’re a complete beginner or someone looking for a relaxing afternoon project, this step-by-step guide is all you need.
In this tutorial, you’ll find a clear and complete crochet pattern for a tulip-themed tumbler cover. We’ll include recommended materials, exact stitch counts, and customization tips. The project works up quickly and can be completed in under 2 hours with basic stitches. Let’s dive into the crochet tulip tumbler sleeve pattern and bring some springtime charm to your drinkware!

🧶 Materials and Measurements for Your Tulip Crochet Tumbler Cover
Before you start crocheting your tulip tumbler cover, it’s essential to gather the right materials. This ensures a neat, snug fit for your tumbler and gives your tulip stitches a clean finish. Here’s what you’ll need to get started.
-
Yarn Selection
Choose 100% cotton yarn in DK (light worsted) weight for best results. Cotton provides durability, stitch definition, and resistance to heat. You’ll need:-
30g of base color (for the sleeve body – usually white or cream)
-
10g of green (for the tulip stems)
-
10g of your chosen tulip color (pink, purple, yellow, etc.)
-
-
Hook Size
Use a 3.5 mm (E-4) crochet hook. This size helps maintain a snug tension so the tumbler cover doesn’t slip off. -
Other Notions
-
Scissors
-
Yarn needle (for weaving in ends)
-
Stitch marker (optional but helpful for working in rounds)
-
-
Finished Dimensions
This pattern is designed to fit a standard 20 oz tumbler:-
Height: 5.5 inches
-
Circumference: 10 inches
You can easily adjust the stitch count for wider or slimmer tumblers.
-
-
Gauge (optional)
-
18 stitches x 16 rows = 4″ in half double crochet (hdc)
Gauge is not critical for this pattern but helps for a precise fit.
-
-
Color Preparation
-
Pre-cut about 24 inches of tulip yarn for petal accents
-
Prepare at least 12 inches of green yarn for stem rows
These lengths help with easy color changes while crocheting continuously.
-
🌷 Step-by-Step Instructions – Base and Foundation Rows
Now that your materials are ready, we’ll begin the crochet tumbler cover by creating a sturdy base. We’ll then work our way up the sleeve, incorporating the tulip stitch pattern along the way.
-
Start With a Foundation Chain
-
Using base color yarn, chain 40 (or any even number to match your tumbler’s circumference)
-
Slip stitch to join into a round, being careful not to twist the chain
-
-
First Round (Single Crochet Base)
-
Ch 1, work 1 sc in each ch around
-
Join with a slip stitch to the first sc
-
You should have 40 stitches (or your custom count)
-
-
Second Round (Half Double Crochet)
-
Ch 1, hdc in each stitch around
-
Sl st to first hdc to close the round
-
Repeat this round for 2 more rounds to build a base
-
-
Begin Tulip Stitch Foundation Row
-
Switch to green yarn
-
Ch 3 (counts as 1 dc), skip 1 st, dc in next st, ch 1, dc in skipped st (this forms an X stitch)
-
Repeat from * to * around
-
Join with sl st, fasten off green yarn
-
-
Crochet Tulip Petals (Next Round)
-
Join tulip color yarn into any ch-1 space of the green X stitch
-
Work (3 dc, ch 1, 3 dc) all in the same ch-1 space (forms a tulip petal)
-
Skip to the next ch-1 space, repeat
-
Continue until all X stitches have tulip petals
-
-
Secure Petals and Return to Base Color
-
Join base color yarn
-
Hdc in each stitch around, working over the base of petals to secure
-
Join and continue with 2–3 more rounds of hdc to build height
-
🪡 Tips to Customize and Secure Your Tumbler Cover
The tulip design is complete after one motif round, but you can easily add more rows or adjust the colors to personalize your tumbler cover. Here’s how to make it your own and ensure it fits snugly.
-
Add a Top Border
-
After completing the final hdc rounds, finish with one round of reverse single crochet (crab stitch)
-
This gives a professional, curled edge and improves grip
-
-
Adjust Height
-
Add or subtract hdc rows above or below the tulip design to accommodate different cup heights
-
Always finish with at least 2 rows of hdc for structure
-
-
Make It Reversible
-
With tidy color changes and clean joins, your cover can be reversible
-
Avoid knots, and weave in ends tightly to maintain shape
-
-
Secure Color Changes
-
Always change colors at the back join area to hide transitions
-
Use invisible join methods if preferred for cleaner seams
-
-
Washability
-
Cotton yarn is machine washable. Use a gentle cycle and air dry to preserve shape
-
Recommend handwashing if your cover has delicate embellishments
-
-
Add a Bottom Cover (Optional)
-
For full coverage, crochet a flat circle the size of your tumbler base
-
Slip stitch it to the starting round or sew with a tapestry needle
-
💡 Creative Variations for Tulip Tumbler Crochet Patterns
Once you’ve completed your first tulip tumbler crochet pattern, you’ll want to try all kinds of variations! Below are a few ideas to keep your crafting fresh and personalized.
-
Make a Matching Coaster Set
-
Use the same tulip stitch for matching coasters
-
Start with a magic circle and build up rounds to desired size
-
Makes a cute drinkware set for gifting
-
-
Try Different Floral Motifs
-
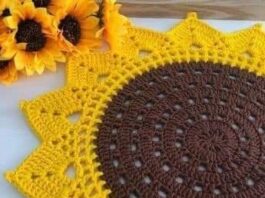
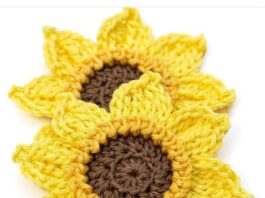
Instead of tulips, insert puff stitches in yellow to create sunflowers
-
Use heart stitches for Valentine-themed covers
-
-
Add Names or Initials
-
Use surface slip stitch or embroidery to personalize with a name
-
Great for teacher gifts or bridesmaid favors
-
-
Switch to Variegated Yarn
-
A variegated yarn for the tulip petals can create a gradient flower field look
-
Avoid overly busy yarn for the background so tulips stand out
-
-
Use Eco-Friendly Yarn
-
Try bamboo-cotton blends or recycled yarns for a sustainable option
-
Soft on hands and eco-conscious
-
-
Holiday Editions
-
Green and red tulips for Christmas
-
Orange and brown for fall
-
Blue and white for winter
-
🧵 Final Thoughts: Practical Beauty with Crochet
Creating your own crochet tumbler cover tulip design is not only a relaxing hobby but also a fantastic way to combine art with practicality. This easy crochet pattern for beginners lets you explore texture, color, and construction while producing something you’ll use every day.
From the clean lines of the hdc base to the pop of cheerful tulip flowers, this project delivers both form and function. It’s a fantastic handmade item for markets, gifts, or even personal use—and with its simple stitches, it’s suitable for beginners while still satisfying for experienced crocheters.
Remember to use cotton yarn for best durability, and don’t be afraid to experiment with color palettes. Once you’ve completed your first sleeve, you’ll likely find yourself making a dozen more for all your favorite tumblers.
Happy Crocheting! 🌷🧶


