
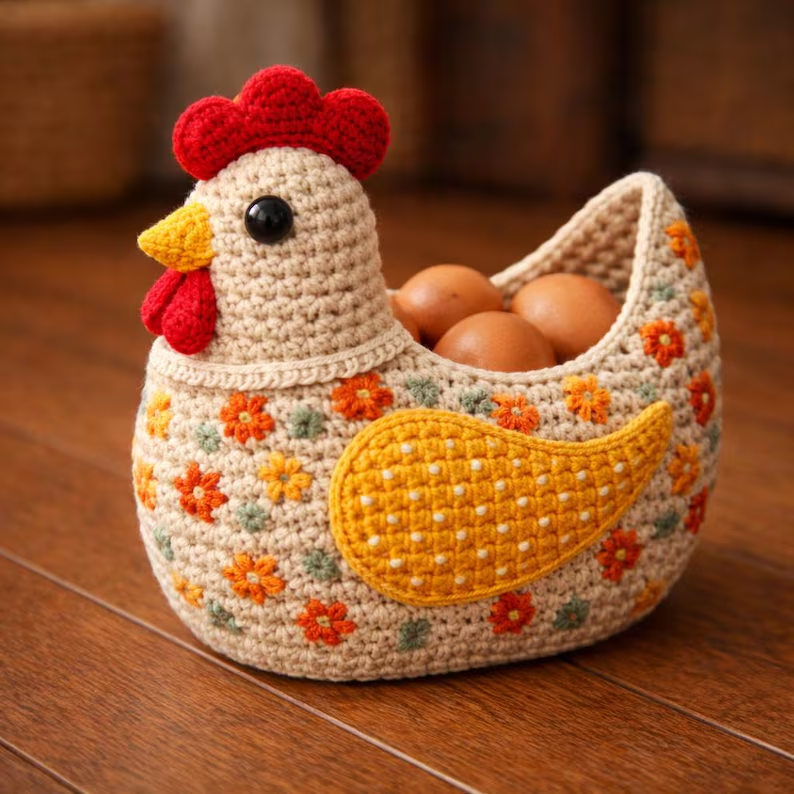
How to make a crochet chicken is a fun and creative project that brings charm, personality, and a touch of handmade warmth to your crochet collection. Whether you are crafting for Easter decorations, children’s toys, or simply to enjoy a relaxing hobby, this project is a wonderful way to explore your creativity. A crochet chicken can be as simple or as detailed as you like, making it perfect for both beginners and experienced crafters.
Creating a crochet chicken allows you to practice essential crochet techniques while producing something adorable and meaningful. From shaping the body to adding small details like the beak and comb, every step offers an opportunity to improve your skills. Plus, handmade crochet animals are always special because they carry a personal touch that store-bought items simply cannot replicate.
In this complete guide on how to make a crochet chicken, you will learn everything you need—from selecting materials to assembling your finished piece. The instructions are written in a clear and friendly way, ensuring that even beginners can follow along with ease. By the end of this article, you’ll feel confident enough to create your own cute crochet chicken and even customize it to your liking.
Choosing Materials for Your Crochet Chicken
When learning how to make a crochet chicken, selecting the right materials is the first important step. The yarn you choose will determine the texture, size, and overall look of your finished project. Cotton yarn is highly recommended because it provides a firm structure, while acrylic yarn is softer and more flexible, making it ideal for plush toys.
The crochet hook size should match your yarn, but many crafters prefer using a slightly smaller hook. This creates tighter stitches, which are essential for amigurumi projects like a crochet chicken, as it prevents stuffing from showing through the gaps.
Color selection is where your creativity can shine. Traditional chickens use white, yellow, or brown yarn, but you can experiment with bright or pastel colors for a playful and unique design. Using contrasting colors for the beak, comb, and wings helps highlight the details of your chicken.
Basic tools such as stitch markers, scissors, and a yarn needle are also essential. Stitch markers help you keep track of rounds, especially when working in a spiral. A yarn needle is necessary for sewing parts together and weaving in loose ends neatly.
Stuffing material, such as polyester fiberfill, is used to give your crochet chicken its shape. Make sure to fill it evenly so your chicken looks smooth and well-formed without lumps.
Lastly, consider safety eyes or embroidered eyes for the face. Safety eyes give a polished look, while embroidery is a safer option if the toy is intended for small children.
Step-by-Step Instructions: How to Make a Crochet Chicken
Understanding the process is key when learning how to make a crochet chicken. Start with a magic ring, which forms the base of your chicken’s body. This technique allows you to close the center tightly, creating a clean starting point.
Work single crochet stitches into the magic ring and increase gradually in each round. This will form a rounded shape, which becomes the body of your crochet chicken. Continue increasing until you reach the desired width.
After forming the base, you will begin working even rounds without increases. This builds the height of the chicken’s body. Make sure your stitches remain tight and consistent for a smooth finish.
Once the body is nearly complete, begin decreasing stitches to close the shape. Before fully closing, add stuffing to give your chicken its soft and plush form. Be careful not to overstuff, as this can distort the shape.
The wings, beak, and comb are usually made separately. These smaller parts are quick to crochet and add personality to your chicken. Use simple stitches and small rounds to shape each piece.
Finally, sew all the parts onto the body using a yarn needle. Position them carefully to ensure your crochet chicken looks balanced and symmetrical. Once everything is attached, weave in any loose ends for a clean finish.
Creative Ideas to Customize Your Crochet Chicken
One of the most enjoyable aspects of learning how to make a crochet chicken is adding your own creative touch. You can experiment with different yarn colors to create unique and playful designs that stand out.
Adding accessories is a great way to personalize your crochet chicken. Consider crocheting a tiny scarf, hat, or even a mini basket for your chicken to hold. These small additions can make your project more fun and expressive.
You can also play with different textures by using various crochet stitches. For example, bobble stitches can create a fluffy effect, while simple stitches keep the design clean and classic.
Another idea is to create themed chickens for special occasions. For Easter, you can use pastel colors and add decorative eggs. For holidays, you can adapt the colors and accessories to match the theme.
Facial expressions can dramatically change the look of your chicken. By adjusting the placement of the eyes or adding embroidered details, you can give your chicken a cute, sleepy, or playful personality.
Lastly, consider making a set of crochet chickens in different sizes. This not only enhances your skills but also creates a charming collection that can be used for decoration or gifting.
Tips for Beginners Making a Crochet Chicken
If you are new to crochet, learning how to make a crochet chicken may feel a bit challenging at first, but with patience and practice, it becomes much easier. Start by mastering basic stitches such as chain, single crochet, and slip stitch.
Keeping consistent tension is very important. Uneven stitches can affect the shape of your crochet chicken, making it look irregular. Practice maintaining a steady rhythm as you work.
Always count your stitches, especially when increasing or decreasing. This helps you stay on track and ensures that your project turns out as expected.
Using stitch markers can make a big difference, especially when working in continuous rounds. They help you identify the beginning of each round and avoid confusion.
Don’t hesitate to undo and redo parts if necessary. Mistakes are part of the learning process, and correcting them will improve your final result.
Most importantly, enjoy the process. Crocheting should be relaxing and rewarding, and every project you complete helps you grow your skills and confidence.
FAQ About How to Make a Crochet Chicken
1. Is a crochet chicken suitable for beginners?
Yes, a crochet chicken is a great beginner project if you know the basic stitches.
2. What type of yarn works best?
Cotton yarn is ideal for structure, while acrylic yarn is softer and easier to work with.
3. How long does it take to make one?
It usually takes 2 to 4 hours, depending on your experience and the complexity of the design.
4. Can I make a larger crochet chicken?
Yes, you can use thicker yarn and a larger hook or increase the number of rounds.
5. Do I need to use stuffing?
Yes, stuffing is necessary to give your chicken its shape and structure.
6. How do I clean a crochet chicken?
Hand washing with mild soap and air drying is recommended to maintain its shape.
Conclusion
In this guide on how to make a crochet chicken, you discovered how to choose the right materials, follow a step-by-step process, and customize your project with creative ideas. This craft is not only fun but also a wonderful way to express your creativity and make something truly unique.
With practice, you will be able to create beautiful crochet chickens that can be used as decorations, toys, or thoughtful handmade gifts. Each piece you make will reflect your personal style and growing skills.

