
How to make a mini crochet Easter basket is a delightful and creative project that combines the joy of crafting with the festive spirit of Easter. Whether you are a beginner or an experienced crocheter, this charming project is perfect for adding a handmade touch to your holiday decorations or gifting something truly special. The beauty of this project lies in its simplicity, versatility, and the ability to personalize it according to your style.
Creating a mini crochet Easter basket allows you to explore different stitches, colors, and textures while producing something both functional and decorative. These tiny baskets are perfect for holding Easter eggs, candies, or even small gifts. Plus, they make wonderful table decorations, party favors, or keepsakes that can be reused year after year. The process is relaxing and rewarding, making it an ideal craft for anyone looking to unwind while being productive.
In this guide on how to make a mini crochet Easter basket, you will learn everything from choosing the right materials to finishing touches that elevate your project. We will break down each step in a clear and beginner-friendly way, ensuring that even those new to crochet can follow along with confidence. By the end of this article, you will have the skills and inspiration needed to create your own adorable baskets.
Choosing the Right Materials for Your Mini Crochet Easter Basket
Selecting the right materials is essential when learning how to make a mini crochet Easter basket. The type of yarn you choose will significantly impact the final look and durability of your basket. Cotton yarn is often recommended because it is sturdy, holds its shape well, and provides a clean finish that enhances the structure of the basket.
Another important factor is the crochet hook size. Using a smaller hook than recommended for your yarn can help create tighter stitches, which is crucial for maintaining the basket’s form. Tight stitches prevent gaps, ensuring that small items like candies or mini eggs do not fall through.
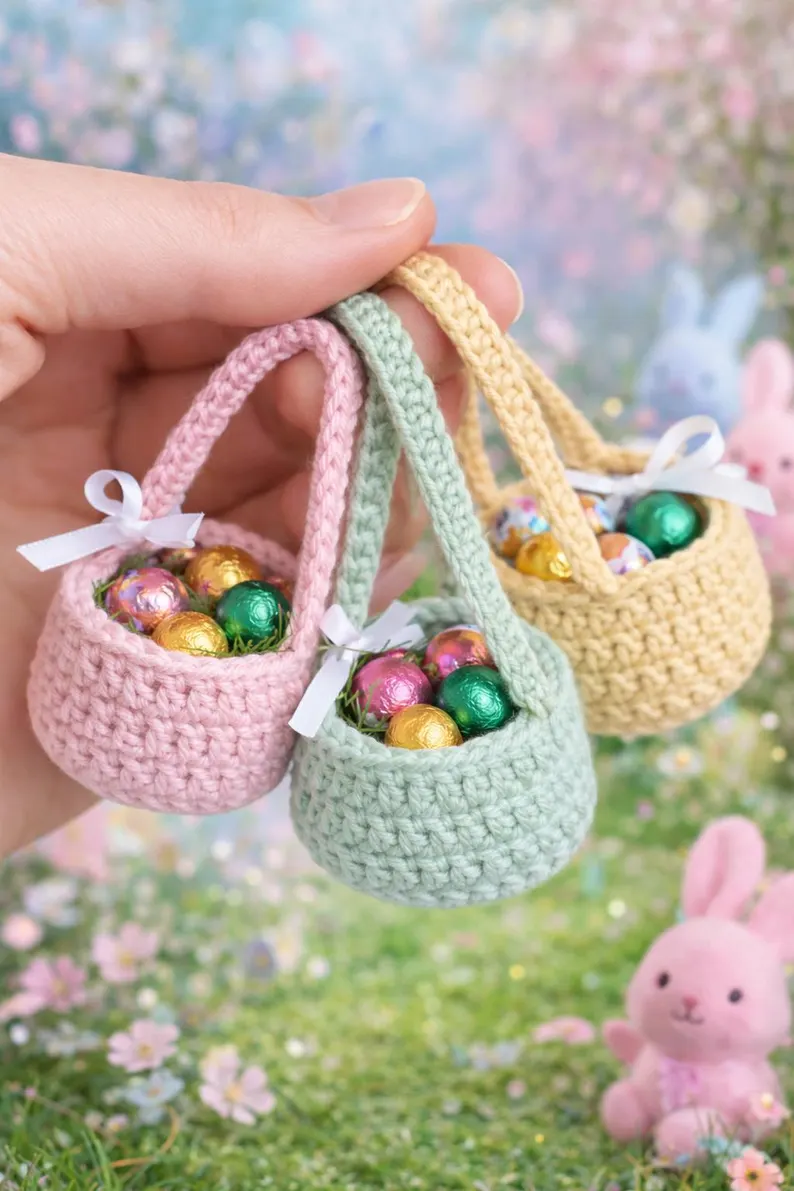
Color selection plays a huge role in the aesthetic appeal of your mini crochet Easter basket. Soft pastel shades such as pink, yellow, lavender, and mint green are popular choices for Easter-themed projects. However, you can also experiment with bold or neutral tones depending on your personal style.
You should also consider additional tools like stitch markers, scissors, and a yarn needle. These tools make the process smoother and help you achieve a more polished result. Stitch markers are especially helpful for keeping track of rounds when working in continuous spirals.
For added structure, some crafters like to use a double strand of yarn or incorporate a lining. This can make your basket more durable and give it a professional finish. While optional, these techniques are worth exploring as you gain confidence.
Finally, always ensure that your materials are of good quality. Investing in reliable yarn and tools will not only make your crafting experience more enjoyable but also ensure that your finished basket looks beautiful and lasts longer.
Step-by-Step Guide: How to Make a Mini Crochet Easter Basket
Understanding the process is key when learning how to make a mini crochet Easter basket. Start by creating a magic ring, which serves as the base of your basket. This technique allows you to tighten the center completely, giving your basket a neat and secure bottom.
Next, work single crochet stitches into the magic ring. Typically, you will begin with six stitches and gradually increase in each round to expand the base. This circular pattern forms the foundation of your basket and determines its size.
As you continue, you will stop increasing and begin working even rounds. This is where the sides of your mini crochet Easter basket start to form. Keep your stitches consistent and tight to maintain a sturdy structure.
To shape the basket properly, it’s important to recognize the transition point between the base and the sides. This is often achieved by working in the back loops only for one round, creating a subtle edge that helps the sides stand upright.
Once the desired height is reached, you can finish off the top edge with a decorative stitch. Slip stitches or a simple scalloped edge can add a charming detail that enhances the overall look of your basket.
Finally, fasten off your yarn and weave in any loose ends using a yarn needle. This step ensures that your basket looks clean and professional, completing the basic structure of your crochet project.
Creative Customization Ideas for Your Mini Crochet Easter Basket
One of the most exciting parts of learning how to make a mini crochet Easter basket is customizing your creation. Personal touches can transform a simple basket into a unique and meaningful piece. You can start by experimenting with different color combinations to match your Easter theme.
Adding embellishments is another great way to enhance your basket. Small crocheted flowers, bows, or even tiny bunny ears can give your mini crochet Easter basket a festive and playful look. These details are especially appealing if you are making baskets for children.
Handles are both functional and decorative. You can create a simple chain handle or a sturdier strap using single crochet stitches. Attaching the handle securely ensures that your basket can hold small items without losing its shape.
You might also consider incorporating texture into your design. Using different stitches such as half double crochet or bobble stitches can add depth and visual interest. This is a great way to practice new techniques while making your basket stand out.
Another idea is to line your basket with fabric. This not only adds durability but also gives your project a polished and professional finish. Choose a fabric that complements your yarn color for a cohesive look.
Lastly, personalization options such as adding initials or themed decorations can make your basket a memorable gift. Whether for family, friends, or customers, these small details make a big difference in the final presentation.
Tips for Beginners: Mastering the Mini Crochet Easter Basket
If you are new to crochet, learning how to make a mini crochet Easter basket might seem challenging at first, but with a few helpful tips, you can quickly build confidence. Start by practicing basic stitches such as chain, single crochet, and slip stitch before beginning your project.
Maintaining consistent tension is crucial for achieving a neat and uniform basket. Try to keep your stitches even throughout the project, as inconsistent tension can affect the shape and stability of your basket.
Take your time and follow each step carefully. Rushing can lead to mistakes, especially when working in rounds. Counting your stitches regularly helps ensure accuracy and prevents the need to unravel your work.
Using stitch markers can be incredibly helpful, particularly for beginners. They allow you to keep track of the beginning of each round, making it easier to follow your pattern and avoid confusion.
Don’t be afraid to make mistakes. Crocheting is a learning process, and each project helps you improve your skills. If something doesn’t look right, simply unravel and try again.
Finally, enjoy the process. Crafting should be relaxing and fun, and your mini crochet Easter basket is a reflection of your creativity. With patience and practice, you will be able to create beautiful pieces that you can be proud of.
FAQ About How to Make a Mini Crochet Easter Basket
1. What is the best yarn for a mini crochet Easter basket?
Cotton yarn is the best choice because it is sturdy and helps the basket maintain its shape.
2. Is this project suitable for beginners?
Yes, learning how to make a mini crochet Easter basket is beginner-friendly as long as you know basic stitches.
3. How long does it take to complete one basket?
It typically takes between 1 to 3 hours, depending on your skill level and the complexity of your design.
4. Can I make the basket bigger?
Absolutely! You can increase the base rounds to create a larger basket.
5. Do I need a pattern to follow?
While patterns are helpful, you can also create your own by understanding the basic structure.
6. How do I make the basket more rigid?
Using tight stitches, double strands of yarn, or adding a fabric lining can help make the basket sturdier.
Conclusion
In this complete guide on how to make a mini crochet Easter basket, you learned how to choose the right materials, follow a step-by-step process, and add creative customizations to make your project unique. This simple yet rewarding craft is perfect for celebrating Easter while expressing your creativity through handmade designs.
By practicing the techniques shared in this article, you can confidently create beautiful and functional baskets for decorations, gifts, or personal use. Remember that every project is an opportunity to improve your skills and explore new ideas.

