
How to make Jellyfish Crochet is a question many crafters ask when they want to create something adorable, soft, and unique. This charming crochet project has become increasingly popular because it combines simplicity with creativity, making it perfect for beginners and experienced crocheters alike. With its flowing tentacles and cute round body, a crochet jellyfish can be used as a toy, decoration, or even a thoughtful handmade gift.
Learning how to make Jellyfish Crochet is also a relaxing and rewarding experience. Crochet, in general, is known for its calming effects, and working on a fun project like a jellyfish adds an extra layer of enjoyment. You can experiment with different yarn textures, colors, and sizes, making each jellyfish truly one of a kind.
In this complete guide, you will discover how to make Jellyfish Crochet step by step. From materials and basic stitches to assembly and creative customization, everything is explained in a clear and structured way. Whether you are just starting or looking to improve your skills, this article will guide you through the entire process.
Essential Materials for How to Make Jellyfish Crochet
To successfully learn how to make Jellyfish Crochet, you need to start with the right materials. Choosing quality supplies will make your project easier and improve the final result significantly.
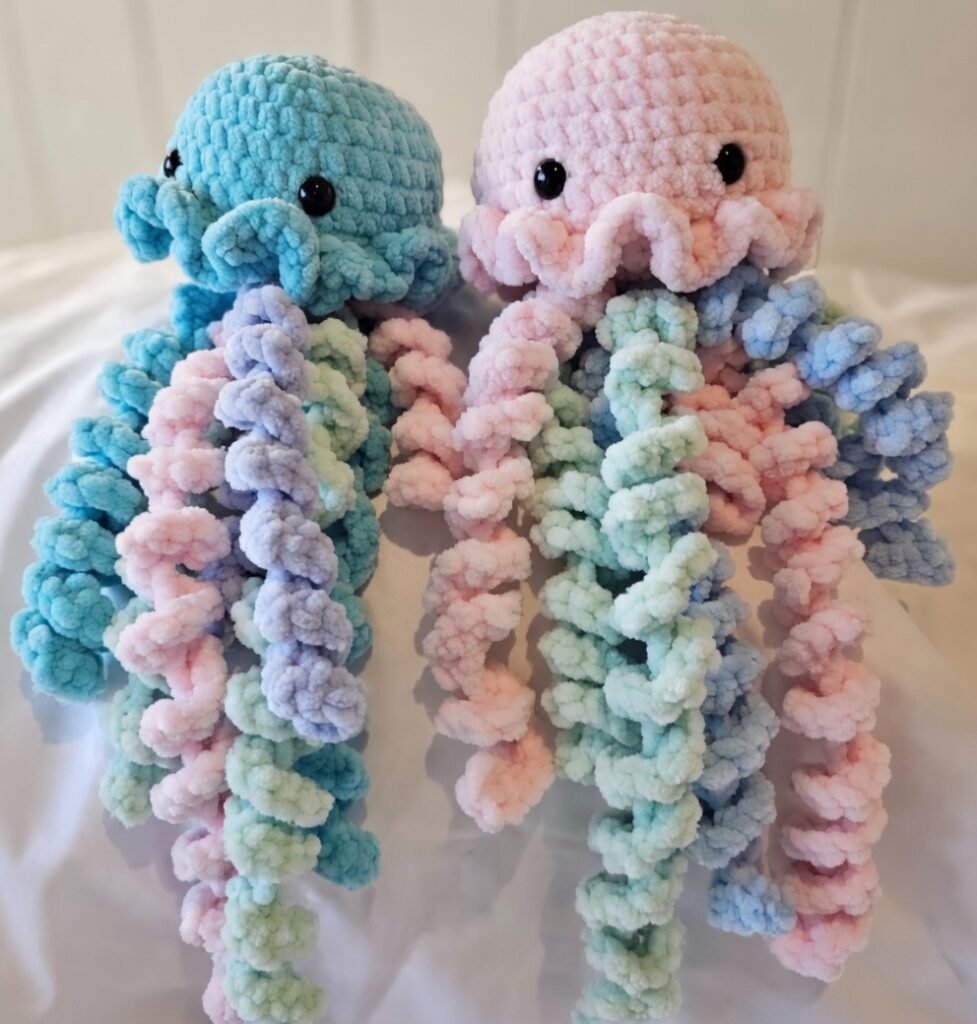
The most important material is yarn. For beginners learning how to make Jellyfish Crochet, cotton or acrylic yarn works best. Cotton provides structure, while acrylic offers softness and a wide range of colors. Choose pastel tones for a cute look or vibrant colors for a playful design.
Next, you will need a crochet hook. The hook size depends on your yarn, but typically a smaller hook is preferred to create tight stitches. Tight stitches are essential when learning how to make Jellyfish Crochet, as they prevent stuffing from showing through.
You will also need fiberfill stuffing to give your jellyfish its round shape. A small amount is enough, but make sure it is evenly distributed for a smooth finish.
Other tools include a yarn needle for sewing parts together and weaving in ends, scissors for cutting yarn, and stitch markers to help keep track of rounds.
Optional materials can enhance your jellyfish. Safety eyes can give it a cute expression, or you can embroider the eyes using thread. You may also add ribbons or textured yarn for unique tentacles when practicing how to make Jellyfish Crochet.
Basic Stitches You Need to Know
Before diving into how to make Jellyfish Crochet, it’s important to understand a few basic stitches. These stitches form the foundation of most crochet projects and are easy to learn with practice.
The magic ring is the starting point for many amigurumi projects. It allows you to create a tight, adjustable loop, which is perfect for the jellyfish body. Mastering this step is key when learning how to make Jellyfish Crochet.
Single crochet is the most commonly used stitch in this pattern. It creates a dense fabric, which is ideal for holding stuffing inside the jellyfish.
Increase stitches are used to expand your work. By placing two single crochets in the same stitch, you gradually form the rounded top of the jellyfish.
Decrease stitches help shape the piece by reducing the number of stitches. This is especially useful when closing the jellyfish body.
Slip stitch is often used for finishing or joining parts. While simple, it plays an important role in neat finishing when practicing how to make Jellyfish Crochet.
Chain stitches are used mainly for the tentacles. They create the long, flowing strands that give the jellyfish its signature look.
Step-by-Step Guide on How to Make Jellyfish Crochet
Now that you understand the basics, let’s go step by step through how to make Jellyfish Crochet in a simple and practical way.
Start with a magic ring and crochet a small number of single crochet stitches into it. This forms the top of your jellyfish.
In the next rounds, begin increasing stitches evenly. This will create a dome shape, which is essential when learning how to make Jellyfish Crochet.
Continue crocheting without increases for a few rounds. This builds the sides of the jellyfish and gives it height.
Once the body is formed, start decreasing stitches gradually. Before closing completely, add stuffing to achieve a soft, round shape.
Close the opening securely and fasten off your yarn. Make sure everything is tight and neat.
To create the tentacles, attach yarn to the bottom and chain several stitches. You can vary the length and style of the chains to make your jellyfish more dynamic. Repeat this process multiple times to complete your how to make Jellyfish Crochet project.
Creative Ideas to Customize Your Jellyfish Crochet
One of the most exciting parts of learning how to make Jellyfish Crochet is customizing your creation. There are endless ways to make your jellyfish unique.
Try using multicolor yarn to create a gradient effect. This adds depth and visual interest to your jellyfish.
Experiment with different tentacle styles. You can use curly chains, thicker yarn, or even ribbon to give a more decorative look when exploring how to make Jellyfish Crochet.
Add facial expressions to your jellyfish. Small embroidered smiles or sleepy eyes can give your project personality.
You can also vary the size by using thicker yarn and larger hooks. This is a great way to create plush toys or decorative pieces.
Another idea is to turn your jellyfish into a mobile for a nursery. Multiple small jellyfish hanging together create a beautiful handmade decoration.
Finally, consider making themed jellyfish for holidays or gifts. This adds a personal touch and makes your how to make Jellyfish Crochet project even more special.
Tips for Perfect Jellyfish Crochet Results
To master how to make Jellyfish Crochet, a few tips can make a big difference in your final results.
Always keep your tension consistent. Uneven stitches can affect the shape and appearance of your jellyfish.
Use a stitch marker to keep track of your rounds. This is especially helpful for beginners learning how to make Jellyfish Crochet.
Stuff your jellyfish evenly. Avoid overstuffing, as it can stretch the stitches, but also ensure it is firm enough to hold its shape.
Take your time when attaching tentacles. Even spacing makes your jellyfish look more balanced and professional.
Practice your stitches regularly. The more you practice, the easier it becomes to follow patterns and create smooth designs.
Lastly, enjoy the process. Learning how to make Jellyfish Crochet should be fun and relaxing, not stressful.
FAQ About How to Make Jellyfish Crochet
1. Is jellyfish crochet suitable for beginners?
Yes, learning how to make Jellyfish Crochet is perfect for beginners because it uses simple stitches and basic shaping techniques.
2. What is the best yarn for jellyfish crochet?
Cotton and acrylic yarn are both great options, depending on whether you want structure or softness.
3. How long does it take to make a jellyfish?
A small jellyfish can usually be completed in 1 to 3 hours, depending on your experience.
4. Can I sell my crochet jellyfish?
Yes, handmade jellyfish are popular items and can be sold, especially if you create unique designs.
5. How do I make curly tentacles?
You can add multiple stitches into each chain stitch, which naturally creates a curly effect.
6. Is stuffing necessary?
Yes, stuffing helps give the jellyfish its shape and makes it look more complete.
Conclusion
Now you fully understand how to make Jellyfish Crochet, from materials and stitches to step-by-step instructions and creative ideas. This project is a perfect combination of simplicity and creativity, making it enjoyable for crafters of all levels.
By following this guide on how to make Jellyfish Crochet, you can create adorable handmade pieces that are perfect for gifts, decorations, or even selling. The possibilities are endless, and each jellyfish you make will have its own unique personality.

