If you’re looking for the perfect holiday project, making a crochet Santa Claus with a pull ring is a charming and joyful idea. This adorable character isn’t just decorative; the pull ring adds a delightful interactive element that children and adults will love. Whether you hang it on a door, gift it to someone special, or use it as part of your holiday décor, this project is sure to spread Christmas cheer.
This crochet pattern is ideal for those who enjoy small amigurumi-style projects but want to take it up a notch by incorporating movement. The pull ring allows Santa to “wiggle” when you pull the string—a playful twist that adds life to your handmade craft. It also makes a great gift for babies or toddlers, as the ring can double as a soft toy accessory (just make sure it’s securely fastened).
In this tutorial, you’ll learn how to create your very own Santa Claus using yarn, stuffing, and a simple plastic pull ring. The instructions are broken down into easy-to-follow steps, and we’ve included all the fabric cuts, measurements, and tips you’ll need. Whether you’re new to crochet or looking to expand your holiday collection, this guide will help you master the project from start to finish.
Materials and Preparations
Before starting your crochet Santa Claus with a pull ring, gather all the necessary tools and materials. Preparation makes the process smoother and more enjoyable. Most of the items are affordable and easy to find at craft stores or online.
You’ll need worsted weight yarn in classic Christmas colors—red, white, black, and peach or beige for Santa’s face. For additional detailing like rosy cheeks or a decorative belt, consider adding pink or gold. A small ball of each color will suffice.
Use a 3.0 mm crochet hook for a tighter amigurumi finish. A tighter stitch ensures the stuffing won’t show through and gives Santa a firm, well-shaped body. If you crochet loosely, consider a 2.5 mm hook for extra firmness.
For stuffing, opt for polyester fiberfill or any clean, soft stuffing material. You’ll also need stitch markers, a yarn needle, and scissors. Don’t forget the pull ring, which can be a repurposed plastic teething ring or a craft store item. The ring should be about 5–6 cm in diameter.
Optional materials include black safety eyes (6 mm), blush for cheeks, and a small piece of felt for adding facial details like a smile or mustache. You’ll also want fabric glue if you’re not sewing on all elements.
Cut your felt or cotton for details as follows:
-
Belt: 1 cm x 12 cm (black)
-
Buckle: 1.5 cm x 1.5 cm (gold or yellow)
-
Beard template: 5 cm x 5 cm (white felt, optional for texture)
With everything in place, you’re ready to begin crafting this joyful crochet holiday character.
Crochet Santa Claus Pattern: Body, Head, and Hat
We’ll start by crocheting Santa’s body and head as one continuous piece. This approach keeps the figure firm and unified.
Santa Body and Head (worked in the round):
-
Magic Ring, 6 SC into ring (6)
-
Round 2: 2 SC in each stitch (12)
-
Round 3: (1 SC, inc) x6 (18)
-
Round 4: (2 SC, inc) x6 (24)
-
Rounds 5–9: SC in each stitch (24) – This forms the base of the body
-
Change to peach/beige for face color
-
Rounds 10–14: SC around (24) – This shapes the head
-
Begin decreasing: (2 SC, dec) x6 (18), then (1 SC, dec) x6 (12)
-
Stuff the body firmly
-
Final round: dec x6, fasten off and weave in ends
Santa Hat:
-
Magic ring, 4 SC (4)
-
Round 2: (1 SC, inc) x2 (6)
-
Round 3: SC around
-
Round 4: (2 SC, inc) x2 (8)
-
Continue increasing every other round until you reach 18 stitches
-
Work even until hat measures about 5–6 cm
-
Fasten off, sew to top of head, and add a pom-pom
You can personalize your Santa by shaping his face differently—wider, rounder, or more oval. For the hat, consider adding a small bell or fluffy cotton ball to the end instead of a pom-pom.
Use crochet pattern shaping techniques to define features. You might also embroider or stitch cheeks and a nose, or use felt for Santa’s beard if you want to avoid crocheting facial features.
Facial Features, Beard, and Arms
Santa’s charm is in the details. This part of the crochet pattern focuses on bringing his face and limbs to life. These elements are what make your Santa Claus truly shine.
Eyes and Nose:
-
Use 6 mm safety eyes and insert between rounds 11 and 12, about 4 stitches apart
-
Alternatively, use black yarn to embroider eyes
-
For the nose, make a small ball:
-
Magic ring, 6 SC
-
Round 2: SC in each
-
Fasten off and sew between the eyes
-
Beard (Crocheted):
-
Chain 10
-
Turn, SC across
-
In next row, (CH 3, sl st) in each stitch to make loops
-
Repeat for a second row
-
Sew around the chin area
Beard (Felt Alternative):
-
Cut a 5 cm x 5 cm white felt circle
-
Snip jagged lines to mimic beard strands
-
Attach with glue or stitches
Santa’s Arms:
-
Chain 6
-
SC in second ch from hook and across
-
Rounds 2–4: SC in each stitch
-
Stuff lightly
-
Make two and attach to body sides
You can adjust arm placement to make Santa hold a small gift or sign. Add mitten shapes by changing yarn color at the hand section. If desired, crochet or glue on a mustache with small white chain loops.
Every stitch here adds expression and texture, so take your time. This is the heart of your crochet Santa’s personality.
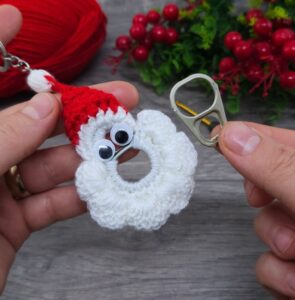
Attaching the Pull Ring and Final Assembly
Now it’s time to add the special feature: the pull ring! This section transforms your Santa into a playful and interactive decoration that’s perfect for the holiday season.
Pull Ring Attachment:
-
Create a crochet chain of about 10 cm using white yarn
-
Sew one end to Santa’s bottom center
-
Loop the other end securely around the pull ring
-
Reinforce the connection with stitches or glue
-
Optional: Add a bell to the ring for a jingle sound
-
Test the pull to ensure smooth movement
Santa Legs (Optional):
-
Magic ring, 6 SC
-
Round 2: SC around
-
Round 3: Change to red and continue for 4 more rows
-
Make 2 legs and sew to the bottom near the pull ring chain
Add Hanging Loop:
-
Chain 10
-
Slip stitch into first chain to form a loop
-
Sew to top of Santa’s hat for hanging on walls, trees, or doors
Final Touches:
-
Use a small brush to fluff the beard
-
Add blush or pink felt cheeks
-
Embroider a tiny smile or use fabric paint
Your crochet Santa Claus with a pull ring is now complete! He’s festive, functional, and sure to bring joy to anyone who sees him. This is one of those crochet patterns that never go out of style and become part of your annual traditions.
Conclusion
Making a crochet Santa Claus with a pull ring is the perfect way to bring together creativity, holiday spirit, and practical crafting. Whether you’re making it for yourself, gifting it to loved ones, or selling at a Christmas market, this project adds warmth and fun to the season.
With simple materials, a thoughtful structure, and clear steps, even beginner crocheters can enjoy success. The use of a pull ring turns a standard plush toy into something memorable, making it stand out among other crochet holiday items.
So pick up your yarn, grab your hook, and start creating a Santa that jingles and dances his way into hearts this Christmas!


