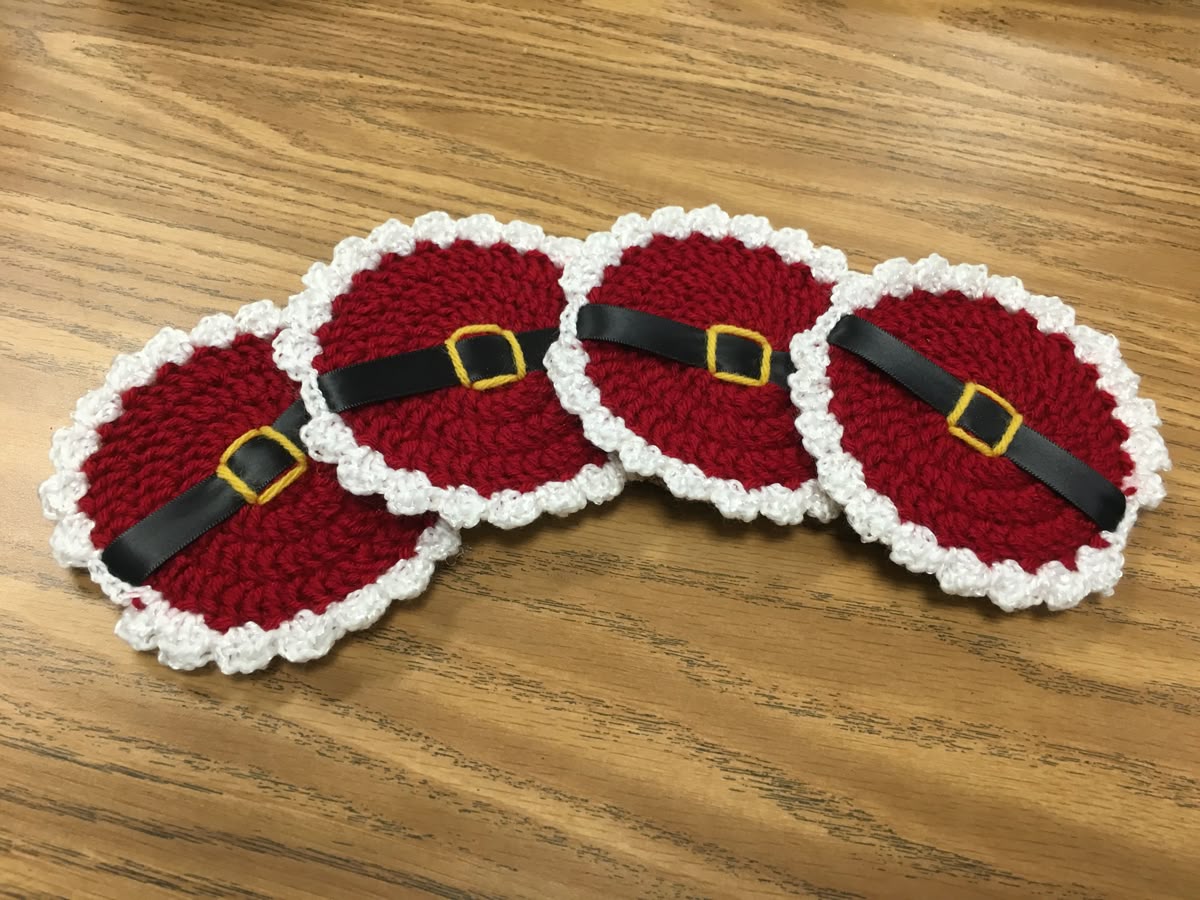
The Santa’s Belt Crochet Coaster – Step by Step Tutorial is a fun and festive project perfect for adding holiday cheer to your home. This coaster design resembles Santa’s iconic red suit with a black belt and a golden buckle, making it an excellent addition to your Christmas table décor. It is simple enough for beginners yet enjoyable for experienced crocheters who want a quick seasonal project.
This crochet coaster is not only decorative but also functional. It protects your table from heat and moisture while adding a handmade touch to your holiday gatherings. It also makes a thoughtful handmade gift for friends, family, or coworkers. Small projects like this are great for using leftover yarn and can be made in just a short amount of time.
In this guide, you will learn how to make a Santa’s Belt Crochet Coaster – Step by Step Tutorial with clear instructions, material suggestions, and tips for success. At the end, you will find a helpful FAQ and a conclusion summarizing everything covered in this tutorial.
Materials and Preparation
To begin the Santa’s Belt Crochet Coaster – Step by Step Tutorial, gather all the necessary materials. You will need worsted-weight cotton yarn in red, black, and yellow (or gold) to create Santa’s suit colors. Cotton yarn is preferred for coasters because it absorbs moisture and is heat-resistant.
A 4mm or 4.5mm crochet hook works well with this yarn weight. You will also need a yarn needle for weaving in ends and scissors for cutting your yarn. If you want a stiffer coaster, you can use a fabric stiffener or block it at the end to help it hold its shape.
Before you start crocheting, familiarize yourself with basic stitches such as chain (ch), single crochet (sc), half double crochet (hdc), and slip stitch (sl st). These simple stitches are all you need for this project.
Make sure to set up a clean, well-lit workspace with all your tools nearby. Having everything organized will make the process smoother and more enjoyable.
If you plan to make several coasters, consider preparing your yarn in advance by winding it into smaller balls for easier color changes while working.
Once you have everything ready, you are set to start creating the base of the Santa-themed coaster.
Creating the Coaster Base
The first step in the Santa’s Belt Crochet Coaster – Step by Step Tutorial is to make the round red base, which represents Santa’s suit. Start with a magic ring and work several single crochet stitches into the ring to form a small circle.
Continue working in rounds, increasing evenly to create a flat circle. Make sure to count your stitches to keep the circle even and prevent curling or ruffling.
Work until the circle reaches the desired coaster size, usually around 4 to 5 inches in diameter. The number of rounds may vary depending on your tension and yarn.
Fasten off and weave in the end once you finish the red portion. If you want a slightly larger coaster, you can add an additional round of half-double crochet stitches.
Check that the base is flat. If it curls up, block it by pinning it flat and lightly steaming it to achieve a smooth finish.
The red circle now forms the foundation for adding Santa’s belt details.
Adding Santa’s Belt and Buckle
The next part of the Santa’s Belt Crochet Coaster – Step by Step Tutorial is adding the black belt and the yellow buckle to create Santa’s signature look.
Cut a piece of black yarn long enough to form a band across the center of the coaster. You can either crochet a separate black strip using single crochet stitches or simply surface slip stitch across the red base.
Once the belt is added, create a small square buckle with yellow yarn. The buckle can be made by crocheting a small chain square or by stitching a simple square shape directly on the belt using surface slip stitches.
Secure the buckle in place with a yarn needle, making sure it sits neatly in the center.
These decorative details are what make the coaster stand out as a festive Christmas piece. You can customize by adding small embellishments like tiny beads or embroidery if desired.
After adding the belt and buckle, the coaster is almost complete and ready for finishing touches.
Finishing and Customization
The final step in the Santa’s Belt Crochet Coaster – Step by Step Tutorial is finishing and personalizing your project. Weave in any remaining yarn ends carefully on the back side of the coaster to give it a neat appearance.
If you prefer a sturdier coaster, you can apply a light fabric stiffener or block it with steam to ensure it lays flat.
Consider making multiple coasters as a matching set for your holiday table. You can even add a green border to some for variety and to complement the Christmas theme.
Another fun idea is to attach a small loop to one edge, allowing the coaster to double as a festive ornament when not in use.
If giving as a gift, bundle several coasters with a ribbon or place them inside a small holiday-themed box for an extra special touch.
With your project finished, you now have a charming handmade coaster that adds joy and personality to your holiday season.
FAQ – Santa’s Belt Crochet Coaster
1. What is the best yarn to use for a coaster?
Cotton yarn is best because it is absorbent and resistant to heat, making it ideal for coasters.
2. Can beginners make this project?
Yes, this pattern is beginner-friendly since it uses basic stitches like chain, single crochet, and slip stitch.
3. How big should the coaster be?
A diameter of about 4 to 5 inches works well for most cups and mugs. You can adjust the size by adding or reducing rounds.
4. How long does it take to make one coaster?
It typically takes 30–45 minutes to make a single coaster, making it a quick and satisfying project.
5. Can I sell coasters I make from this tutorial?
Yes, handmade coasters are popular at craft fairs and as holiday gifts. Always check if the pattern is free for commercial use.
6. How do I clean the coaster?
Hand wash gently in cool water and lay flat to dry. Cotton yarn is durable and easy to clean.
Conclusion
The Santa’s Belt Crochet Coaster – Step by Step Tutorial is a festive, fun, and practical project that adds holiday cheer to your table. With just a few materials and basic crochet skills, you can create a beautiful handmade item perfect for gifts or personal use.
This tutorial guided you through every step, from preparing materials to creating the base, adding Santa’s belt details, and customizing your coaster. The included FAQ answered common questions to help you succeed in your project.
We hope you enjoyed this guide and feel inspired to try it yourself. If you make these coasters, please leave your honest opinion and share suggestions—we would love to hear your thoughts and see your creations!


