
Simple Crochet Shoe – Pattern is a wonderful project for crocheters who want to create comfortable, stylish, and practical handmade footwear using basic crochet stitches. Whether you are making cozy indoor slippers for yourself, thoughtful handmade gifts, or beautiful accessories to sell at craft fairs, this project combines simplicity with elegance. The Simple Crochet Shoe – Pattern is suitable for beginners who already know the basic stitches, while also offering enough flexibility for experienced crocheters who enjoy customizing their projects. Throughout this tutorial, you will learn every stage of the construction process, from choosing the right materials to assembling and finishing a pair of durable crochet shoes.
Crochet shoes have become increasingly popular because they are lightweight, customizable, and enjoyable to make. Unlike mass-produced slippers, handmade crochet footwear allows you to choose your favorite colors, textures, and finishing details while ensuring a comfortable fit. You can create minimalist designs for everyday use or decorate them with flowers, bows, buttons, or embroidered motifs to reflect your own personal style. Because this project uses repetitive stitches and simple shaping techniques, it is also an excellent opportunity to improve stitch consistency and learn more about three-dimensional crochet construction.
Before beginning the Simple Crochet Shoe – Pattern, it is useful to understand how the project is built. Most crochet shoes begin with a sturdy sole, followed by rounds that gradually form the sides. Once the body reaches the desired height, the toe and heel are shaped using decreases before finishing the opening with a neat decorative edge. Following each step carefully while maintaining consistent stitch tension will help you create a comfortable shoe with a professional appearance that can be worn indoors throughout the year.
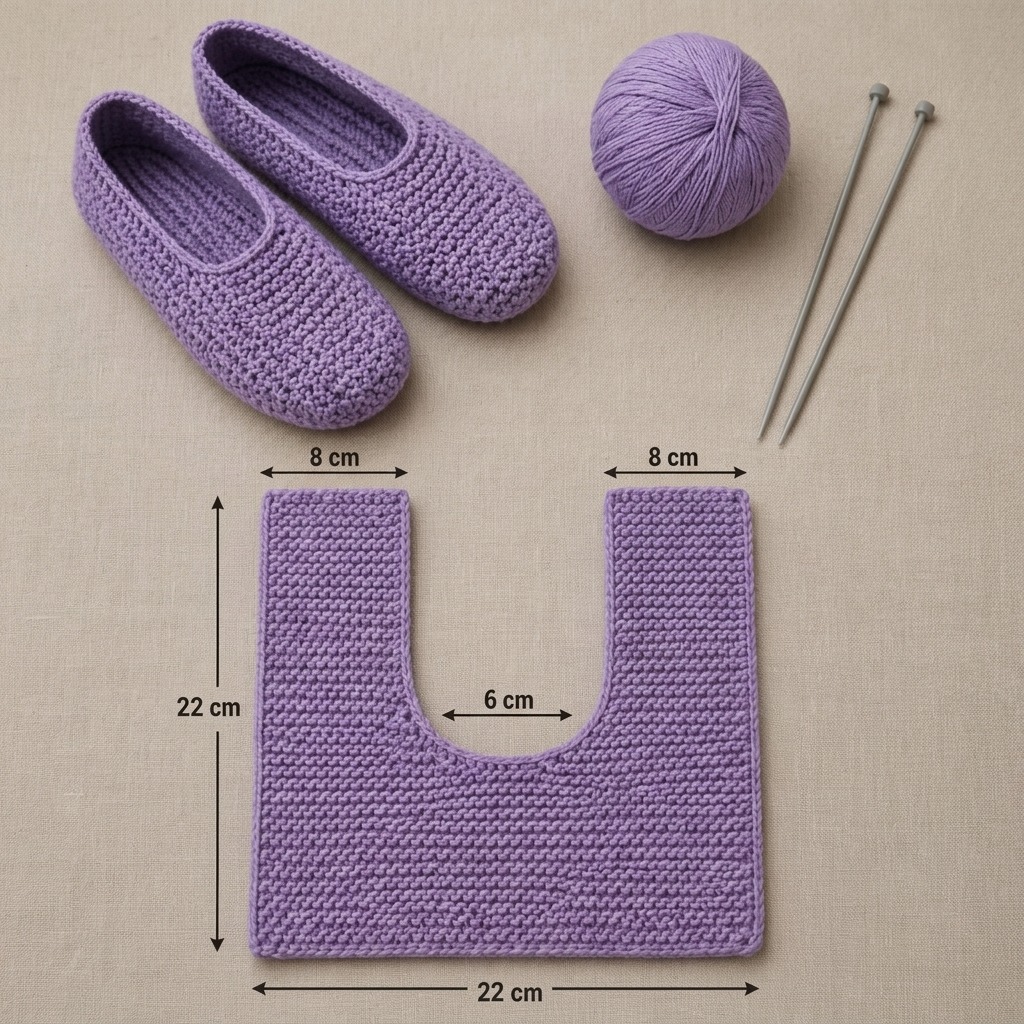
Choosing the Best Materials for the Simple Crochet Shoe – Pattern
The first step toward creating a successful Simple Crochet Shoe – Pattern is selecting high-quality materials. Cotton yarn is one of the best choices because it offers durability, excellent stitch definition, breathability, and minimal stretching. Cotton blends also work beautifully if you prefer a slightly softer texture while maintaining good structure.
Premium acrylic yarn is another excellent option, especially if you want warm indoor slippers for cooler weather. Soft acrylic fibers are lightweight, easy to wash, and available in a wide variety of beautiful colors that suit every season and personal style.
Choose a crochet hook that matches your yarn weight while producing firm stitches. A slightly smaller hook than normally recommended often creates a denser fabric, helping the finished shoe maintain its shape and provide better support during everyday use.
Gather all necessary crochet supplies before beginning the project. In addition to yarn and a crochet hook, prepare scissors, a yarn needle, stitch markers, measuring tape, and optional non-slip sole material if you wish to improve traction.
Selecting the right color is one of the most enjoyable parts of the project. Neutral shades such as beige, gray, navy, cream, and black create elegant everyday footwear, while pastel colors or bright tones produce cheerful handmade slippers suitable for gifts.
Finally, measure the foot carefully before starting. Accurate measurements help determine the proper foundation size and ensure the completed crochet shoes fit comfortably without becoming too tight or too loose.
Step-by-Step Instructions for the Simple Crochet Shoe – Pattern
Begin your Simple Crochet Shoe – Pattern by creating a foundation chain that matches the length of the desired sole. The exact number of chains depends on the shoe size, but the foundation should remain straight without twisting before you continue.
Work around the foundation chain using single crochet (sc) stitches while placing increases at both rounded ends. These increases gradually shape the toe and heel, forming a smooth oval sole that supports the entire shoe.
Continue crocheting additional rounds while increasing evenly until the sole reaches the desired width. Count your stitches carefully at the end of every round to maintain symmetry and ensure both shoes in the pair remain identical.
Once the sole is complete, stop increasing and crochet evenly around each round. Working into the back loops during the first side round helps create a clean fold between the sole and the shoe body, giving the footwear a more professional appearance.
As the sides grow taller, begin shaping the toe by working gentle decreases along the front portion of the shoe. Continue trying the shoe on if possible, making small adjustments to ensure a comfortable fit while maintaining a neat rounded shape.
Finish the upper edge using one or two rounds of single crochet or slip stitch (sl st). These finishing rounds strengthen the opening, prevent stretching, and provide a clean border that complements the overall design.
Customizing Your Simple Crochet Shoe – Pattern
One of the greatest advantages of the Simple Crochet Shoe – Pattern is the ability to personalize every detail. Once you understand the basic construction, you can easily create many different styles using the same foundation.
Experiment with textured stitch patterns such as half double crochet (hdc), ribbed stitches, moss stitch, or basket weave. These stitch variations add visual interest while maintaining comfort and flexibility.
Decorative appliqués such as crochet flowers, bows, hearts, stars, butterflies, or leaves can be sewn onto the toe area or side panels. These embellishments transform a simple slipper into a beautiful handmade accessory.
Seasonal color combinations are another wonderful way to personalize the project. Soft pastel shades work beautifully for spring, bright colors are perfect for summer, warm earth tones complement autumn, and classic red, green, or white create festive holiday slippers.
For extra comfort, consider sewing a soft fabric lining inside the finished shoes. A lining increases warmth, reduces stretching, and provides a polished interior finish while making the slippers even more comfortable for extended wear.
Matching accessories such as slippers for children, coordinating storage baskets, cozy blankets, or crochet handbags made with the same yarn colors create thoughtful handmade gift sets suitable for birthdays, holidays, or housewarming celebrations.
Helpful Tips for Professional Crochet Shoes
Maintain consistent stitch tension throughout the entire Simple Crochet Shoe – Pattern. Even stitches help both shoes remain the same size while producing smooth edges and balanced shaping.
Count your stitches regularly during every round. Small counting mistakes can gradually affect the fit, making one shoe larger than the other or causing uneven shaping around the toe.
Use stitch markers to identify the beginning of each round. This simple technique improves accuracy, especially when working continuous rounds without joining.
Secure every yarn end by weaving it through several stitches in different directions. Proper finishing prevents unraveling and significantly increases the durability of the finished shoes.
If the completed slippers appear slightly uneven, lightly block them according to your yarn manufacturer’s recommendations. Blocking smooths the stitches, improves symmetry, and gives the shoes a refined handmade appearance.
Most importantly, enjoy every step of the creative process. Every pair of handmade crochet shoes reflects your patience, craftsmanship, and creativity, making each finished project truly unique.
FAQ
Is the Simple Crochet Shoe – Pattern suitable for beginners?
Yes. Beginners who know basic stitches such as chain, single crochet, half double crochet, and slip stitch can successfully complete this project by following the instructions carefully.
What yarn is best for crochet shoes?
Cotton yarn is generally the preferred choice because it provides durability, breathability, excellent stitch definition, and minimal stretching. Premium acrylic yarn is also suitable for warm indoor slippers.
Which crochet stitches are commonly used?
The project mainly uses chain (ch), single crochet (sc), half double crochet (hdc), slip stitch (sl st), and occasional decreases to shape the toe and heel.
How do I determine the correct shoe size?
Measure the foot length and width before beginning the project. Compare your measurements throughout construction to ensure a comfortable fit.
Can I make the shoes non-slip?
Yes. You can sew non-slip fabric, suede patches, or flexible slipper soles onto the bottom after completing the crochet work to improve traction.
How long does it take to crochet one pair?
Depending on your experience and the complexity of the chosen stitch pattern, most crocheters complete one pair within a weekend or several relaxing evenings.
Can I wash crochet shoes?
Yes. Follow the care instructions for your chosen yarn. Most cotton slippers can be hand washed or machine washed on a gentle cycle before being laid flat to dry.
Can I sell shoes made from this pattern?
Yes. Handmade crochet shoes are popular items at craft fairs and online marketplaces. If adapting another designer’s copyrighted pattern, always respect any licensing or copyright terms associated with the original design.
Conclusion
The Simple Crochet Shoe – Pattern is a rewarding project that combines creativity, comfort, and practical crochet techniques into a beautiful pair of handmade slippers. Throughout this tutorial, you learned how to choose the best materials, build a sturdy sole, shape the sides, form the toe and heel, customize the design with decorative details, and apply professional finishing techniques that improve both appearance and durability. These skills provide a strong foundation for creating crochet footwear in a wide variety of sizes, colors, and styles, allowing every crocheter to develop unique handmade designs. Whether you create these shoes for yourself, as thoughtful gifts, or as part of your handmade business, they are sure to become treasured accessories that showcase your craftsmanship. If you enjoyed this tutorial, please leave your honest opinion and share your suggestions for future crochet projects. Your feedback is greatly appreciated and helps inspire even more creative ideas for the crochet community.

