If you’re looking for a fun and creative way to add charm to your home décor or craft a heartfelt gift, A Cute Cow Quilt Pattern is the perfect project. This whimsical design combines the timeless appeal of quilting with a touch of farmhouse personality. Whether you’re new to quilting or an experienced stitcher, this quilt pattern offers a delightful blend of simplicity and visual impact.
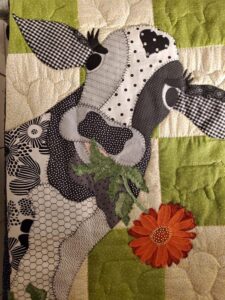
The cow motif is a favorite among animal lovers, farmhouse décor enthusiasts, and parents decorating nurseries. With its sweet face, black-and-white spots, and customizable accents, the cow block is both versatile and endearing. You’ll also find that this quilt project is a great opportunity to practice a variety of techniques, from piecing and appliqué to precision cutting and assembly.
In this tutorial, we’ll walk you through everything you need to know to create your very own cow quilt masterpiece. We’ll cover materials, measurements, step-by-step construction, and assembly instructions to help you complete a beautiful quilt that’s as functional as it is adorable. This tutorial uses the keywords quilt and quilt patterns throughout to keep it fully optimized for search engines.
Planning and Choosing the Right Quilt Materials
When starting A Cute Cow Quilt Pattern, your first task is gathering the necessary materials. Choosing the right fabric and tools makes all the difference, especially when you want your quilt to stand the test of time. Pick high-quality cotton fabrics for durability and ease of sewing.
You’ll want a mix of solid and patterned fabrics. Opt for a black and white or brown and white cow print look for the body, along with a light neutral for the background. Consider adding pastel or gingham borders for a farmhouse flair that enhances the cow motif.
Here are the basic cuts and materials you’ll need:
-
White fabric: (1.5 yards) for background
-
Black fabric: (1 yard) for cow patches and ears
-
Pink or beige fabric: (½ yard) for the snout and inner ears
-
Accent fabric: (¾ yard) for borders or cornerstones
-
Backing fabric: (2.5 yards)
-
Batting: crib-size (45” x 60”)
-
Binding fabric: (½ yard)
-
Thread: coordinating colors
-
Basic quilting tools: rotary cutter, mat, rulers, pins, and an iron
The fabric cuts for each cow block are simple and manageable, making this a beginner-friendly project. You can scale up or down depending on how many blocks you want in your final layout.
Cutting and Preparing the Quilt Blocks
Now that you have your fabrics ready, it’s time to begin cutting. Accuracy is key when it comes to making sure your quilt blocks align perfectly. The cow design can either be pieced or appliquéd, depending on your comfort level and preferred style.
Begin by preparing your cuts for one cow block (approx. 12” x 12” finished):
-
White background squares: (4) 3.5” x 3.5”
-
Cow body (black): (2) 4.5” x 6.5” rectangles
-
Snout (pink/beige): (1) 3” x 6” rectangle
-
Ears (black): (2) 2” x 2.5” rectangles
-
Eyes: (2) 1.5” black buttons or black felt
-
Inner ears (pink): (2) 1” x 1.5” pieces
Cutting tip: Stack your fabrics in layers when cutting to save time, but don’t cut more than 4 layers at once to keep accuracy.
Label your pieces with sticky notes or chalk so you don’t mix them up during assembly. Iron each piece after cutting to remove wrinkles and make piecing smoother. This step ensures your quilt patterns look professional and neat.
Piecing Together the Cow Quilt Blocks
With all your pieces cut and labeled, it’s time to assemble your adorable cow blocks. This part is where the quilt really starts to come to life!
Start with the cow’s face. Sew the snout rectangle to the bottom of the head block. Then attach the ears to either side of the top head section. Place the inner ears on top and sew down or appliqué for detail. Add the button or felt eyes above the snout for a cute, animated look.
Next, piece the body section by attaching the cow patch rectangles (black and white) to create the spotted effect. You can go freestyle with the cow spots for a natural, imperfect pattern, or follow a uniform grid if you prefer structure.
Once your cow block is complete, sew it to background squares to form a complete quilt block. Press the seams as you go to reduce bulk and ensure smooth lines.
Repeat this process for each block. You can make a baby quilt with just 4–6 blocks or a full throw with 12 or more. The pattern is highly customizable depending on your intended quilt size.
Assembling the Quilt Top and Finishing Touches
Once you’ve completed all your cow blocks, it’s time to assemble the quilt top. Lay out your blocks on a design wall or large table to experiment with layout and border options.
Sew the blocks together row by row. Press seams to one side or open, depending on your preference. Add sashing strips (typically 2” wide) between blocks to give space and highlight each cow face. Add borders using your accent fabric to frame the quilt.
Use the following dimensions as a guide:
-
Sashing strips: 2” x width of each row
-
Border strips: 3”–4” wide
-
Quilt top finished size (crib quilt): approx. 36” x 48”
Layer your quilt top with batting and backing, then baste it using safety pins or temporary adhesive spray. For quilting, you can stitch in the ditch around each block or try a simple meandering free-motion pattern for softness.
Bind the edges using 2.5” binding strips folded in half. Attach with a sewing machine and finish by hand or machine on the back for a neat finish.
Your cow quilt is now ready to gift or use!
Why You’ll Love This Cow Quilt Pattern
There are countless quilt patterns out there, but few offer the same charm as this cute cow design. Whether you’re making it for a nursery, a gift, or your own couch, it’s guaranteed to bring smiles.
One great aspect of this quilt is how beginner-friendly it is. Even if you’ve never worked with animal-themed blocks before, the piecing is simple and forgiving. You can use appliqué for the face and ears if you want to simplify it further.
Customization is easy too—switch up the colors to make a Highland cow, a brown Jersey cow, or even a rainbow cow for a fun twist. Add embroidered names or tags to personalize it even more.
This pattern is also a great stash buster. Use leftover scraps of black, white, and pink fabrics to reduce waste and get creative with patterns.
Most importantly, the joy of creating a handmade quilt is unmatched. It’s a labor of love that reflects your creativity and attention to detail. Quilting is more than a craft—it’s a way to express personality and make something meaningful.
Final Thoughts on This Quilt Pattern
If you’ve been searching for a project that combines fun, creativity, and heartwarming results, A Cute Cow Quilt Pattern is exactly what you need. It’s charming, beginner-friendly, and totally customizable.
From selecting your fabrics to sewing on that final binding stitch, this project will leave you with a finished piece that’s not only beautiful but also deeply personal. Whether it’s for a baby shower, a birthday, or a new home, your handmade cow quilt is sure to be a treasured keepsake.
Remember to take your time, enjoy each step, and embrace any imperfections—they’re what make your quilt one of a kind. Happy quilting!


