Creating a Braided Table Runner Quilt Pattern is one of the most rewarding quilting projects for both beginners and experienced crafters. This elegant design combines the charm of traditional quilting with a touch of modern flair..
One of the most appealing aspects of this project is its versatility. With a braided table runner quilt, you can choose any color palette that fits your home décor—soft pastels for a cozy cottage look or bold hues for a more contemporary aesthetic.
For quilters, mastering the Braided Table Runner Quilt Pattern can open doors to many creative possibilities. Not only is this design visually stunning, but it’s also a fantastic way to use up fabric scraps from previous projects. The repetitive, rhythmic motion of sewing the braid can be meditative and relaxing, making quilting not only a hobby but also a form of artistic expression.
Understanding the Braided Table Runner Quilt Pattern
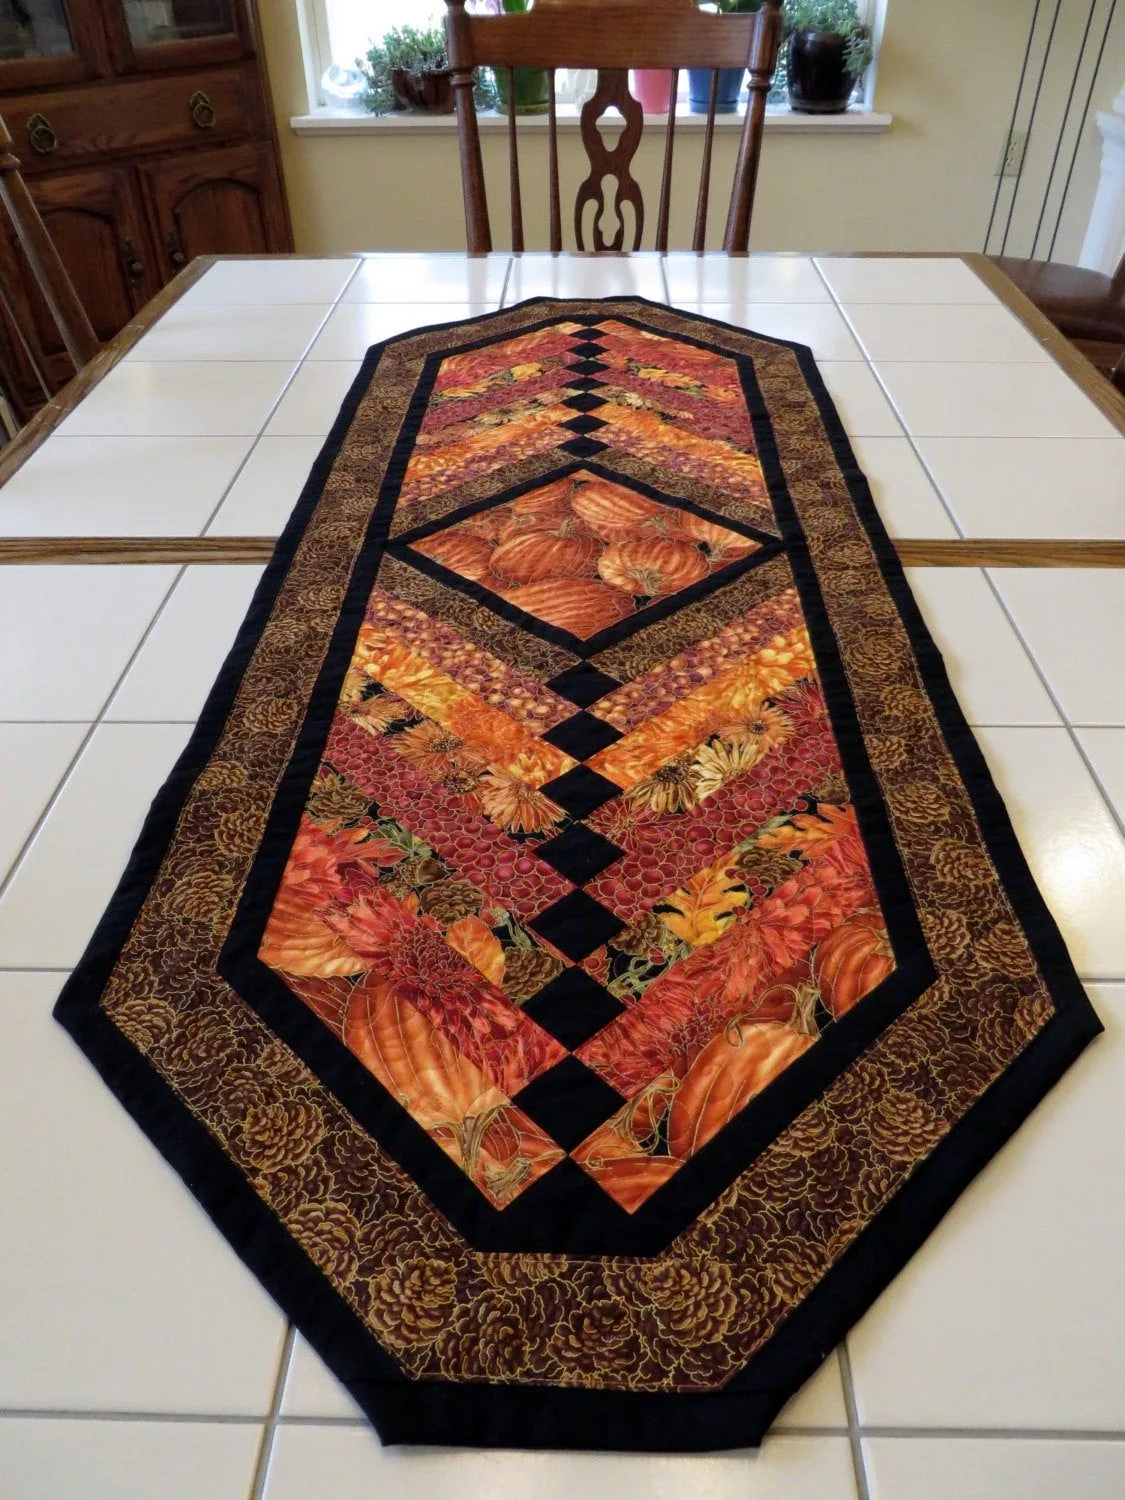
The Braided Table Runner Quilt Pattern is inspired by the timeless braid design, often seen in woven crafts and textiles. The idea is simple: long strips of fabric are arranged in an overlapping sequence that mimics a braid, creating a visually dynamic effect. This structure allows quilters to play with contrasting colors and prints, adding depth and movement to the design.
When starting your project, choosing the right fabrics is essential. Cotton is the most common fabric for quilting because it’s durable and easy to handle. However, you can also experiment with linen or blends for a slightly different texture. To highlight the braided pattern, select fabrics with a mix of light, medium, and dark tones. This color variation will give your braid a three-dimensional appearance.
One of the benefits of the Braided Table Runner Quilt Pattern is its flexibility in size. You can create a short runner for a small table or extend the braid to fit a long dining table. This adaptability makes it an ideal project for any home. Additionally, it’s a great way to experiment with fabric combinations without the commitment of a large quilt.
To start the pattern, you’ll need fabric strips, a sewing machine, thread, and basic quilting tools like a rotary cutter and ruler. The braid begins with a central strip, and new pieces are added alternately on each side, gradually forming the elongated braided design. The key is to maintain consistent seam allowances and press the seams flat after each step for a polished look.
The beauty of this design lies in its simplicity. While it looks intricate, the Braided Table Runner Quilt Pattern follows a repetitive process that’s easy to master. Once you complete the top panel, you can add batting and backing fabric, then quilt the layers together to secure your work. Finish by sewing the binding around the edges for a clean, professional appearance.
Finally, consider adding decorative stitching or hand quilting details. These subtle touches can elevate your table runner from beautiful to breathtaking. Whether you prefer minimalist designs or vibrant patchwork styles, the braided pattern adapts to your taste effortlessly.
Step-by-Step Guide to Sewing a Braided Table Runner
The process of sewing a Braided Table Runner Quilt Pattern involves patience and precision, but it’s also highly enjoyable. To begin, cut several fabric strips, typically 2½ inches wide. The length will depend on your desired table runner size. A variety of colors and prints can create visual interest, but keeping a cohesive palette will ensure balance.
Start by laying one strip flat and then positioning the next strip at a 45-degree angle to the left side. Sew along the edge and press the seam open. Next, place a strip on the right side, again at a 45-degree angle. Continue alternating sides as you build the braid. This method creates the signature woven appearance of the pattern.
As your braid grows, it will begin to form a distinctive chevron-like shape. To keep it even, occasionally trim the edges to maintain straight sides. Once you’ve reached your desired length, trim both ends evenly. The runner’s dimensions can be customized to fit your table—most designs range from 40 to 60 inches long.
After completing the braided top, layer it with batting and backing fabric. Pin the layers together securely before quilting. You can choose to machine quilt using straight or wavy lines that follow the braid’s direction. Alternatively, hand quilting can give your project a more traditional and textured finish.
When quilting is done, it’s time to bind the edges. Cut strips of binding fabric, fold them in half, and sew them around the perimeter of your table runner. Take care to neatly miter the corners for a professional result. This final touch enhances durability and gives your project a refined look.
Before displaying your table runner, press it carefully to remove any wrinkles. You’ll be amazed at how this handmade piece instantly brightens your dining or coffee table with elegance and charm.
Design Variations and Creative Ideas
The Braided Table Runner Quilt Pattern offers endless design possibilities. One way to personalize your project is by experimenting with color placement. Try creating an ombre effect by arranging fabric strips from light to dark tones, or alternate between two contrasting colors for a striking visual.
For a festive touch, use holiday-themed fabrics—reds and greens for Christmas, pastels for Easter, or orange and brown hues for Thanksgiving. A seasonal braided table runner can instantly transform your dining area into a welcoming and themed space.
If you prefer a rustic farmhouse style, opt for natural tones like beige, cream, and muted blues. Add lace or embroidery accents along the borders for a delicate, handmade touch. For a modern look, bold geometric prints and bright colors can make your braid pattern pop.
You can also play with strip widths. Wider strips create a chunky, bold braid, while narrower ones produce a delicate and detailed pattern. Mixing widths can add extra texture and visual interest to your design.
Some quilters enjoy adding appliqué or embroidered motifs to their runners. This creative detail gives your project a personalized, artistic feel and makes it stand out as a one-of-a-kind piece.
Useful Tips for Perfecting Your Braided Table Runner
To achieve a flawless Braided Table Runner Quilt Pattern, precision and consistency are key. Always cut your fabric strips accurately, as uneven strips can distort the braid. Using a rotary cutter and quilting ruler will help maintain clean, straight edges.
When sewing, maintain a consistent seam allowance—typically ¼ inch. Inconsistent seams can cause the braid to become misaligned. Press each seam as you go to keep your fabric smooth and manageable. This step ensures your final piece lies flat and looks professional.
If you’re a beginner, start with fewer colors to simplify the process. As you gain confidence, you can experiment with more complex combinations and layouts. The braided design is forgiving, so small mistakes often blend in once the project is complete.
FAQ – Braided Table Runner Quilt Pattern
1. What size should my braided table runner be?
The size depends on your table. Most table runners measure between 40 and 60 inches long and 12 to 18 inches wide, but you can adjust it as needed.
2. Can I make a braided runner without a sewing machine?
Yes, but it will take longer. Hand stitching is possible, though a sewing machine provides faster and more precise results.
3. How many fabric strips will I need?
The number of strips depends on your desired length and width. For a standard 40-inch runner, you’ll need around 40–50 strips of 2½-inch width.
4. What’s the best fabric for a braided quilt pattern?
High-quality cotton is the best option because it’s easy to work with, durable, and washable.
Conclusion
The Braided Table Runner Quilt Pattern is a timeless project that combines creativity, functionality, and beauty. It allows you to express your personal style through color and design while enhancing your home décor with a handmade touch. From choosing fabrics to adding finishing details, every step of this process is both enjoyable and rewarding.