
The Falling Leaves Quilt Block – TUTORIAL is a perfect project for quilters who love combining seasonal themes with timeless designs. Quilting has always been about more than just fabric and thread—it’s about creativity, storytelling, and capturing the beauty of everyday life.
This quilt block embodies the elegance of autumn with its symbolic falling leaves, making it a project that resonates deeply with anyone who loves the coziness and warmth of the season.
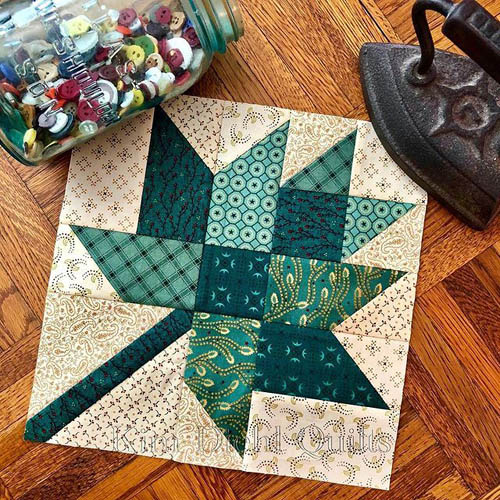
Creating a quilt block with the Falling Leaves Quilt Block – TUTORIAL gives crafters the opportunity to explore symmetry, color contrast, and texture in a meaningful way. The leaf motif works beautifully in both traditional and modern quilting settings, allowing you to personalize the design according to your fabric choices.
Whether you choose earthy browns, fiery reds, or golden yellows, the block reflects the richness of autumn and the natural world.
Another reason this Falling Leaves Quilt Block – TUTORIAL is so popular is its versatility. You can use it as a standalone decorative piece, incorporate it into a larger quilt, or even create smaller items like table runners, placemats, or wall hangings. The design adapts to various fabric styles, from solids to bold prints, making it suitable for both beginners and experienced quilters. No matter how you choose to use it, the block tells a seasonal story through fabric and stitches.
Materials and Preparation for the Falling Leaves Quilt Block – TUTORIAL
Before starting the Falling Leaves Quilt Block – TUTORIAL, it’s important to gather the right materials. Cotton fabric is highly recommended because of its durability and ease of use. Choose a mix of light and dark tones to highlight the leaf shapes and create depth within the design. Seasonal prints, like fabrics featuring leaves or acorns, can further enhance the autumn theme.
Batting is another essential element. For quilt blocks, thin cotton batting is ideal since it provides structure without adding too much bulk. This makes it easier to assemble multiple blocks into a larger quilt later. Polyester batting is another option if you prefer more loft and texture.
The backing fabric can be simple or decorative, depending on your goals. For smaller projects like placemats or wall hangings, a patterned fabric on the back adds an extra layer of interest. For larger quilts, a neutral or complementary fabric works best.
Thread choice is also crucial. Strong cotton or polyester thread ensures durability, especially if the quilt will be used often. You may also experiment with thread colors—neutral shades blend seamlessly, while bold threads can highlight the leaf shapes.
Tools for this project include a rotary cutter, quilting ruler, self-healing cutting mat, and sewing machine. Precision is key with quilt blocks, so make sure to measure carefully and cut accurately. Scissors, pins, and clips will also be useful throughout the process.
Lastly, prepare your sewing machine with a quilting needle. Quilting needles are designed to handle multiple fabric layers, making them essential for smooth stitching. Having all your materials ready ensures a stress-free and enjoyable quilting experience.
Step-by-Step Guide for the Falling Leaves Quilt Block – TUTORIAL
The first step in the Falling Leaves Quilt Block – TUTORIAL is cutting the fabric pieces. Begin by cutting squares and triangles according to the block measurements. Accuracy here is essential, as uneven cuts will disrupt the symmetry of the design.
Next, start piecing the block. Assemble the leaf sections by sewing triangles and squares together. Press each seam as you go to keep the fabric flat and the block neat. This step-by-step assembly is what gradually builds the leaf motif.
Once the smaller leaf sections are complete, arrange them into the full quilt block. At this point, you’ll begin to see the falling leaves pattern emerge. Double-check that your pieces are aligned before stitching the rows together.
After the block is assembled, layer it with batting and backing fabric to prepare for quilting. Smooth out any wrinkles and secure the layers with safety pins or clips. This ensures that the block stays in place during the quilting process.
Now comes the quilting stage. You can outline the leaf shapes with straight-line stitching to emphasize the design or use free-motion quilting to add swirling patterns that mimic falling leaves. This step gives the block depth and character.
Finally, finish the edges with binding. Binding not only secures the layers but also gives the block a polished look. Completing the Falling Leaves Quilt Block – TUTORIAL is a rewarding experience that results in a piece both beautiful and functional.
Creative Design Ideas for the Falling Leaves Quilt Block – TUTORIAL
One creative approach to the Falling Leaves Quilt Block – TUTORIAL is experimenting with seasonal color palettes. Rich reds, golds, and oranges capture the feeling of autumn, while cool greens and blues can represent the transition from summer to fall.
You can also use the block in smaller decorative projects. For example, making a set of placemats or a table runner adds a seasonal touch to your dining space. These smaller items are quick to complete and make excellent handmade gifts.
Another idea is to create a wall hanging. The falling leaves motif works beautifully as a piece of textile art that can be displayed each autumn. It serves as both decoration and a reminder of the season’s beauty.
If you enjoy personalizing your quilts, consider adding embroidery to the block. Small stitched details, such as veins on the leaves or initials, make the quilt more meaningful and unique.
You can also mix textures by combining cotton fabrics with flannel or linen. This adds tactile variety and makes the quilt feel even more special. The contrast of textures can enhance the overall design.
Finally, the Falling Leaves Quilt Block – TUTORIAL can be adapted for modern quilts by using bold geometric fabrics or unexpected color combinations. This gives the block a fresh look while still honoring its traditional roots.
Tips and Tricks for Success with the Falling Leaves Quilt Block – TUTORIAL
When working on the Falling Leaves Quilt Block – TUTORIAL, precision is key. Take your time measuring and cutting fabric pieces. Small mistakes can throw off the symmetry of the leaf design.
Pressing seams as you go is another essential step. A well-pressed block lies flat, making it easier to assemble and quilt. It also gives the final product a professional appearance.
If you’re a beginner, start with larger blocks. Bigger pieces are easier to cut, align, and sew, making the process more manageable. As you gain confidence, try smaller blocks for more intricate designs.
Use a walking foot on your sewing machine when quilting. This attachment helps feed multiple layers evenly, preventing fabric from shifting and ensuring smooth quilting lines.
Experiment with quilting stitches. Straight-line stitching emphasizes structure, while free-motion quilting adds a whimsical, flowing effect that pairs beautifully with the leaf theme.
Lastly, remember to enjoy the process. The Falling Leaves Quilt Block – TUTORIAL is more than just a project—it’s a chance to connect with the art of quilting and celebrate the beauty of the changing seasons.
FAQ About the Falling Leaves Quilt Block – TUTORIAL
Q1: Is the Falling Leaves Quilt Block beginner-friendly?
Yes, it’s suitable for beginners who are comfortable with basic cutting and piecing techniques. Starting with larger blocks makes the process easier.
Q2: How big should the quilt block be?
The block can vary in size, but common dimensions are 12″ x 12″ or 10″ x 10″. You can adjust the measurements based on your project.
Q3: What fabrics are best for this quilt block?
Cotton fabrics are ideal. They are durable, easy to work with, and available in countless seasonal prints and colors.
Q4: Can I hand quilt the Falling Leaves Quilt Block?
Yes, hand quilting is an option and adds a traditional touch. It will take more time than machine quilting but provides a unique handmade feel.
Q5: How can I use this block beyond quilts?
You can use it in placemats, table runners, wall hangings, or even as part of a pillow design. Its versatility makes it suitable for many projects.
Q6: Can I customize the block with other patterns?
Absolutely. You can combine the falling leaves design with other seasonal blocks or use modern fabrics to create a unique variation.
Conclusion
The Falling Leaves Quilt Block – TUTORIAL is a beautiful blend of tradition, creativity, and seasonal inspiration. From selecting fabrics to quilting the final stitches, this project allows you to capture the essence of autumn in fabric form. Its versatility makes it suitable for everything from quilts to small decorative items, while its timeless design ensures it will be cherished for years.
VIDEO TUTORIAL
We hope this guide has inspired you to try your own project. Please share your honest opinion about this article and offer suggestions for future quilting topics. Your feedback helps keep the quilting community creative, supportive, and full of fresh ideas.

