
How to make a beautiful butterfly quilt block – tutorial is one of the most delightful quilting topics for anyone who loves combining creativity with traditional patchwork techniques. The butterfly motif brings a sense of lightness, movement, and charm to any quilt project. Whether you are making a baby quilt, a spring wall hanging, or a colorful sampler, learning how to make a beautiful butterfly quilt block – tutorial will open the door to many inspiring designs.
Many quilters are drawn to butterfly blocks because they look intricate but can be created with straightforward piecing methods. With the right preparation and step-by-step guidance, even beginners can achieve impressive results. This tutorial focuses on clarity, accuracy, and practical tips so you can confidently master how to make a beautiful butterfly quilt block – tutorial without feeling overwhelmed.
In this complete guide, you will discover the materials you need, cutting instructions, sewing steps, layout ideas, and finishing tips. By the end, you will fully understand how to make a beautiful butterfly quilt block – tutorial and be ready to incorporate this charming block into your next quilting project.
Understanding the Butterfly Quilt Block Design
Learning how to make a beautiful butterfly quilt block – tutorial begins with understanding the structure of the block. Most butterfly quilt blocks are built using simple geometric units such as half-square triangles, rectangles, and squares arranged to form wings and a body.
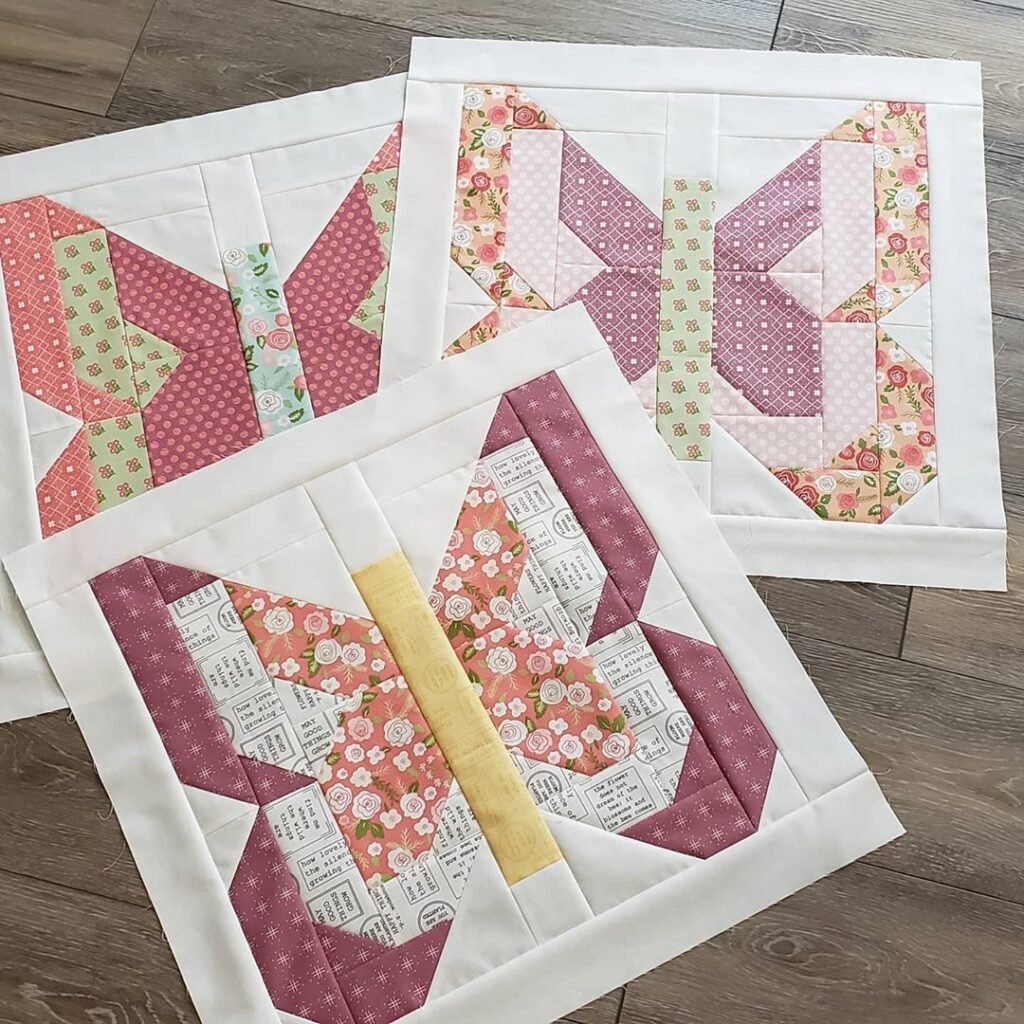
The butterfly shape typically features two upper wings, two lower wings, and a narrow center body. This symmetry makes the block visually balanced and pleasing to the eye. Once you understand the layout, the sewing process becomes much easier.
One reason quilters love the butterfly block is its versatility. You can create realistic butterflies with soft gradients or go bold with bright, playful fabrics. The same basic structure supports many different styles.
Color placement plays a major role in the final appearance. High contrast between the wings and the background helps the butterfly stand out clearly. Beginners often find success by choosing one dominant wing color and a neutral background.
Another advantage when learning how to make a beautiful butterfly quilt block – tutorial is that the block size can be easily adjusted. You can make small blocks for detailed quilts or larger ones for quick projects.
Because of its cheerful and symbolic meaning, the butterfly block is often used in children’s quilts, spring themes, and nature-inspired designs.
Materials and Tools You Will Need
Before starting how to make a beautiful butterfly quilt block – tutorial, gathering the proper materials will set you up for success. Preparation helps ensure accurate piecing and a smooth quilting experience.
First, choose high-quality quilting cotton in at least three fabrics: one for the wings, one for the butterfly body, and one for the background. Strong contrast between these fabrics will highlight the butterfly shape.
Essential cutting tools include a rotary cutter, self-healing cutting mat, and acrylic quilting ruler. Precise cutting is extremely important when working through how to make a beautiful butterfly quilt block – tutorial.
You will also need a reliable sewing machine set to a consistent quarter-inch seam allowance. Accuracy here keeps the block square and professional looking.
Select a neutral cotton thread that blends well with your fabrics. This prevents the stitching from distracting from the butterfly design.
Pins or sewing clips help keep pieces aligned, especially when working with half-square triangles. Many quilters also like using a pressing mat and hot iron nearby.
Finally, keep a small design surface available so you can preview your butterfly layout before sewing. This simple step prevents common orientation mistakes.
Step-by-Step Sewing Instructions
Now let’s walk through how to make a beautiful butterfly quilt block – tutorial step by step. Taking your time during each stage will greatly improve your final results.
Begin by cutting all fabric pieces according to your chosen block size. Typically, you will prepare background squares, wing pieces, and a narrow rectangle for the butterfly body.
Next, create the half-square triangles that form the angled edges of the wings. Pair the appropriate fabrics, mark a diagonal line, sew on both sides, then cut and press carefully.
Lay out all pieces on your workspace before sewing. This is a critical step in how to make a beautiful butterfly quilt block – tutorial, because it ensures the butterfly wings are oriented correctly.
Sew the units together in rows, maintaining a precise quarter-inch seam allowance. Press seams gently after each step to keep the block flat and accurate.
Once the rows are complete, join them to form the full butterfly block. Check that the block measures correctly and trim if necessary.
Repeat the process to create multiple blocks if you are planning a full quilt. With practice, how to make a beautiful butterfly quilt block – tutorial becomes faster and very enjoyable.
Creative Layout and Finishing Ideas
After mastering how to make a beautiful butterfly quilt block – tutorial, the fun continues with layout and finishing choices. These decisions greatly influence the final look of your quilt.
A simple grid layout is perfect for beginners and highlights each butterfly clearly. This works especially well for baby quilts and themed projects.
For a more dynamic design, try alternating butterfly colors or rotating blocks slightly. This creates movement across the quilt surface and adds visual interest.
Sashing between blocks can frame each butterfly beautifully. Light sashing gives the quilt an airy feel, while darker sashing creates strong definition.
When quilting the finished top, gentle curves or loop designs complement the butterfly theme nicely. Straight-line quilting works too if you prefer a modern finish.
Borders are optional but can enhance the overall presentation. A floral border pairs especially well with butterfly blocks.
With thoughtful finishing touches, your project based on how to make a beautiful butterfly quilt block – tutorial can become a stunning handmade piece.
FAQ About How to Make a Beautiful Butterfly Quilt Block – Tutorial
Is this butterfly quilt block beginner-friendly?
Yes, most versions are suitable for beginners who are comfortable with basic cutting and half-square triangles.
What size should my butterfly block be?
Common sizes range from 8 to 12 inches finished, but you can scale the block depending on your project.
Which fabrics work best for butterfly wings?
Bright prints, batiks, and small florals work beautifully because they add life and movement to the wings.
Do I need special quilting tools?
No special tools are required beyond standard quilting supplies, though accurate rulers and a rotary cutter are highly recommended.
Can I make a scrappy butterfly quilt?
Absolutely. Scrappy butterflies are very popular and give the quilt a playful, colorful appearance.
How do I keep my block square?
Use a consistent quarter-inch seam allowance, press carefully, and trim the block after assembly if needed.
Conclusion
Learning how to make a beautiful butterfly quilt block – tutorial is a rewarding step for any quilter who wants to add charm and personality to their projects. In this guide, you discovered the structure of the butterfly block, the essential materials, step-by-step construction methods, and creative finishing ideas.
With careful cutting, accurate seams, and thoughtful color choices, your butterfly block can look polished and professional. The beauty of how to make a beautiful butterfly quilt block – tutorial is that it offers endless opportunities for personalization while remaining approachable for quilters of many skill levels.

