
Learning how to make a handkerchief quilt is a beautiful way to preserve memories and create something meaningful from vintage or sentimental fabrics. This type of quilt has been cherished for generations — often made from old handkerchiefs that once belonged to loved ones.
A handkerchief quilt combines both nostalgia and creativity. Many people use inherited or vintage handkerchiefs that carry special meaning—wedding hankies, family heirlooms, or collectible prints. These delicate fabrics are ideal for quilting because they are light, soft, and often beautifully detailed with lace, embroidery, or printed designs.
Another reason why making a handkerchief quilt has become increasingly popular is its eco-friendly appeal. Rather than discarding old fabrics, you can repurpose them into something new and functional. Handkerchief quilts tell a story—each square can represent a moment, a person, or a place in time.
Choosing and Preparing Handkerchiefs for Your Quilt
Before you begin stitching, the first step in how to make a handkerchief quilt is selecting and preparing your materials. Choosing the right handkerchiefs determines how your finished quilt will look and feel. Aim for handkerchiefs of similar sizes and materials for an even and balanced result. Cotton or linen handkerchiefs are best because they’re breathable, durable, and easy to work with. Avoid synthetics that may stretch or melt when ironed.
Inspect each handkerchief for stains, holes, or weak areas. These can often be repaired, but it’s best to choose fabrics that are still strong enough to handle stitching and handling. If your handkerchiefs are of sentimental value, consider reinforcing delicate sections with lightweight fusible interfacing to strengthen them before sewing.
Next, wash each handkerchief gently using mild detergent and cold water. Since many vintage fabrics are fragile, avoid harsh scrubbing or bleach. Lay them flat to dry or press with a warm iron to remove wrinkles. This will make cutting and assembling much easier later on.
Ironing is a critical step when learning how to make a handkerchief quilt. Pressing each piece not only helps flatten edges but also prevents uneven seams. Be sure to iron on the reverse side, especially if the handkerchiefs have embroidery or delicate lace.
Once clean and pressed, sort your handkerchiefs by color or pattern. You may choose a uniform theme—like pastels or floral prints—or create a colorful mix for a patchwork look. Laying them out beforehand helps you visualize the final design and adjust the placement to your liking.
Finally, measure each piece carefully. Even a small difference in size can affect how the quilt fits together. Trim any uneven edges with a rotary cutter and ruler, keeping your cuts straight and accurate. This ensures all squares align properly when sewing the quilt top.
Designing the Layout of Your Handkerchief Quilt
The next step in how to make a handkerchief quilt is designing your layout. This is where creativity truly shines. Decide on the quilt’s overall size—whether you’re making a small lap quilt, a wall hanging, or a full-size bedspread. Your layout can be as simple or as intricate as you want.
Lay out all the handkerchiefs on a flat surface or design wall. Experiment with different arrangements before committing to one. Some quilters prefer symmetrical designs, while others like the charm of a random mix. Consider color balance—spread darker or bolder pieces evenly so that no section appears too heavy or bright.
If your handkerchiefs vary slightly in size, you can frame each one with borders of coordinating fabric to make them uniform. These fabric “frames” not only balance sizes but also add a lovely touch that enhances each handkerchief’s design.
You can also add sashing between the handkerchief squares. Sashing is the fabric that separates each block, giving your quilt a more defined structure. White or cream-colored sashing keeps the focus on the handkerchiefs, while colored sashing can create contrast and personality.
Take a photo of your layout once you’re satisfied with it. This will serve as a guide during sewing so you can maintain the same arrangement. A digital snapshot is especially helpful if you need to move your work or pause mid-project.
When designing, think about where the quilt will be displayed. A handkerchief quilt filled with vintage lace and soft tones might look perfect in a bedroom, while a bright and patterned version could bring life to a living room or nursery. The design stage is your opportunity to let imagination meet emotion.
Sewing the Handkerchief Quilt Top
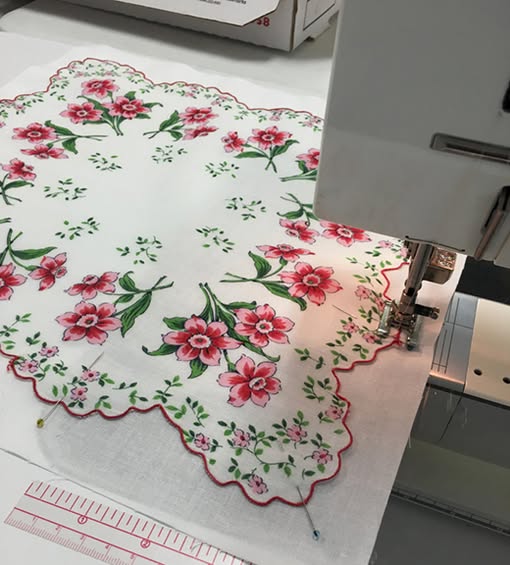
Now comes the heart of how to make a handkerchief quilt—stitching it all together. Start by joining your handkerchief squares row by row. Use a sewing machine set to a short, gentle stitch to avoid tearing delicate fabric. If you’re new to quilting, work slowly and use a quarter-inch seam allowance for consistency.
To prevent fraying, place the right sides of the handkerchiefs together before sewing. This ensures that the seam allowances are hidden inside once you press the rows open. Press each seam flat as you go to keep your quilt top smooth.
If you’ve added borders or sashing, sew them between the handkerchief blocks before joining the rows. This helps the quilt stay even and gives a polished, framed appearance. Make sure all lines match up neatly at the corners—using pins or clips can make alignment easier.
After sewing all rows together, press the entire quilt top one more time. A well-pressed quilt top lays flat and makes layering and quilting much easier. Take a moment to admire your work—it’s rewarding to see how each piece fits together beautifully.
If you want to add extra decorative touches, consider sewing lace, embroidery, or small appliqué details along the edges of certain squares. These personal embellishments enhance the charm of your quilt and make it truly one-of-a-kind.
Once your quilt top is complete, trim the edges neatly to prepare for the final steps—layering and quilting. Remember, patience and precision go a long way toward achieving a professional-looking result.
Layering, Quilting, and Finishing Touches
The final phase in how to make a handkerchief quilt is assembling and finishing it. Begin by laying out your quilt backing fabric on a large, flat surface—wrong side facing up. Next, place the batting (the fluffy inner layer) on top, followed by your quilt top with the right side facing up. Smooth each layer carefully to remove wrinkles or folds.
Use quilting pins or safety pins to secure all three layers together. This step, called “basting,” prevents shifting while you quilt. You can also baste using long, temporary stitches if you prefer a thread method instead of pins.
Quilting itself can be done by hand or machine. Hand quilting offers a traditional, soft finish that complements vintage handkerchiefs beautifully. Machine quilting, however, is faster and provides extra durability. Whichever method you choose, stitch gently to avoid damaging delicate fabrics.
You may quilt in straight lines, along seams, or around the designs within each handkerchief. The choice depends on your desired look. Some prefer minimal quilting to keep the fabric’s natural flow, while others enjoy decorative stitches that enhance texture.
FAQ – Frequently Asked Questions about Handkerchief Quilts
1. Can I make a handkerchief quilt if I’m a beginner?
Yes! Making a handkerchief quilt is a great project for beginners because it uses simple stitching and square shapes. Take your time and focus on accuracy, especially when cutting and pressing your fabrics.
2. Do I need to use vintage handkerchiefs?
Not necessarily. While vintage pieces add sentimental value, you can use new or reproduction handkerchiefs too. The process and techniques remain the same.
3. How many handkerchiefs do I need for a quilt?
It depends on the size of the quilt. A small lap quilt may need around 16–20 handkerchiefs, while a full-size bed quilt could require 40 or more.
4. What kind of batting works best?
A lightweight cotton batting is ideal. It complements the delicate texture of handkerchiefs and ensures the quilt remains soft and flexible.
Conclusion
Creating a handkerchief quilt is more than just a craft—it’s a heartfelt journey that combines creativity, history, and love. You’ve learned how to make a handkerchief quilt step by step: from selecting and preparing your fabrics, designing your layout, sewing your quilt top, to layering and finishing it beautifully.

