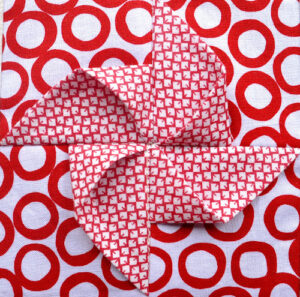
Creating an Origami 3D Pinwheel quilt block is a fun and unique way to add dimension and interest to your quilt patterns.
In this tutorial, we’ll guide you step-by-step through the process of making this intricate quilt block.
Whether you’re a seasoned quilter or a beginner, this guide will help you craft a beautiful and dynamic pinwheel quilt block.
Materials and Fabric Cuts
To begin your Origami 3D Pinwheel quilt block, you’ll need to gather your materials. For this project, the fabric choices are crucial as they will determine the final look and feel of your quilt block. Here’s what you’ll need:
- Fabric A (background fabric): Cut four 5-inch squares.
- Fabric B (pinwheel fabric): Cut eight 3.5-inch squares.
- Fabric C (center square): Cut one 4.5-inch square.
- Batting: Cut a 12-inch square.
- Backing fabric: Cut a 12-inch square.
Choosing the right fabrics is essential. Opt for contrasting colors and patterns to make the pinwheel design stand out. High-quality quilting cotton works best for this project, as it provides durability and ease of handling.
Before you start cutting, ensure your fabric is pressed and free of wrinkles. This will help you achieve accurate cuts and neat folds in your 3D pinwheel quilt block. Use a rotary cutter, quilting ruler, and a cutting mat to make precise cuts.
Assembling the Pinwheel Units
Now that you have all your pieces cut, it’s time to start assembling the pinwheel units. The key to a successful Origami 3D Pinwheel quilt block is precise folding and sewing. Follow these steps to create your pinwheel units:
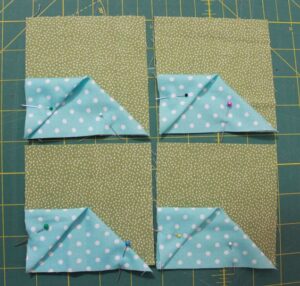
- Fold the 3.5-inch squares: Take each of the 3.5-inch squares from Fabric B and fold them in half diagonally, pressing with an iron to create a crisp fold.
- Layer the folded squares: Lay two folded triangles on top of each 5-inch square from Fabric A, aligning the raw edges. The folded edges should be facing inward, creating a triangular pocket on the square.
- Sew the layers: Sew a scant 1/4-inch seam along the raw edges of the folded triangles to secure them to the background fabric. Repeat this process for all four 5-inch squares from Fabric A.
This method of layering and sewing creates the 3D effect of the pinwheel. Ensure your seams are straight and even, as this will impact the final appearance of your quilt block. After sewing, press the units with an iron to set the seams.
Constructing the Quilt Block
With the pinwheel units ready, the next step is to assemble the quilt block. This involves arranging the units in a specific pattern and sewing them together. Follow these steps:
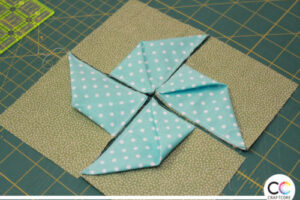
- Arrange the units: Lay out the four pinwheel units in a 2×2 grid. Ensure the folded edges of the triangles are facing the center to create the pinwheel effect.
- Sew the rows: Sew the top two pinwheel units together, followed by the bottom two units. Press the seams open to reduce bulk.
- Join the rows: Sew the two rows together, aligning the seams carefully. Press the final seam open.
At this point, you should have a completed pinwheel block with a beautiful 3D effect. The key to a successful assembly is precise alignment and pressing, which will help your block lie flat and look professional.
Adding the Center Square
To enhance the 3D effect and add a finishing touch, we’ll add the center square to the quilt block. This step is simple but makes a significant difference in the overall design. Follow these steps:
- Center placement: Take the 4.5-inch square from Fabric C and place it in the center of the pinwheel block.
- Secure the center: Sew around the edges of the center square using a 1/4-inch seam allowance. Ensure your stitches are even and secure.
- Press the block: After sewing, press the entire block with an iron to set the seams and smooth out any wrinkles.
Adding the center square not only completes the design but also reinforces the structure of the quilt block. It’s a small detail that enhances the visual appeal and stability of your project.
Join our VIP list and receive exclusive free patterns. You’ll have daily access to the best designs, delivered straight to your device. Don’t miss this chance to get inspired and improve your projects with new and amazing patterns!
Quilting and Finishing
The final steps involve quilting and finishing your Origami 3D Pinwheel quilt block. This stage brings the entire project together, transforming your quilt block into a piece of art. Follow these steps:
- Layer the quilt sandwich: Place the backing fabric wrong side up, then layer the batting on top, followed by the quilt block right side up. Smooth out any wrinkles and secure the layers with quilt basting spray or pins.
- Quilt the layers: Quilt through all layers using a walking foot or free-motion quilting foot. Follow the lines of the pinwheel or create your own quilting design to enhance the 3D effect.
- Trim and bind: Once quilting is complete, trim the excess batting and backing fabric. Finish the edges with a binding of your choice, ensuring it is securely attached.
Quilting adds texture and dimension to your project, highlighting the 3D effect of the pinwheel. Take your time to quilt carefully, as this will impact the final appearance and durability of your quilt block.

Creating an Origami 3D Pinwheel quilt block is a rewarding project that adds a unique touch to any quilt. By following these detailed steps, you can craft a beautiful and intricate quilt block that stands out. Remember, the key to success lies in precise cutting, careful folding, and accurate sewing. Happy quilting!


