
Crochet Bird – Pattern is a charming handmade project that turns a small amount of yarn into an adorable bird that can be customized in countless colors and styles. A crochet bird can become a spring decoration, Christmas ornament, nursery accent, garland piece, appliqué, keychain, or thoughtful handmade gift. Because the basic shape can be created with common crochet stitches and simple increases and decreases, this project is approachable for beginners while still giving experienced crocheters plenty of opportunities to add creative details.
One of the most enjoyable parts of this Crochet Bird – Pattern is choosing the colors. You can work with natural shades inspired by robins, bluebirds, cardinals, chickadees, or other familiar birds, or forget realism entirely and combine bright colors for a whimsical result. A contrasting belly, colorful wings, and a tiny beak can dramatically change the personality of the finished bird. This also makes the project an excellent way to use small amounts of leftover yarn from previous crochet projects.
The construction can also be adapted depending on how you want to use the finished piece. A flat crochet bird appliqué works beautifully on blankets and bags, while two matching pieces can be joined and lightly stuffed to create a dimensional ornament. Another option is to crochet continuously in rounds for a small amigurumi-style bird. This tutorial focuses on an adaptable dimensional bird made with basic shaping techniques, explaining how to form the body, add wings and a tail, create the facial details, and finish everything neatly.
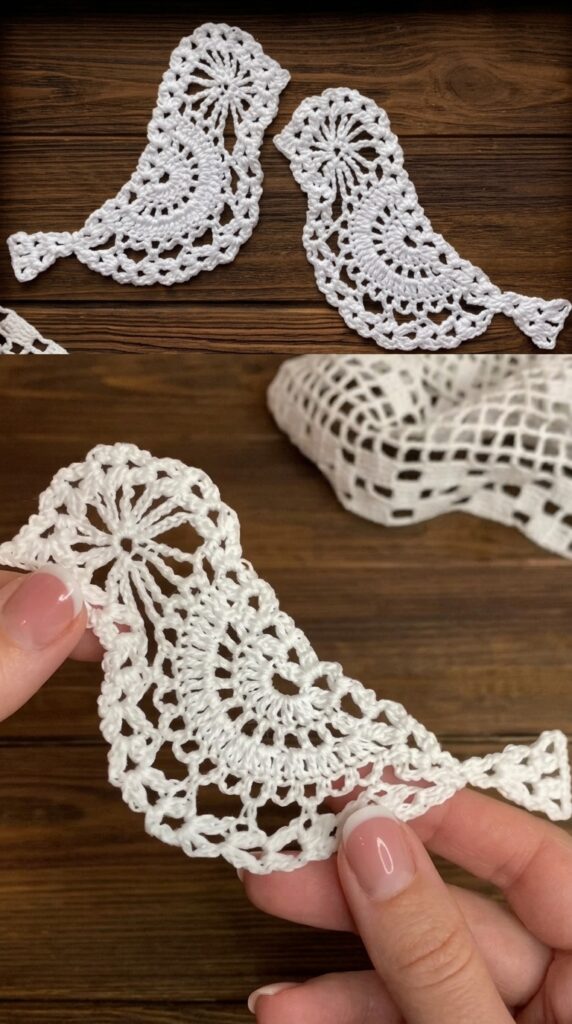
Materials and Basic Stitches for the Crochet Bird
To begin your Crochet Bird – Pattern, select a yarn that provides good stitch definition. Cotton is an excellent choice for decorative birds because it produces clear, structured stitches. Acrylic yarn also works well and is available in a wide variety of colors. Medium-weight yarn creates a larger bird, while lightweight yarn or crochet thread can produce delicate miniature versions.
Choose a crochet hook appropriate for the yarn. For a stuffed crochet bird, using a hook slightly smaller than you might normally use with that yarn can help produce a dense fabric. Compact stitches reduce visible gaps and help prevent filling from showing through the finished piece.
You will also need scissors, a yarn needle, stitch markers, and a small amount of suitable stuffing if you want a dimensional bird. Prepare contrasting yarn for the beak, wings, tail, and eyes. Facial details can be embroidered with yarn so the project remains completely textile-based.
The primary stitch for this easy crochet bird pattern is single crochet, abbreviated as sc in US terminology. To work single crochet, insert the hook into the designated stitch, yarn over, pull up a loop, yarn over again, and pull through both loops. Single crochet creates a dense surface that is particularly useful for small stuffed projects.
You will also need single crochet increases and decreases. To increase, work two single crochet stitches into one stitch. This expands the circumference and helps form rounded sections. A decrease combines neighboring stitches and gradually narrows the piece. Together, increases and decreases create the bird’s curved body.
Before starting the final project, consider making a small gauge sample or simply crocheting the first few rounds and evaluating the fabric. For a decorative bird, matching an exact standardized gauge is less important than maintaining consistent tension. The stitches should be firm but comfortable to work.
How to Crochet the Bird Body Step by Step
Begin the crochet bird body with a magic ring. Work a small number of single crochet stitches into the ring and pull the center closed. Place a stitch marker in the first stitch if you plan to work continuously in a spiral. The marker will make it much easier to identify the beginning of each round.
During the next rounds, add evenly distributed crochet increases. The piece will gradually expand into a small circle and then begin forming a rounded shape. Avoid placing all increases in exactly the same location from round to round because staggering them can produce a smoother body.
Once the body reaches the desired width, work several rounds without increases. These even rounds establish the middle section of the bird. For a plump decorative bird, add more straight rounds. For a smaller, compact shape, begin decreasing sooner.
Start forming the neck and head by gradually adjusting the circumference. Depending on the style you want, the head can be worked as part of the same continuous piece or created separately and sewn onto the body. Continuous construction reduces sewing and can produce a smooth amigurumi bird silhouette.
Before the opening becomes too small, begin adding the stuffing. Use small portions rather than pushing in one large piece. Distribute the filling toward the sides and rounded areas with your fingers. The bird should feel pleasantly firm while still allowing the crochet fabric to maintain its natural shape.
Continue decreasing until the remaining opening is small enough to close. Add a final amount of stuffing if necessary, then fasten off while leaving a yarn tail. Thread the tail through the remaining stitches, pull gently to close the opening, and weave the end securely into the body.
Crocheting the Wings, Tail, Beak, and Details
The wings give your Crochet Bird – Pattern much of its personality. Begin each wing with a short foundation chain or small magic ring, depending on the shape you prefer. Work increases near the wider portion and use shorter stitches toward the tip to create a soft teardrop or leaf-shaped piece.
Make two matching crochet wings and place them temporarily against the sides of the bird. Before sewing, check that they sit at approximately the same height and angle. Once you are satisfied with their position, use a yarn needle and matching yarn to sew around the upper or inner portion of each wing.
For the tail, crochet several short pointed sections or create one small fan-shaped piece. Attach it at the back of the body, slightly below the center line. A contrasting tail color can make the design more playful, while matching the tail to the wings creates a coordinated appearance.
The crochet bird beak can be created with orange, yellow, beige, or another contrasting yarn. For a tiny bird, a few embroidered stitches may be enough. For a larger project, crochet a small triangular piece and sew it securely to the front of the head.
Embroider the eyes with dark yarn, positioning them evenly on either side of the head. Make each eye small at first because additional stitches can always be added. Facial details have a strong effect on the expression of a miniature crochet animal, so check the placement before securing the yarn ends.
You can also add optional details such as a contrasting breast, embroidered feathers, tiny feet, or a decorative loop. If you want to turn the bird into a crochet hanging ornament, securely attach a chain loop to the upper portion of the body and test that the bird hangs in the desired orientation.
Finishing and Creative Ways to Customize Your Crochet Bird
Once all components are attached, inspect your crochet bird from every angle. Check that the wings are positioned evenly, the tail is centered, and the facial features appear balanced. Gently reshape the stuffing with your fingers if one side looks noticeably flatter than the other.
Carefully weave in all remaining yarn tails. Pass each end through several stitches inside or along the back of the work before trimming it. Secure finishing is especially important when the bird will be handled frequently or hung as a seasonal decoration.
Color changes offer endless possibilities for this Crochet Bird – Pattern. A red body with darker wings can suggest a cardinal-inspired bird, while blue and white create a fresh spring palette. Brown, cream, and orange can produce a woodland appearance. Pastel colors work beautifully for Easter and nursery decorations.
You can also change the size without changing the general construction. Thicker yarn and a larger hook produce a bigger bird, while crochet thread and a fine hook create miniature birds. When changing materials, remember to adjust the size of the wings, tail, beak, and other details so they remain proportional.
For a crochet bird garland, make several birds in coordinating colors and attach them along a crocheted chain. You could also combine birds with flowers, leaves, hearts, or seasonal motifs. Another idea is to add a hanging loop and create individual ornaments for a decorative branch display.
Keep notes about your favorite version, including the yarn, hook size, number of rounds, increase and decrease placement, and finished dimensions. These notes will make it much easier to reproduce matching birds and will turn the basic instructions into your own personalized crochet bird pattern.
FAQ About the Crochet Bird – Pattern
Is the Crochet Bird – Pattern suitable for beginners?
Yes. A beginner who understands single crochet, increases, decreases, working in rounds, and basic sewing can complete the project. If you are new to amigurumi, using stitch markers and counting every round can make the process much easier.
What yarn is best for crocheting birds?
Cotton is popular because it offers excellent stitch definition, while acrylic is affordable and available in many colors. Both can work well. Select the fiber according to the texture and finished appearance you prefer.
What crochet hook should I use?
Use a hook suitable for your chosen yarn. For stuffed crochet projects, a slightly smaller hook can create denser fabric and reduce gaps between stitches.
How do I make a crochet bird bigger?
You can use thicker yarn and a larger hook or add additional increase rounds to the body. If you change the body dimensions, adjust the wings and other features proportionally.
How do I make a miniature crochet bird?
Use lightweight yarn or crochet thread with a smaller hook. Keep the same general shaping principles while reducing the number of rounds if necessary.
Why does my crochet bird have visible holes?
Visible gaps can result from loose tension or a hook that is too large for the yarn. Try a smaller hook or slightly firmer tension. Avoid overstuffing because excessive filling can also stretch the stitches apart.
Can I make the bird without stuffing?
Yes. You can crochet two flat bird shapes and join them without filling to create an appliqué or flat ornament. A single flat piece can also be sewn onto another crochet or fabric project.
How can I make different species of crochet birds?
Change the colors, wing shapes, beak proportions, and markings. You can take inspiration from familiar birds while keeping the basic crocheted body construction consistent.
Can I use scrap yarn for this project?
Absolutely. A small crochet bird requires relatively little yarn, making it an excellent scrap-friendly project. Small leftovers can be especially useful for wings, beaks, tails, and embroidered details.
What can I make with finished crochet birds?
They can become ornaments, garlands, appliqués, decorative mobiles, bag charms, spring decorations, or small handmade gifts. Changing the colors also makes the same pattern suitable for different seasons.
Conclusion
The Crochet Bird – Pattern is a delightful way to practice basic crochet shaping while creating a small project filled with personality. By starting with a magic ring, using single crochet increases and decreases, shaping the body, and adding separate wings, a tail, beak, and facial details, you can transform simple yarn into an adorable handmade bird.
Throughout this tutorial, you learned how to select suitable yarn, create a dense amigurumi-style body, stuff and close the piece, crochet matching wings, form the tail and beak, embroider the eyes, and securely assemble all the components. These techniques are useful for many other small crochet animals and decorative projects.

