
Crochet Bow – Pattern is a charming and versatile crochet project that turns a small amount of yarn into a beautiful handmade accessory. Crochet bows can be used to decorate hair accessories, bags, hats, blankets, gift packages, keychains, clothing, and many other handmade creations. Because the basic construction is simple and highly customizable, this project can be enjoyable for beginners while still giving experienced crocheters plenty of opportunities to experiment with colors, yarn textures, sizes, and decorative details.
Another reason the Crochet Bow is such an appealing project is that it does not require a large collection of materials or complicated techniques. With yarn, a suitable crochet hook, scissors, and a yarn needle, you can create an attractive bow using familiar stitches. The project also provides useful practice with chain stitches, single crochet, half double crochet, double crochet, slip stitches, and basic finishing techniques. Once you understand how the rectangular or shaped crochet piece becomes a bow, creating additional versions becomes much easier.
Following this Crochet Bow – Pattern also gives you the freedom to create a bow that matches almost any project. You might choose soft pastel yarn for a delicate decoration, neutral shades for a classic appearance, or bright colors for something playful and cheerful. The center can be wrapped with yarn or covered with a small crocheted band, while the edges can remain simple or receive additional finishing. The following tutorial explains the complete process so you can understand how to create, shape, assemble, and personalize your own crochet bow.
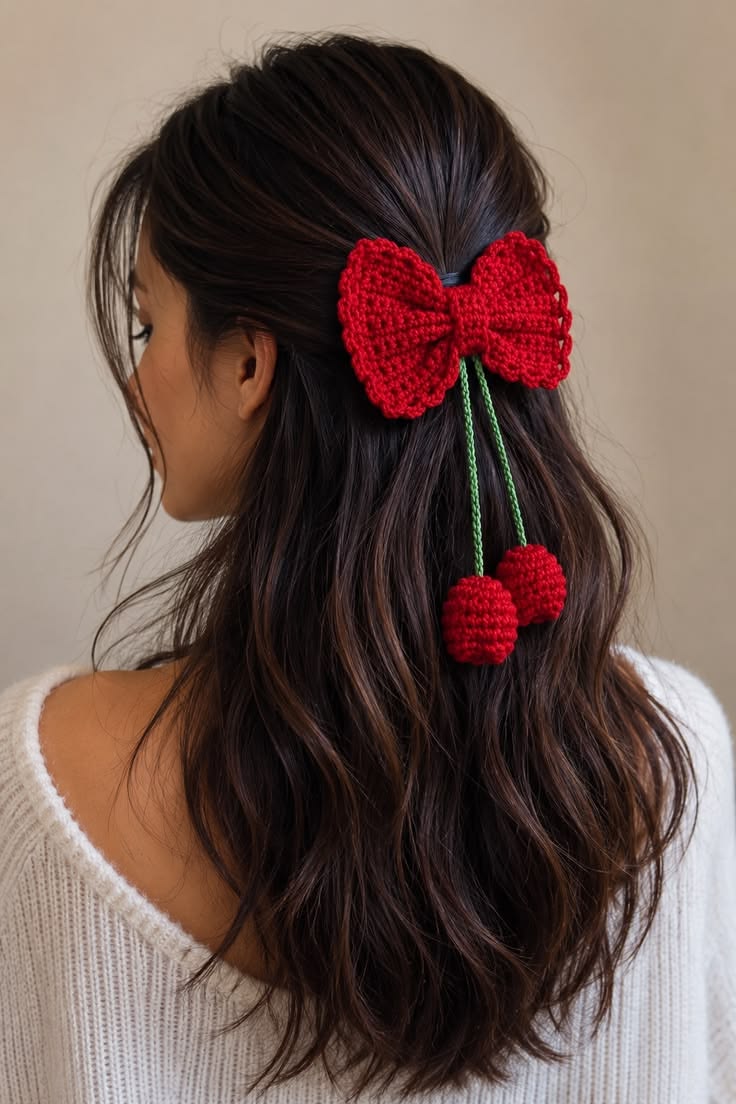
Materials and Basic Crochet Stitches for the Crochet Bow
Start your Crochet Bow – Pattern by selecting yarn that provides good stitch definition. Cotton yarn is an excellent option because it creates a structured bow and helps the finished piece maintain its shape. Acrylic yarn can also work well, especially when you want a softer and slightly more flexible result.
Choose a crochet hook appropriate for the yarn weight. Using a slightly smaller hook can produce tighter stitches and a firmer fabric, which is useful when making decorative bows. Avoid making your stitches excessively tight, however, because you should still be able to insert the hook comfortably throughout the project.
You will also need scissors and a yarn needle. Stitch markers are optional but can help beginners identify the first and last stitches of each row. If the bow will be attached to another handmade item, prepare any additional materials needed for that purpose before beginning.
The chain stitch (ch) creates the foundation for many crochet projects. To make a chain, create a slip knot, insert your hook, yarn over, and pull the yarn through the loop. Continue repeating this movement until you have the required foundation length.
The single crochet (sc) creates a compact and sturdy fabric. Insert your hook into the appropriate stitch, yarn over and pull up a loop, then yarn over again and pull through both loops on your hook. This stitch is especially useful when you want a structured crochet bow.
Other useful stitches include the half double crochet (hdc) and double crochet (dc). Half double crochet creates slightly more height while maintaining a relatively dense fabric, while double crochet produces a taller and more flexible texture. The exact stitch can be selected according to the appearance you want for your finished bow.
Crochet Bow Pattern: Step-by-Step Instructions
Begin by creating the foundation chain for your Crochet Bow. The number of chains determines the approximate width of the main bow piece. For a small decorative bow, you can begin with approximately 16 to 20 chains. For a larger bow, simply increase the foundation length.
For a simple version, chain 18. Starting in the second chain from the hook, work one single crochet into each chain across. At the end of the row, chain one and turn your work. You should now have a neat rectangular foundation for the bow.
Continue working one single crochet into every stitch across. Chain one and turn after each row. Repeat this process until the rectangle reaches approximately 8 to 10 rows, or until the proportions look suitable for the size of bow you want to create.
When the rectangle is complete, fasten off while leaving a reasonably long yarn tail. Use your yarn needle to weave in any unnecessary ends. The rectangle should look even and relatively flat before you begin shaping it.
Pinch the center of the rectangle firmly between your fingers. Fold the fabric slightly so the middle forms small pleats. This simple movement transforms the rectangular crochet piece into the recognizable shape of a crochet bow.
Wrap the long yarn tail several times around the pinched center. Keep the wrapping firm enough to maintain the bow shape without distorting the stitches. Secure the yarn at the back with your needle and weave the remaining end carefully through several stitches.
Creating the Center Band and Customizing Your Crochet Bow
A separate center band can give the Crochet Bow – Pattern a polished and professional appearance. Begin with a short foundation chain that is wide enough to cover the wrapped center section. For many small bows, approximately four to six chains will provide a useful starting point.
Work single crochet back and forth across this short foundation until the strip is long enough to wrap completely around the center of the bow. Keep checking the length against your bow instead of relying only on a fixed number of rows because yarn thickness can change the final measurements.
Wrap the completed strip around the center, positioning the seam at the back. Sew both ends of the strip together securely using a yarn needle. You can also place a few stitches through the bow itself to prevent the center band from shifting during use.
Color is one of the easiest ways to customize this crochet bow pattern. A single-color bow creates a clean and traditional look, while a contrasting center band adds visual interest. You can also alternate colors between rows to create stripes or use variegated yarn for natural color changes.
Texture provides another opportunity for customization. Once you are comfortable with the basic construction, try creating bows using half double crochet or double crochet instead of single crochet. Different stitches can produce softer, taller, or more textured fabric while maintaining the same basic bow construction.
Size can also be adjusted easily. Add more foundation chains for a wider bow and crochet additional rows for greater height. When resizing, maintain balanced proportions so the finished project still has the recognizable shape and attractive symmetry associated with a handmade Crochet Bow.
Finishing Your Crochet Bow and Creative Ways to Use It
After assembling the bow, carefully examine its shape. Gently pull each side outward and adjust the center folds until both halves appear balanced. Handmade crochet does not need to be perfectly identical on both sides, but careful shaping can produce a much cleaner final result.
Weave in every loose yarn end securely. Thread each tail through several nearby stitches on the back of the project before trimming away the excess. Proper finishing prevents loose yarn from appearing on the front and helps your Crochet Bow remain durable.
If your bow appears slightly uneven, gentle blocking can help. Lightly dampen the crochet fabric, arrange it into the desired shape on a flat surface, and allow it to dry naturally. Avoid stretching the bow excessively because this could distort the stitches.
The completed Crochet Bow – Pattern can be incorporated into many other crochet and craft projects. Sew a bow onto a handmade bag, attach it to a crocheted hat, or use several small bows as decorative elements on a blanket. They can also add a handmade touch to gift wrapping.
Crochet bows can also become decorative accessories when securely attached to an appropriate base. Because the pattern can be made in different sizes, you can create coordinated sets using matching yarn colors. Small bows work beautifully as subtle embellishments, while larger versions can become statement decorations.
Once you understand the basic technique, consider making several bows at the same time. Experiment with different combinations of yarn weight, stitch type, center-band width, and color. Keeping notes about your favorite stitch counts will make it easier to reproduce successful designs later.
FAQ About the Crochet Bow – Pattern
Is the Crochet Bow – Pattern suitable for beginners?
Yes. A basic Crochet Bow is an excellent beginner project because the main piece can be created with simple rows of single crochet. It also provides useful practice with turning rows, counting stitches, fastening off, sewing, and weaving in yarn ends.
What is the best yarn for a crochet bow?
Cotton and acrylic yarns are both popular options. Cotton usually produces a firmer bow with clearly defined stitches, while acrylic can create a softer result. The best choice depends on how you plan to use the finished accessory.
What crochet hook size should I use?
Choose a hook recommended for your yarn weight as a starting point. If you want a particularly firm bow, you may prefer a slightly smaller hook, provided you can still crochet comfortably without creating excessively tight stitches.
How can I make a larger Crochet Bow?
Increase the number of foundation chains to make the bow wider and add more rows to increase its height. Try to increase both dimensions proportionally so that the bow maintains an attractive shape.
How do I make a smaller bow?
Use fewer foundation chains and crochet fewer rows. Lightweight yarn and a smaller crochet hook can also help you create miniature bows with more delicate stitches.
Why does my crochet rectangle curl?
Curling can happen when tension is too tight, when stitches are accidentally added or removed, or simply because of the characteristics of the yarn. Maintaining consistent tension and counting your stitches regularly can reduce this problem.
Can I use double crochet instead of single crochet?
Yes. Double crochet creates a softer and more flexible fabric. Single crochet is generally firmer, but both stitches can work depending on the style and size of bow you want.
How can I keep the center of the bow secure?
Wrap yarn firmly around the pinched center and secure it at the back before adding the center band. After positioning the band, sew it securely and pass a few stitches through the back of the bow if additional stability is needed.
Can I use leftover yarn for this project?
Absolutely. A crochet bow pattern typically requires only a small quantity of yarn, making it a practical project for using leftover yarn from larger crochet creations.
What can I make with crochet bows?
Crochet bows can decorate hats, bags, blankets, gift packages, keychains, clothing, and many other handmade items. Changing their size and colors makes them easy to coordinate with different projects.
Conclusion
The Crochet Bow – Pattern demonstrates how a simple crochet shape can become a beautiful and versatile handmade accessory. Starting with basic materials and familiar stitches, you can crochet a rectangular piece, shape the center, secure the folds, and finish the project with a neat decorative band.
Throughout this tutorial, you learned how chain stitches, single crochet, half double crochet, double crochet, consistent tension, careful assembly, and finishing techniques contribute to a well-shaped bow. You also learned how changing yarn, colors, stitches, and dimensions can transform the same basic pattern into many different designs.

