
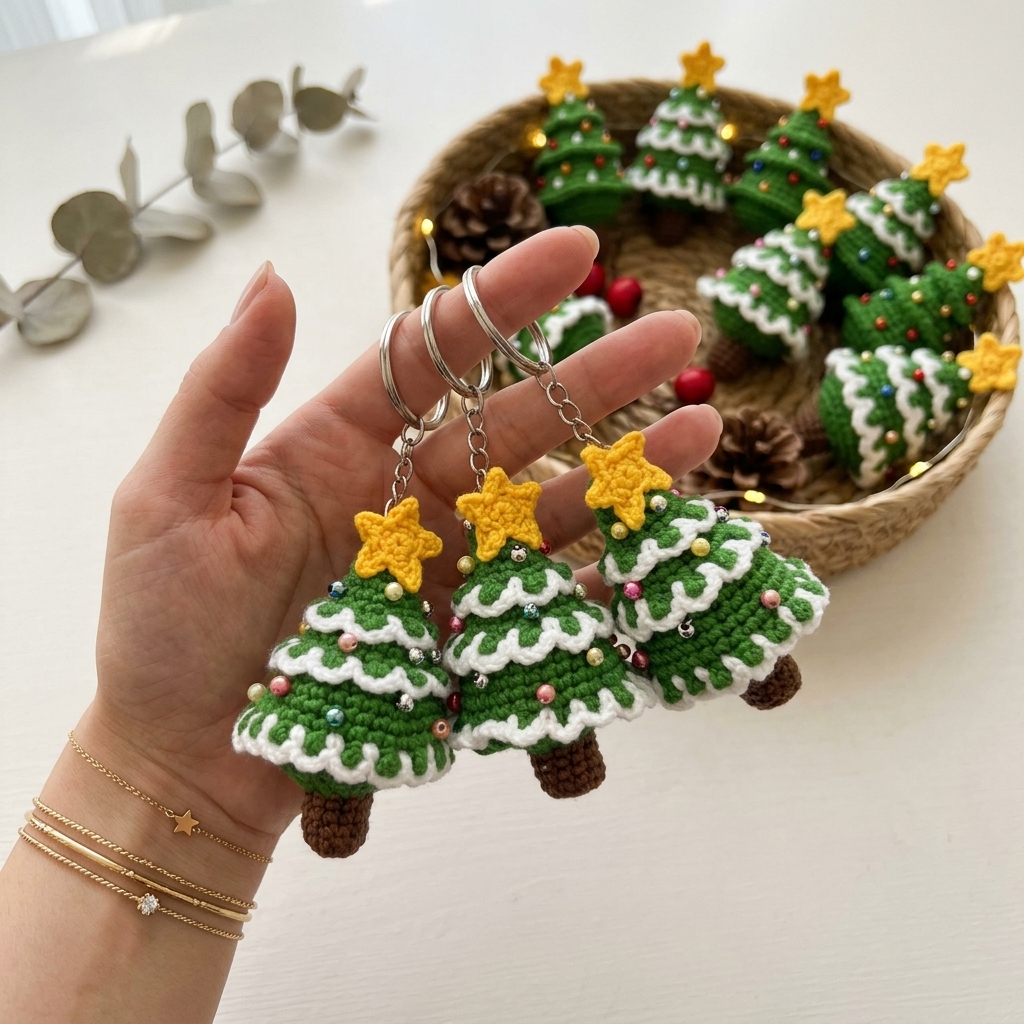
Crochet Christmas Tree Pattern is a festive and creative project that allows you to transform a small amount of yarn into a beautiful handmade Christmas decoration. Whether you want to make ornaments for your Christmas tree, create a holiday garland, decorate wrapped gifts, or prepare small handmade presents for family and friends, a crochet Christmas tree is a versatile project that can be adapted in many ways. Its familiar triangular silhouette can be created with basic crochet stitches and simple shaping techniques, making it accessible to beginners while still offering plenty of opportunities for experienced crocheters to experiment with colors, textures, and decorative details.
Another wonderful feature of this Crochet Christmas Tree Pattern is that you do not need a large yarn collection to get started. Small amounts of green yarn are enough for miniature trees, while leftover white, red, gold, brown, or yellow yarn can become borders, ornaments, trunks, stars, and other decorations. Traditional Christmas colors create a timeless result, but modern palettes such as sage green and cream, pink and white, blue and silver-inspired shades, or neutral beige tones can completely transform the finished project. This makes the pattern particularly useful for creating decorations that coordinate with your existing holiday décor.
The construction of this easy crochet Christmas tree pattern is based on gradually creating width as you move from the narrow top toward the bottom branches. After completing the main tree, a small trunk can be added at the center of the lower edge, followed by optional decorations and a hanging loop. Because yarn thickness, hook size, and individual tension influence the final measurements, this tutorial focuses on understanding the construction rather than requiring one rigid stitch count. Once you understand the technique, you can make tiny ornaments, larger appliqués, garlands, gift decorations, or even two-piece stuffed Christmas trees using the same basic idea.
Materials and Basic Crochet Techniques
To begin your Crochet Christmas Tree Pattern, choose the yarn for the main body. Green is the classic choice, and shades such as forest green, emerald, pine, olive, or sage can all produce beautiful results. Medium-weight yarn is easy to handle for beginners, while thinner yarn can be used when you want to create delicate miniature ornaments.
Select a crochet hook that works comfortably with your yarn. The recommended hook size on the yarn label provides a useful starting point, although decorative projects often benefit from slightly firm tension. Your stitches should be compact enough to help the crochet Christmas tree maintain its shape without becoming so tight that inserting the hook becomes difficult.
You will also need scissors, a yarn needle, stitch markers if desired, and small quantities of contrasting yarn for decorations. Brown yarn can be used for the trunk, while red, white, yellow, or gold-colored yarn can create ornaments and other accents. If you plan to hang the finished tree, reserve some yarn for a loop at the top.
The primary stitch used in this beginner-friendly version is single crochet, abbreviated as sc in US crochet terminology. To make single crochet, insert your hook into the appropriate stitch, yarn over, pull up a loop, yarn over again, and pull through both loops. This creates a compact stitch that provides good structure.
You will also use crochet increases to create the triangular shape. An increase means working additional stitches into the same stitch or strategically adding stitches along a row. When increases are positioned consistently near the outer edges, each new section becomes wider than the one above it, gradually forming the shape of an evergreen tree.
Before beginning your final piece, make a small practice sample if you are unfamiliar with your yarn. The exact gauge is less critical for an ornament than for a fitted garment, but consistent tension is still important. Even stitches help both sides of the Christmas tree crochet pattern remain symmetrical.
How to Crochet the Christmas Tree Step by Step
Begin the Crochet Christmas Tree Pattern at the narrow top. Make a slip knot and crochet a short foundation chain. Work a small number of single crochet stitches to establish the first row. Turn your work carefully and keep the starting section compact because this becomes the pointed top of your Christmas tree.
As you work the following rows, begin adding stitches near both outer edges. These increases gradually widen the piece. Keep the increases balanced so that the center of the tree remains aligned. Count your stitches after each shaping row, especially when you are learning the pattern, because an accidental skipped stitch can make one side narrower.
Continue working downward while alternating regular rows with increase rows as needed. If you want a simple geometric tree, maintain smooth diagonal sides. If you prefer a more traditional evergreen appearance, periodically create wider branch sections followed by a slightly narrower transition. These small changes give the sides a layered shape resembling individual branches.
Keep crocheting until the tree reaches your preferred height and width. For a small crochet Christmas ornament, you may need only a compact series of rows. For wall décor or a larger appliqué, continue the same shaping sequence. Place the project on a flat surface occasionally to check that the tree remains symmetrical.
When the main green section is complete, fasten off and locate the center of the bottom edge. Join brown yarn to several central stitches and work downward in short rows. This forms the crochet Christmas tree trunk. Keep the trunk proportional to the tree; a small ornament generally needs only a short rectangular section.
Finish the trunk, fasten off, and weave in the initial yarn tails. Lay the tree flat and inspect the overall shape. The top point and trunk should approximately share the same central line, while the branches should extend evenly to either side. Minor handmade variations are completely normal and can add character to the finished decoration.
Decorating and Finishing the Crochet Christmas Tree
Once the basic crochet Christmas tree is finished, decorations can bring the project to life. One of the easiest techniques is using contrasting yarn to embroider small dots or short stitches across the green surface. Red, white, yellow, pink, and blue details can represent traditional Christmas ornaments without adding significant bulk.
You can also crochet miniature circles and attach them individually. Small crochet ornaments add texture and create a playful three-dimensional effect. Keep the decorations proportional to the tree, especially when working with a miniature design. Too many large embellishments can hide the stitch pattern and distort the shape.
A small star makes a beautiful finishing detail at the top. You can crochet a separate Christmas star, embroider a simple star directly onto the fabric, or create a tiny contrasting motif. Yellow, cream, or metallic-effect yarn can provide a festive accent while maintaining the handmade appearance of the project.
Another option is adding decorative edging. Join white yarn along an outer edge and work slip stitches or single crochet around the tree. White can suggest snowy branches, while red or gold-colored yarn creates a more traditional holiday border. Add extra stitches carefully around corners so the edging follows the shape without pulling.
To transform the project into a hanging ornament, crochet a loop at the top. Attach the yarn securely, create a chain long enough to fit comfortably over a branch, and join it back to the tree. Check the connection before hanging the decoration. The same technique can be used when preparing several trees for a crochet Christmas garland.
Finish by weaving in all remaining yarn ends. Use a yarn needle to pass each tail through several nearby stitches before trimming the excess. If your yarn is suitable for blocking, gently shape the tree according to the fiber’s care instructions. Proper finishing helps straighten the edges and gives the handmade ornament a polished appearance.
Creative Ideas for Customizing the Christmas Tree Pattern
Changing colors is the simplest way to personalize your Crochet Christmas Tree Pattern. Traditional green and red are always attractive, but cream and sage can produce a softer look, while white creates the impression of a snow-covered tree. You could also crochet several trees in different shades and display them together as a coordinated collection.
Texture can completely change the appearance as well. More experienced crocheters can experiment with puff stitches, bobbles, shell stitches, or surface crochet to represent branches and ornaments. When adding textured stitches, monitor the dimensions because some stitches require considerably more yarn and space than basic single crochet.
You can also make a three-dimensional version by crocheting two identical trees. Place the pieces with their edges aligned and join them around most of the perimeter. Add a small amount of suitable filling before closing the remaining opening. The result is a soft stuffed crochet Christmas tree that can be used as an ornament or decorative accent.
Another creative idea is making a complete Christmas crochet garland. Crochet several miniature trees and attach them at regular intervals along a long chain. You can alternate green and white trees or combine Christmas trees with stars, stockings, snowflakes, and other small seasonal motifs.
Small trees can also become reusable gift decorations. Attach one to ribbon or yarn around a wrapped present, and the recipient receives both the gift and a handmade ornament. You can even coordinate the colors of the crochet tree ornament with the wrapping paper for a thoughtful handmade presentation.
Whenever you create a version you particularly like, record your hook size, yarn type, number of rows, increase placement, and finished measurements. Keeping these notes effectively creates your own personalized Crochet Christmas Tree Pattern, allowing you to reproduce matching ornaments whenever you need them.
FAQ About the Crochet Christmas Tree Pattern
Is the Crochet Christmas Tree Pattern suitable for beginners?
Yes. A basic version can be created primarily with chain stitches, single crochet, increases, turning, and fastening off. Beginners should practice maintaining even tension and counting stitches before adding more complicated decorative details.
What yarn is best for crochet Christmas trees?
Cotton, acrylic, and blended yarns can all work well. Cotton provides excellent stitch definition, while acrylic is available in many colors and can be convenient for decorative projects. Choose the fiber according to the appearance and structure you want.
What crochet hook should I use?
Choose a hook suitable for your yarn. The yarn label provides a useful recommendation, but you may prefer slightly tighter stitches for an ornament that needs to hold its shape. Avoid making the stitches so tight that crocheting becomes uncomfortable.
How can I make my crochet Christmas tree bigger?
Continue adding rows and maintain the widening pattern. You can also use thicker yarn and a larger hook. When enlarging the tree substantially, increase the size of the trunk and decorations so all elements remain proportional.
How do I make a miniature Christmas tree?
Use thinner yarn or crochet thread, a smaller hook, and fewer shaping rows. Miniature trees are particularly useful for ornaments, gift decorations, and garlands.
Why does my crochet Christmas tree curl?
Curling can result from tight tension, missing increases, inconsistent stitch counts, or an unsuitable hook size. Check the number of stitches and gently flatten the piece while working. Appropriate blocking may correct minor curling after completion.
Can I use scrap yarn for this project?
Yes. The Crochet Christmas Tree Pattern is excellent for using leftover yarn because smaller versions require only modest quantities. Even very small scraps can be useful for ornaments, stars, and embroidered details.
How can I make a 3D crochet Christmas tree?
Create two matching flat trees, align their edges, and join them together. Before closing the final section, add a small amount of filling. Avoid overfilling because excessive stuffing can distort the triangular silhouette.
Can I turn these trees into a garland?
Absolutely. Make multiple trees and attach them to a long crocheted chain at evenly spaced intervals. Alternating colors or different tree sizes can make the garland more visually interesting.
What other decorations can I add to a crochet Christmas tree?
You can add embroidered ornaments, tiny crochet circles, stars, bows, surface-crochet garlands, contrasting borders, or small yarn pom-poms. Choose lightweight details that do not overwhelm the basic tree shape.
Conclusion
The Crochet Christmas Tree Pattern is a charming project that demonstrates how simple stitches can become a festive handmade decoration. By beginning with a narrow top, using carefully positioned crochet increases to create the branches, adding a small trunk, and finishing the design with decorative details, you can create a recognizable Christmas tree without complicated construction.
Throughout this tutorial, you learned how to select yarn, work single crochet, control increases, shape the tree, create a trunk, add ornaments, crochet a hanging loop, and finish the project neatly. You also discovered several ways to adapt the same basic construction into flat ornaments, stuffed decorations, gift accents, and Christmas garlands.

