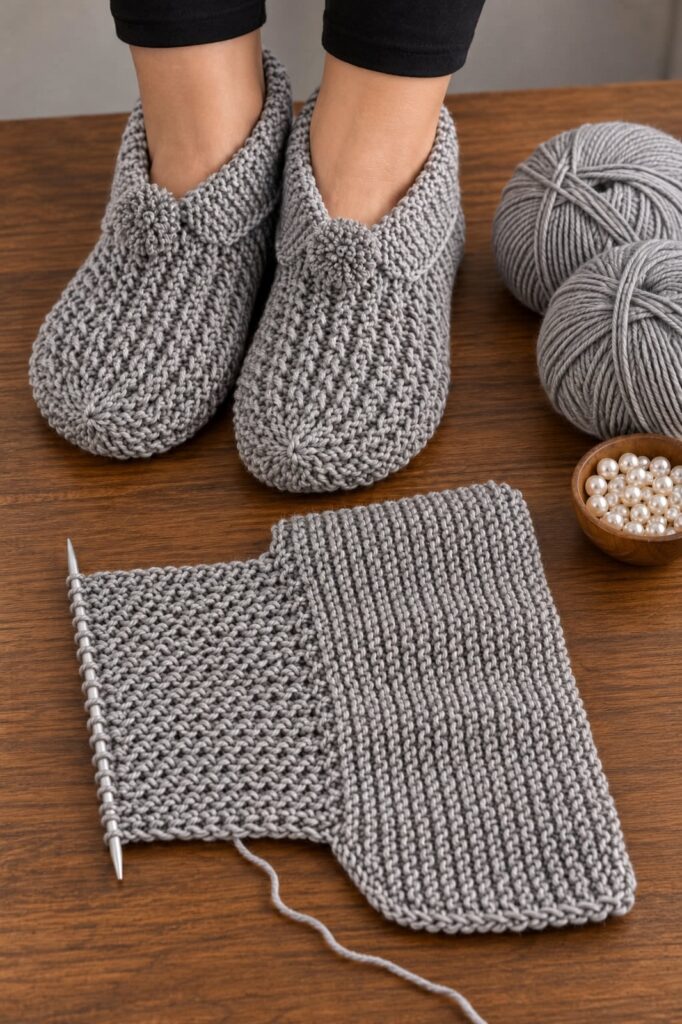
The Crochet Slippers – Pattern is a wonderful project for anyone who loves creating comfortable, practical, and beautiful handmade accessories. Crochet slippers combine the warmth of soft yarn with the charm of traditional craftsmanship, making them a popular choice for relaxing at home. Whether you are a beginner learning basic crochet stitches or an experienced crocheter searching for a quick and satisfying project, crochet slippers offer endless creative possibilities. They can be made in different sizes, colors, and textures, allowing you to customize every pair according to your preferences.
One of the greatest advantages of following a Crochet Slippers Pattern is the opportunity to make something useful while improving your crochet skills. These slippers are ideal for chilly mornings, relaxing evenings, and comfortable indoor activities. You can choose lightweight cotton yarn for warmer seasons or soft wool blends for additional warmth during colder months. The construction process also introduces essential crochet techniques, including working in rounds, increasing stitches, shaping fabric, and creating secure seams.
Creating easy crochet slippers does not require complicated equipment or advanced experience. With a crochet hook, suitable yarn, scissors, and a yarn needle, you can begin making your first pair using a straightforward construction method. The pattern explained in this guide focuses on a rounded toe, a comfortable foot section, and a shaped heel that provides a secure fit. You will also discover how to adjust the slipper length, select appropriate yarn, and add decorative details without compromising comfort.
Essential Materials and Basic Techniques for Crochet Slippers
Choosing the correct materials is the first step toward creating a successful Crochet Slippers Pattern. Medium-weight or worsted-weight yarn is an excellent option for beginners because it is easy to handle and produces a comfortable fabric. Wool blends provide warmth and elasticity, while cotton blends offer breathability and durability. Select yarn that feels soft against the skin but is sturdy enough for regular indoor use.
For this beginner-friendly crochet slippers tutorial, you will need approximately 150–200 yards of worsted-weight yarn, a 5 mm crochet hook, scissors, a yarn needle, and stitch markers. The exact yarn amount depends on the slipper size, yarn characteristics, and individual crochet tension. You may also want a measuring tape and optional non-slip sole material to improve traction on smooth indoor floors.
Before starting, become familiar with the basic crochet stitches used throughout the project. The chain stitch (ch) creates the starting foundation, while the single crochet (sc) produces a dense and durable fabric. Slip stitches (sl st) are useful for joining rounds and finishing edges. Increases are made by working two single crochet stitches into the same stitch, allowing the fabric to expand gradually.
The pattern uses US crochet terminology, which is important because stitch names differ between American and British instructions. In US terminology, a single crochet is equivalent to a double crochet in UK terminology. Beginners should pay attention to this distinction when following instructions, since using the wrong stitch can significantly change the finished dimensions and appearance.
Understanding crochet gauge is another important part of making properly fitted slippers. For this project, aim for approximately 14 single crochet stitches and 16 rounds or rows per 4 inches (10 cm), measured in a relaxed fabric. Create a small gauge swatch before beginning, and adjust your hook size if necessary. A slightly firm fabric is preferable because loose stitches may stretch excessively during wear.
Finally, measure the intended wearer’s foot from the heel to the longest toe. This measurement will help determine the required slipper length. For example, an adult foot measuring approximately 24 cm may need a finished slipper around 23–24 cm long, depending on yarn elasticity and personal preference. Accurate measurements are more reliable than assuming that every crochet slipper size will fit the same way.
Step-by-Step Crochet Slippers Pattern for Beginners
Begin the Crochet Slippers Pattern by creating the rounded toe section. Make a magic ring and work 6 single crochet stitches into the center. Pull the ring closed carefully and place a stitch marker in the first stitch. Work in continuous spiral rounds without joining unless otherwise instructed. This construction creates a smooth toe with minimal visible seams.
For Round 2, work 2 single crochet stitches into each stitch around, creating 12 stitches. In Round 3, repeat one single crochet followed by an increase around, producing 18 stitches. For Round 4, repeat two single crochet stitches followed by an increase, reaching 24 stitches. Continue increasing evenly: Round 5 produces 30 stitches, Round 6 produces 36 stitches, and Round 7 produces 42 stitches. These increases create the rounded shape required for comfortable crochet slipper toes.
After completing the increases, work one single crochet into every stitch around without adding more stitches. Continue until the toe and upper-foot tube measures approximately 11–13 cm from the starting ring, or reaches slightly beyond the ball of the intended wearer’s foot. Try the piece against the foot occasionally to ensure that the fabric is neither too tight nor excessively loose. This section forms the front of the easy crochet slippers pattern.
Next, begin shaping the open heel section. With 42 stitches in the round, work single crochet stitches across the first 28 stitches, then chain one and turn. Leave the remaining 14 stitches unworked to create the opening across the top of the foot. Continue working back and forth over the 28 stitches, making one single crochet in each stitch and chaining one before turning. The turning chain does not count as a stitch.
Continue these rows until the slipper reaches the required foot length when measured from the toe to the back of the heel. For a foot measuring approximately 24 cm, begin checking the fit when the total crocheted length reaches around 23 cm. Fold the final row in half, bringing its two short sides together to form the back heel seam. Sew the matching edges securely using a yarn needle and matching yarn, then turn the slipper right side out.
To finish the crochet slipper opening, attach yarn at the upper edge near the heel and work one round of single crochet evenly around the opening. Avoid adding too many stitches, as this can create a loose or wavy edge. For a firmer finish, work an additional round of slip stitches without pulling the yarn too tightly. Weave in all loose ends securely and repeat the complete process to make the second slipper.
Creative Designs, Sizing Adjustments, and Helpful Crochet Tips
One of the most enjoyable aspects of the Crochet Slippers – Pattern is the freedom to experiment with colors and decorative finishes. Neutral shades such as beige, cream, gray, and brown create a classic appearance suitable for everyday wear. Bright colors, including coral, turquoise, lavender, and mustard yellow, can transform simple slippers into cheerful handmade accessories.
You can also customize your handmade crochet slippers by adding decorative borders, small crocheted flowers, bows, or textured stitch details. A contrasting color around the opening creates a polished finish without requiring advanced techniques. When adding decorations, attach them securely and avoid placing bulky embellishments where they could rub against the foot or interfere with walking.
Adjusting the size of crochet slippers for adults requires attention to both length and width. To make a wider slipper, continue the toe increases beyond 42 stitches in multiples of six until the circumference fits comfortably. For a narrower slipper, stop increasing earlier. After changing the circumference, adjust the number of stitches worked across the sole and sides so the opening remains centered.
For crochet slippers for kids, use smaller measurements and fewer toe increases. Children’s feet vary considerably, so measuring the actual foot is more accurate than relying entirely on age-based sizing. Check the slipper frequently during construction and ensure that the finished fabric allows natural toe movement without slipping off easily. Avoid detachable decorations or loose components on footwear intended for very young children.
The choice of yarn also influences the durability of your crochet house slippers. Soft acrylic blends are easy to maintain, while wool blends offer warmth and natural elasticity. Cotton can produce breathable slippers but may stretch differently depending on its construction. Whatever yarn you choose, follow the manufacturer’s washing instructions to preserve the shape and texture of your finished project.
Another useful technique involves maintaining consistent stitch tension throughout the project. If your stitches become noticeably tighter or looser, the slipper may develop uneven shaping. Count stitches regularly, use markers to identify important positions, and compare both slippers as you work. These simple habits help produce a matching pair of comfortable crochet slippers with a balanced appearance.
Finishing Techniques, Non-Slip Soles, and Caring for Crochet Slippers
Once both slippers are complete, inspect the overall construction carefully. Check the heel seams, toe shaping, and upper edges for loose stitches or uneven tension. A well-finished Crochet Slippers Pattern should feel comfortable around the foot without creating excessive pressure. Make any necessary adjustments before adding decorative details or preparing the slippers for regular use.
Adding non-slip soles for crochet slippers is particularly important when they will be worn on smooth surfaces such as tile, laminate, or polished wood. Crochet fabric alone may provide insufficient traction, especially when made with soft or slippery yarn. Consider attaching purpose-made non-slip sole patches or suitable flexible grip material designed for footwear. Follow the product instructions and test the finished slippers carefully before use.
For additional durability, some crocheters attach thin leather, suede, or felt sole pieces to the underside of their slippers. These materials can help protect the crochet stitches from friction, although not every material provides reliable grip. If you choose this approach, select a flexible material appropriate for indoor footwear and secure it with strong stitching. Avoid thick soles that make the slippers uncomfortable or difficult to bend.
Washing your handmade crochet slippers correctly helps maintain their appearance and shape. Always check the yarn label before cleaning. Many acrylic and cotton blends can be washed gently, while certain wool fibers require handwashing in cool water. Avoid excessive agitation, particularly with wool, because it may cause shrinking or felting. Allow the slippers to dry flat in their natural shape.
Proper storage can also extend the life of your crochet slippers. Keep them in a clean, dry location away from excessive moisture and direct sunlight. If the slippers become stretched after repeated use, gently reshape them after washing, provided the yarn’s care instructions allow it. Inspect the soles periodically for worn areas and repair small problems before they become larger.
Finally, consider making several pairs of easy crochet slippers using different yarn colors and sizes. Once you understand the basic construction, the process becomes faster and more enjoyable. Matching slippers can make thoughtful handmade gifts for family members and friends, especially when customized with favorite colors or simple decorative accents. Each completed pair offers an opportunity to improve your skills and create something genuinely useful.
Conclusion
The Crochet Slippers – Pattern is a delightful project that combines creativity, comfort, and practical crochet techniques. With basic materials and a little patience, you can create beautiful handmade crochet slippers that are suitable for relaxing at home or giving as thoughtful gifts.
Throughout this guide, you learned how to select yarn, understand essential crochet stitches, create a rounded toe, shape the foot and heel, adjust slipper sizes, and finish your project neatly. You also discovered helpful ways to improve durability, add suitable non-slip materials, and care for your finished slippers.