
Simple Crochet Shoe – Pattern is a practical and charming crochet project for anyone interested in creating soft handmade footwear while practicing essential shaping techniques. Unlike a flat crochet project, a shoe gradually develops from a simple sole into a three-dimensional form with sides, a shaped toe, heel, and comfortable opening. The basic construction can be adapted to different yarn colors, stitch textures, and sizes, making this crochet shoe pattern an excellent foundation for creating personalized indoor footwear.
One of the most important parts of a Simple Crochet Shoe – Pattern is achieving the correct size and shape. The sole establishes the dimensions of the entire project, so careful measurement should come before decorative details. Instead of relying only on a predetermined stitch count, it is helpful to consider the intended foot length, yarn thickness, hook size, and personal crochet tension. Two crocheters can follow identical instructions and still produce slightly different dimensions, which is why checking crochet gauge and measuring the sole as you work can improve the final fit.
This tutorial uses standard US crochet terminology and focuses on techniques that can be applied to many styles of crochet footwear. You will work with the chain stitch, single crochet, half double crochet, slip stitch, increases, and decreases, as well as crocheting around a foundation chain and shaping the upper. The design can remain simple and minimalist or be customized with contrasting borders, stripes, textured stitches, or securely integrated crochet details. The finished project is best considered soft indoor footwear unless an appropriate sole specifically designed for the intended use is added.
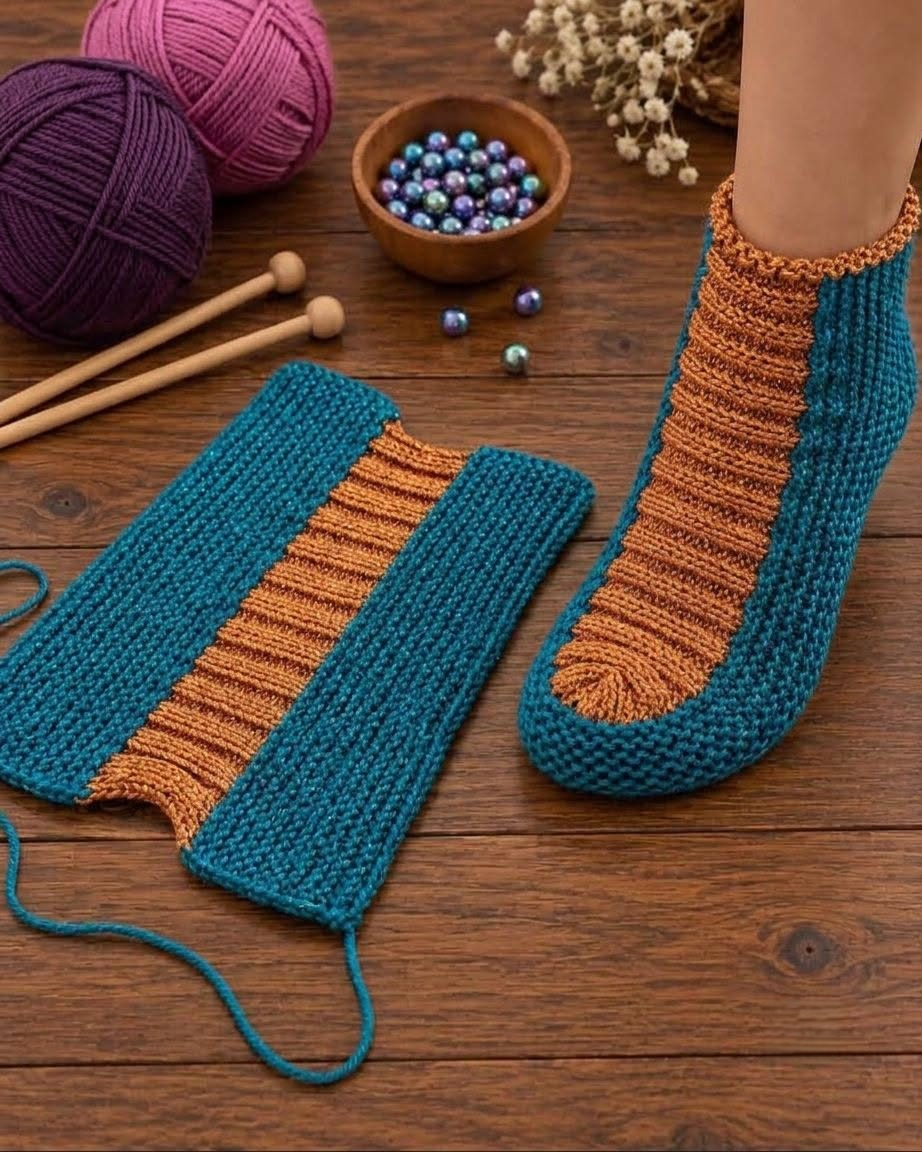
Materials, Measurements, and Basic Crochet Stitches
Begin the Simple Crochet Shoe – Pattern by choosing yarn with the right combination of softness and structure. A yarn that is excessively delicate may not hold the shoe shape well, while very stiff yarn can make the finished footwear uncomfortable.
Medium-weight yarn can be a convenient starting choice for many indoor crochet shoes because it provides visible stitches and reasonable structure. Cotton, acrylic, and suitable blends can all behave differently, so consider the characteristics you want in the finished fabric.
Choose a crochet hook that produces firm but flexible stitches with your selected yarn. The hook recommendation on the yarn label provides a starting point, but your personal tension and desired fabric density should also influence the decision.
Gather scissors, a yarn needle, stitch markers, and measuring tape. Stitch markers are especially useful for identifying the beginning of rounds and marking the center of the toe before you begin the shaping decreases.
The single crochet (sc) creates compact fabric and is useful for both the sole and upper. The half double crochet (hdc) is slightly taller and can create a softer, more flexible texture. A slip stitch (sl st) can be used for joining and finishing.
Before beginning the complete shoe, create a small gauge swatch. Measure the intended foot when possible, paying attention to both length and width. Plan for a comfortable fit rather than making the crochet fabric excessively tight around the foot.
How to Crochet the Shoe Sole Step by Step
Begin the crochet shoe sole with a foundation chain. The exact chain length depends on your gauge and intended shoe dimensions. Because additional stitches will create the curved toe and heel, the foundation itself will generally be shorter than the complete sole.
Work along one side of the foundation chain using your selected stitch. Maintain consistent tension so the central section remains straight. When you reach the final chain, place multiple stitches into the end to begin forming the rounded toe.
Rotate the work naturally and continue crocheting along the opposite side of the same foundation chain. You are now working around both sides rather than turning the project as you would for an ordinary rectangular piece.
At the heel, place the required increases to complete the oval. Continue working additional rounds while distributing crochet increases around the curved toe and heel sections. Keep the straight side sections relatively consistent.
Place the sole on a flat surface after each round. It should remain smooth rather than forming pronounced waves or curling dramatically. Rippling can indicate too many increases, while strong cupping may indicate insufficient expansion or overly tight tension.
Continue until the sole reaches the required length and width. Write down every round and stitch count before proceeding. You will need to reproduce the same construction accurately when making the second crochet shoe.
Building the Sides, Toe, Heel, and Shoe Opening
Once the sole reaches the correct dimensions, stop following the previous increase pattern and begin working around the perimeter without expanding it. This change encourages the crochet fabric to turn upward and form the sides of the shoe.
For a more defined transition between the crochet sole and upper, one round can be worked through a selected loop if it suits your design. Continue with even rounds until the side walls reach the desired height.
Find the center front of the shoe and mark the toe section. Place markers at equal distances from the center so the shaping remains symmetrical. Accurate placement is important because uneven decreases can cause the upper to twist.
Work normally around the heel and sides, then place crochet decreases across the marked toe area. Gradually repeat the decreases over subsequent rounds. The fabric should begin curving over the front of the foot without becoming excessively tight.
Shape the heel by maintaining enough height and structure around the back of the shoe. Depending on your design, you can keep the heel relatively low for a slipper-like appearance or extend it slightly higher for additional coverage.
Complete the opening with an even round of single crochet or slip stitches. Check that the opening remains flexible enough for comfortable use. Avoid pulling the final round too tightly, as this can make the shoe difficult to put on.
Finishing, Customizing, and Making the Matching Shoe
Once the first shoe is complete, fasten off while leaving enough yarn for secure finishing. Thread the tail through a yarn needle and weave it through several stitches, change direction, and continue weaving before trimming the excess.
Inspect the inside carefully for loose ends and bulky areas. Since the project is intended to be worn, the interior should be as smooth as practical. Repeat the same finishing process for every yarn tail created by color changes.
Use your written notes to create the matching shoe. Follow the same foundation length, increases, number of sole rounds, side rounds, toe decreases, and finishing rounds. Compare the two crochet shoes frequently as you work.
Customize the pattern with color changes. A contrasting sole, stripe around the upper edge, two-tone toe, or different heel color can transform the appearance while preserving the same basic construction.
You can also experiment with texture by incorporating simple stitch variations into selected areas of the upper. Keep the sole relatively dense and stable, however, because very open stitches are generally less practical beneath the foot.
Remember that yarn soles can be slippery on smooth floors. If the shoes will actually be worn indoors, consider an appropriate commercially made non-slip treatment or sole material intended for footwear and follow its manufacturer’s directions. The crochet construction alone should not be assumed to provide slip resistance.
FAQ About the Simple Crochet Shoe – Pattern
Is the Simple Crochet Shoe Pattern suitable for beginners?
It can be a good project for crocheters who already understand basic stitches and want to practice increases, decreases, working in rounds, and simple three-dimensional shaping.
What crochet terminology is used in this tutorial?
This tutorial uses US crochet terms, including chain, single crochet, half double crochet, slip stitch, increase, and decrease.
What yarn should I use for crochet shoes?
Choose yarn that creates comfortable but sufficiently structured fabric. The ideal fiber depends on how you intend to use and care for the finished shoes.
How do I determine the correct shoe size?
Actual foot measurements are more reliable than general size labels. Measure the foot and use your gauge to adjust the sole length and width accordingly.
Why is crochet gauge important?
Gauge determines how large your stitches are. Different tension, yarn, or hook sizes can significantly change the dimensions even when the stitch counts remain identical.
Why is my crochet sole curling?
Your tension may be tight, or the curved sections may need additional increases. Check the sole on a flat surface after every round.
Why does my sole look wavy?
Too many increases can cause rippling. Review the curved toe and heel sections and make sure you are not accidentally adding extra stitches.
How do I make the shoe wider?
Adjust the sole width first. Depending on the construction, you may need additional stitches or carefully placed increases before beginning the upper.
How do I shape the toe?
Mark the center front and distribute decreases symmetrically across the toe area. Gradual shaping usually creates a smoother result.
How can I make both shoes the same size?
Record every stitch count, round, increase, decrease, and measurement while making the first shoe. Use those notes when crocheting the second.
Can I use different colors?
Yes. Contrasting soles, stripes, borders, and color-blocked sections are simple ways to customize the pattern.
Can I use double crochet for the entire shoe?
You can incorporate double crochet into selected sections, but its taller construction creates a more open fabric. Compact stitches can provide greater structure in areas where firmness is useful.
Are yarn soles non-slip?
No. Crochet yarn alone should not be considered reliably non-slip. Smooth flooring can make yarn footwear slippery, so use suitable products or materials specifically designed to improve traction when necessary.
How should I care for crochet shoes?
Follow the washing and drying recommendations for the specific yarn and any additional sole materials used. Keeping the original yarn label can make future care easier.
Conclusion
The Simple Crochet Shoe – Pattern demonstrates how basic crochet techniques can be combined to create comfortable, three-dimensional handmade footwear. The project begins with an oval sole, develops upward through even rounds, and takes its recognizable shape through carefully positioned decreases around the toe and thoughtful construction around the heel and opening.
Throughout this tutorial, you learned how to choose suitable yarn, check crochet gauge, measure the intended foot, create a foundation chain, crochet an oval sole, work single crochet and half double crochet, use increases and decreases, shape the toe and heel, finish the opening, secure yarn ends, and reproduce the same measurements for a matching pair. You also learned why sole construction and appropriate traction deserve special consideration when making wearable crochet footwear.

